- Introducing @HuckEats – the Manger Seul rebrand
The COVID-19 situation has had us sheltering-in-place out of our usual element (in San Francisco & Oakland) and finding centeredness in body, mind & spirit amidst nature & the extraordinary Pacific coastal scenery.
I have never before felt so much gratitude for the magnificent sparkle that the ocean greets us with each day.

Since we have decided not to eat out during this time, I have been working on overdrive as ‘Head of Kitchen’ –
- getting stocked up on shelf-stable pantry staples starting in early March,
- doing a ton of recipe research on creative ways to keep nutritious, interesting & varied meals on the table,
- and of course actually doing the meal-preparation and execution –
and I realized, now that I am cooking for a team – three meals a day, everyday – the ethos once associated with @mangerseul has been long foregone.
So Friends,
I am very excited to share with those who have been following along with my culinary adventures (Hi, Mom!): @HuckEats!

@huckeats is a foundational element of the Adventures of Huckleberry Kim‘s identity!
Throughout my life, sharing good food has been a huge part of my social & family culture, creative exploration and manifestation of both external & self-directed love.
A fun quote that Sug shared with me recently was one from a friend who has recently discovered cooking and described that:
“…it’s like having a little restaurant inside your house!”
I love that newbies in the kitchen can find such delight & gratification from putting together a simple meal for themselves (and/or for loved ones); and I hope that I can make a little impact in inspiring you to try out something new in your kitchen & to share it with someone you love because honestly it’s perhaps not as hard (& actually might be a fun challenge) as you’d have assumed it might be 🙂
I love being able to support local farmers and makers who are an integral part of our society’s backbone on which limelight is seldom shown upon.
I love being able to create & share meals with my family & friends – new and old – while connecting over great conversations that nourish our bodies, minds & spirits.
♥️ Please share some love, give @HuckEats a follow and take a peek into the little restaurant inside our house.♥️
& for more details from Huck Eats, check out: huckleberrykim.com/category/eats
xo,
Huckleberry Kim
- Massaman Curry Noodles with Instant Pot Caramelized Pork Shoulder Recipe

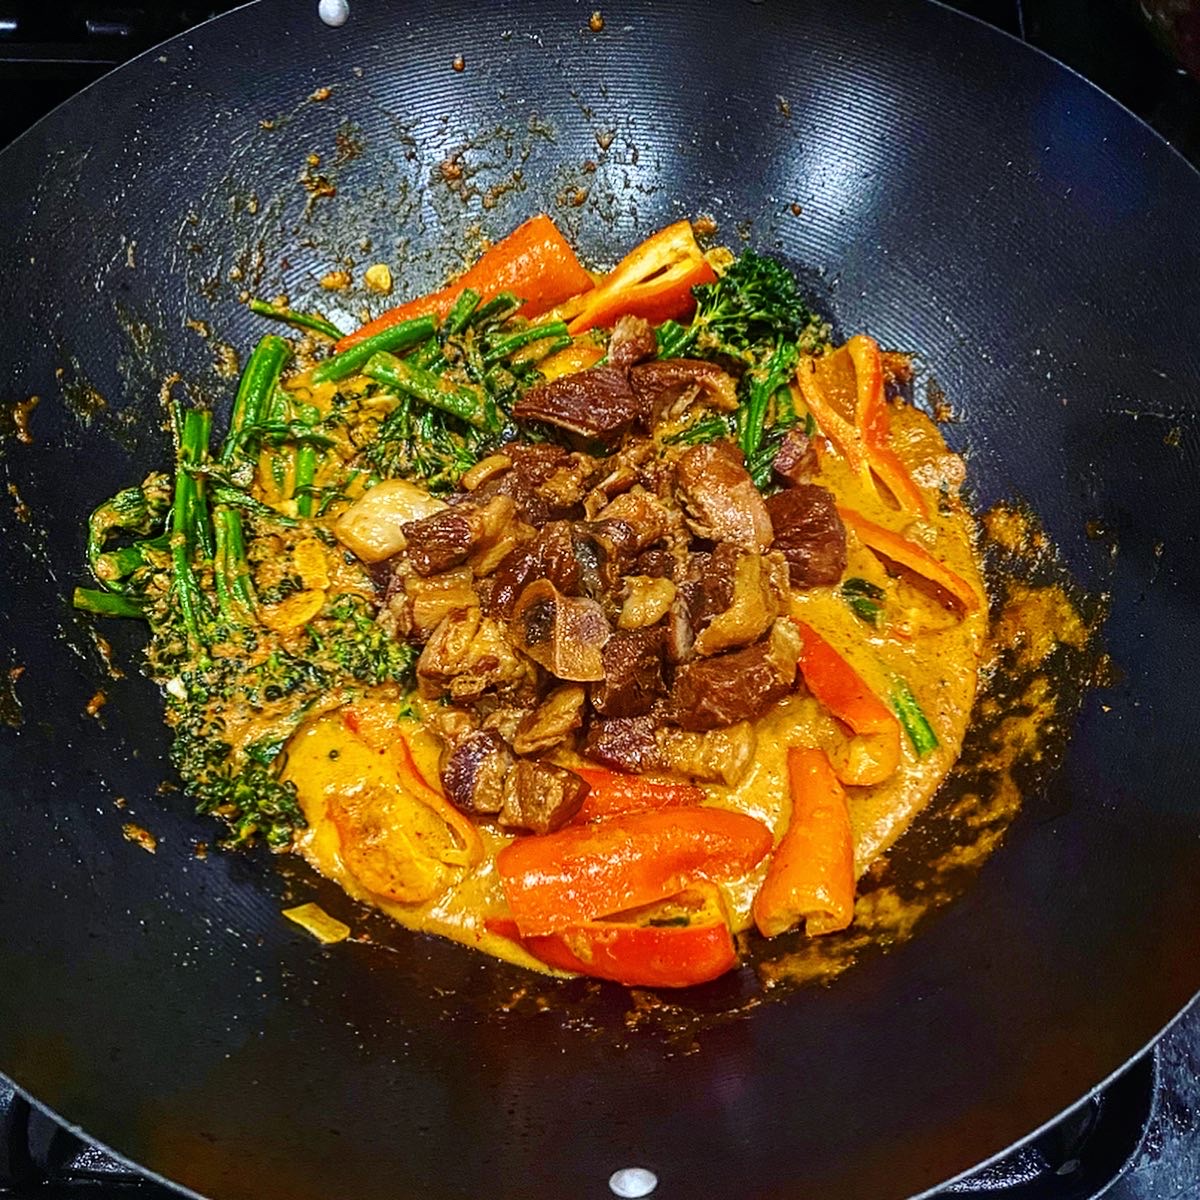
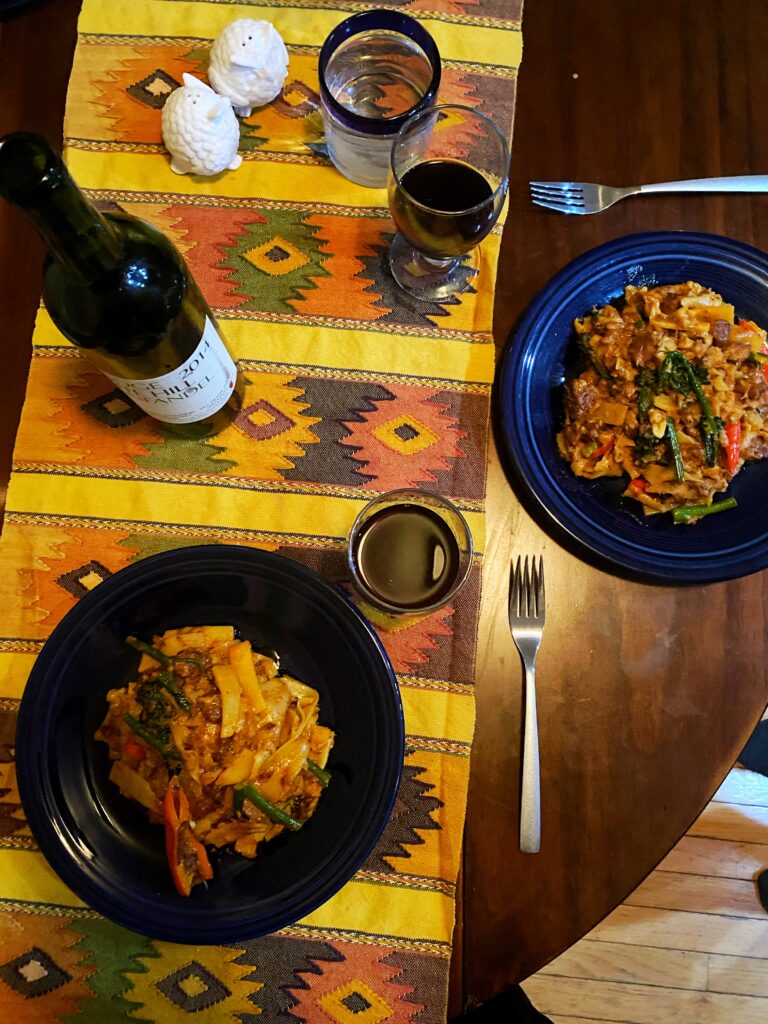
After one of the best Sundays ever, Sug & I spent it surfing for hours in the sunshine, under some of the greatest conditions, at one of our favorite places in the entire world, we were due to dive into a delicious nutrient-packed meal. I gave Sug the choice of protein, and off I went to throw together this slightly sweet, extraordinarily flavorful Massaman curry noodle dish! Check out recipe below:
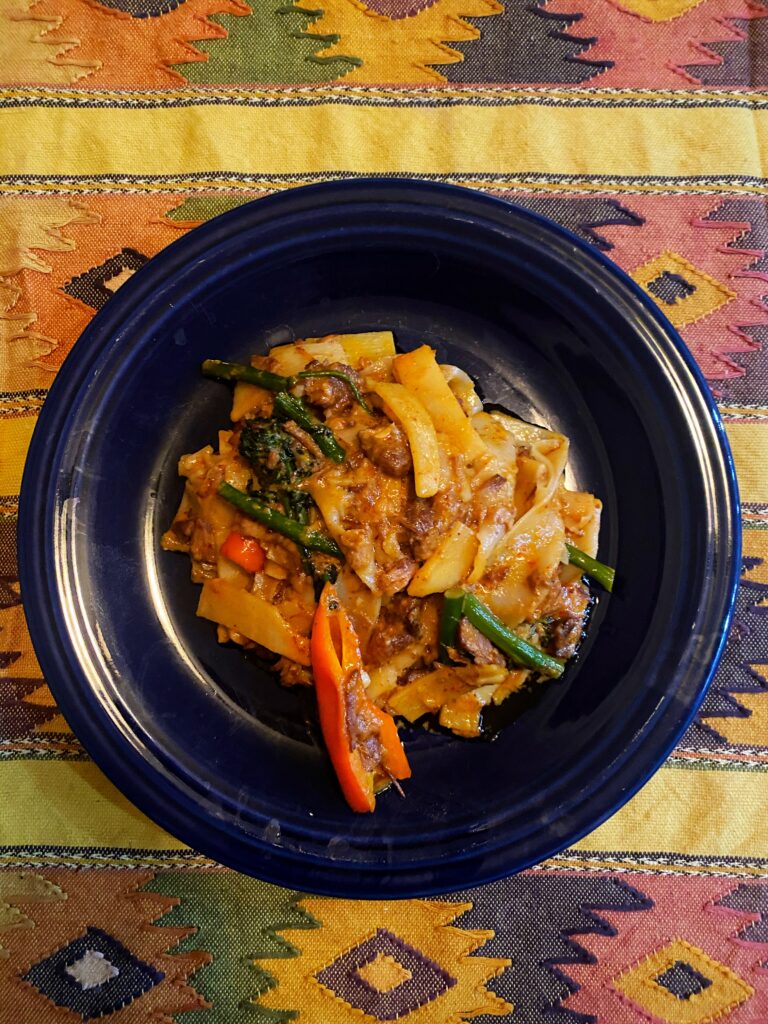
Huckleberry’s Massaman Curry Noodles with Caramelized Pork Shoulder & Vegetables
Ingredients:
- ~2 lbs of pork shoulder – cut up into ~3cm cubes
- 0.25 cup sugar
- ~3 tbsp ginger – minced
- 4 cloves of garlic – minced
- 5 tbsp dark soy sauce
- 2 tbsp fish sauce
- ~2.5+ cups of duck/chicken/vegetable broth (sub water OK)
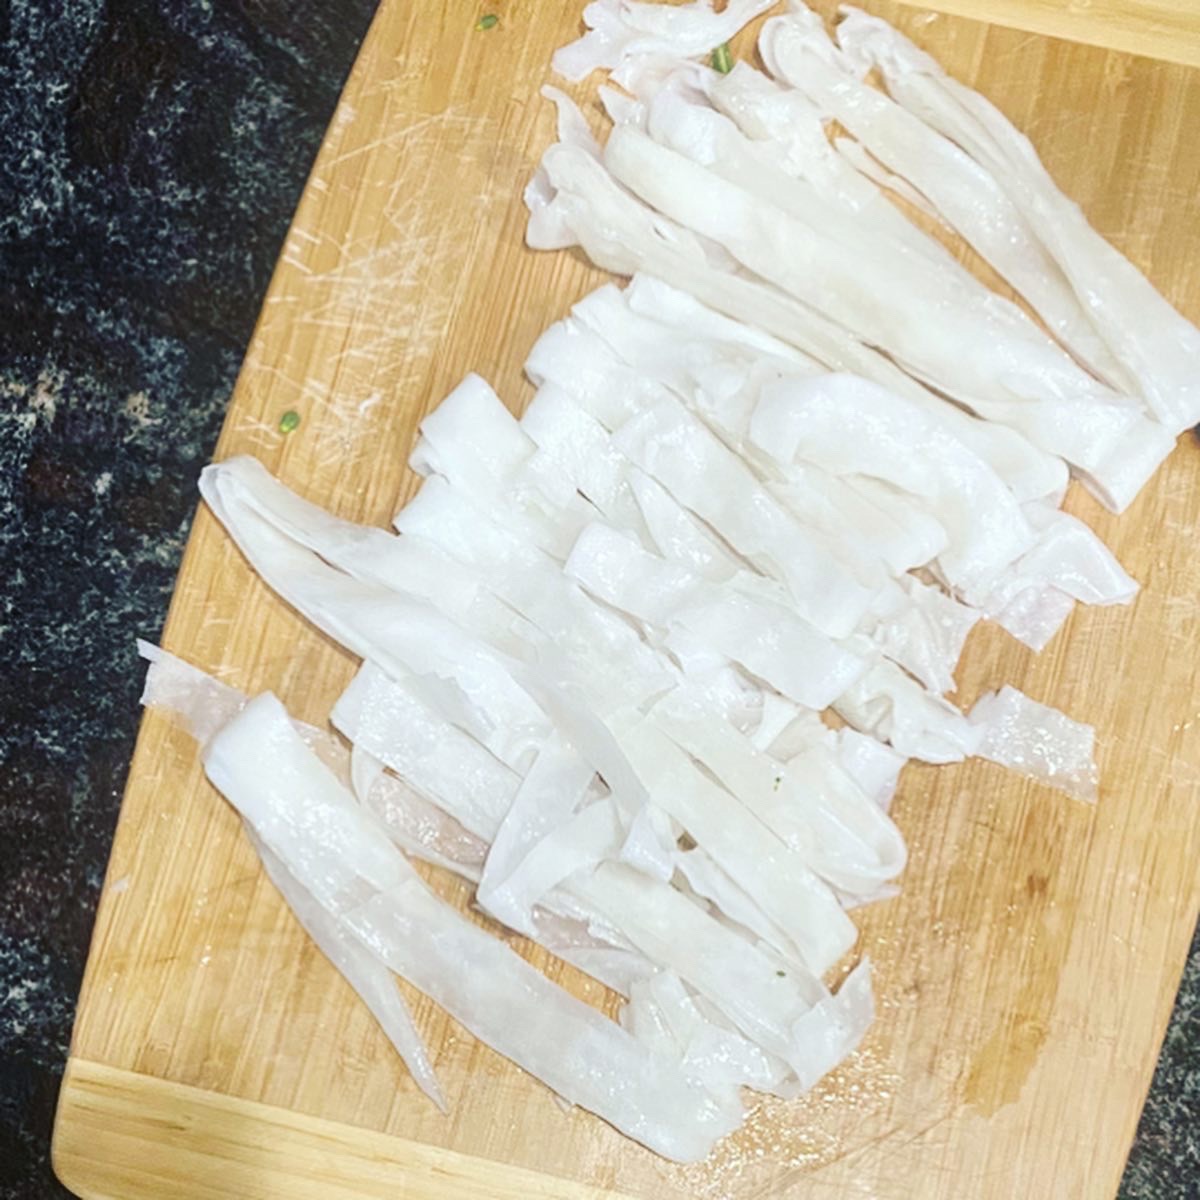
- 1 package (~7 cups) fresh ho fun rice noodles – sliced into ~2cm strips & separated
- ~ 0.25 cup of Massaman Curry Paste (e.g. this is the kind I used – available on Amazon)
- 1 ~14 oz can of unsweetened coconut milk
- ~6 mini sweet red peppers – halved
- ~1 cup of bamboo shoots – drained
- ~1 bunch of broccolini – chopped into ~2cm pieces
- Optional: extra chili to taste (e.g. bird’s eye chili, red pepper flakes or ghost pepper flakes)
Instructions:
- Turn your Instant Pot to Sauté on High, then add the sugar, stirring constantly so that it doesn’t burn but turns dark golden brown ~5 minutes.
- Add the stock or water and stir in the dark soy sauce, fish sauce, and grated ginger; once well combined, add the pork shoulder. *Note you can substitute with any other protein, e.g. tofu, chicken, beef, duck, etc.
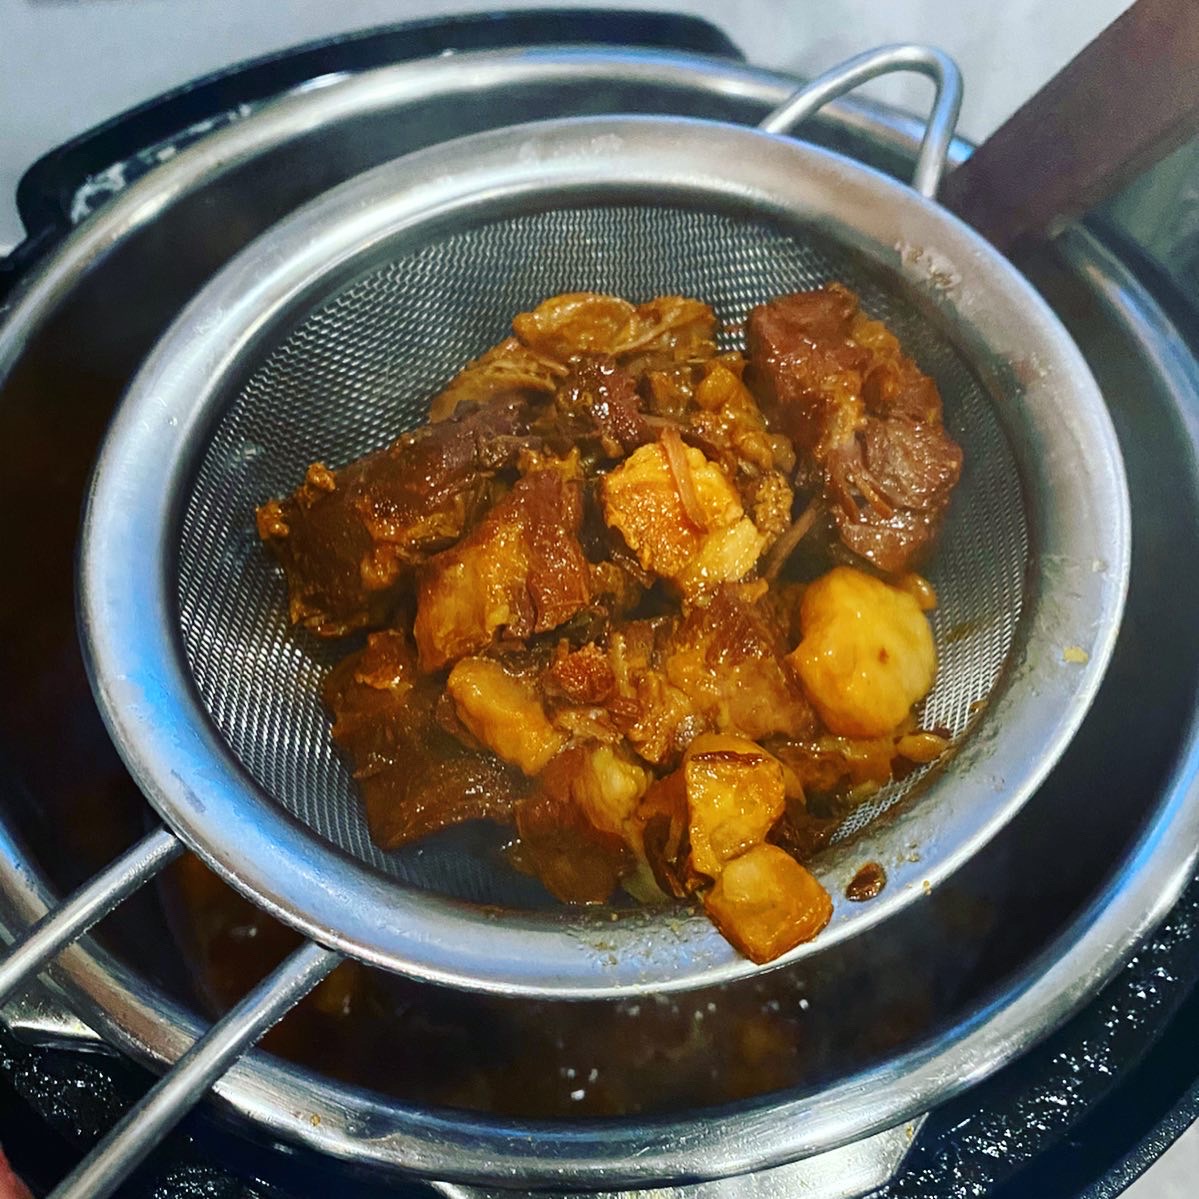
- Turn Instant Pot to Pressure Cook on Quick Release for ~30 minutes.
- Meanwhile, slice the rice noodles up and set aside.
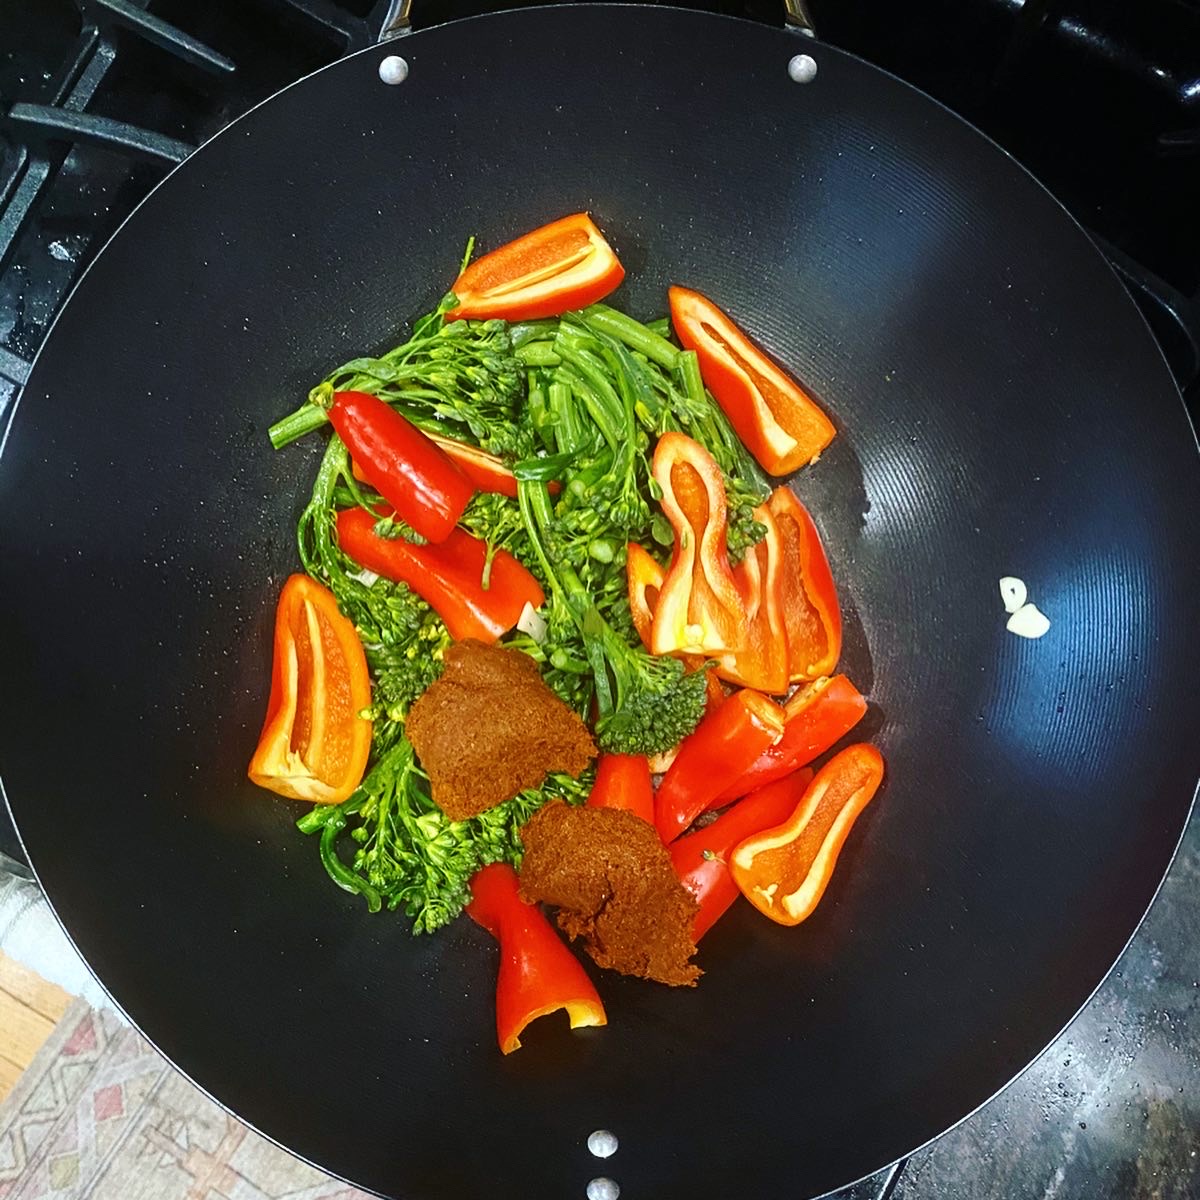
- Then heat up a wok or large pan with a bit of oil, add the garlic, broccolini, red peppers & bamboo shoots. Cook on medium-high heat for ~4 minutes.
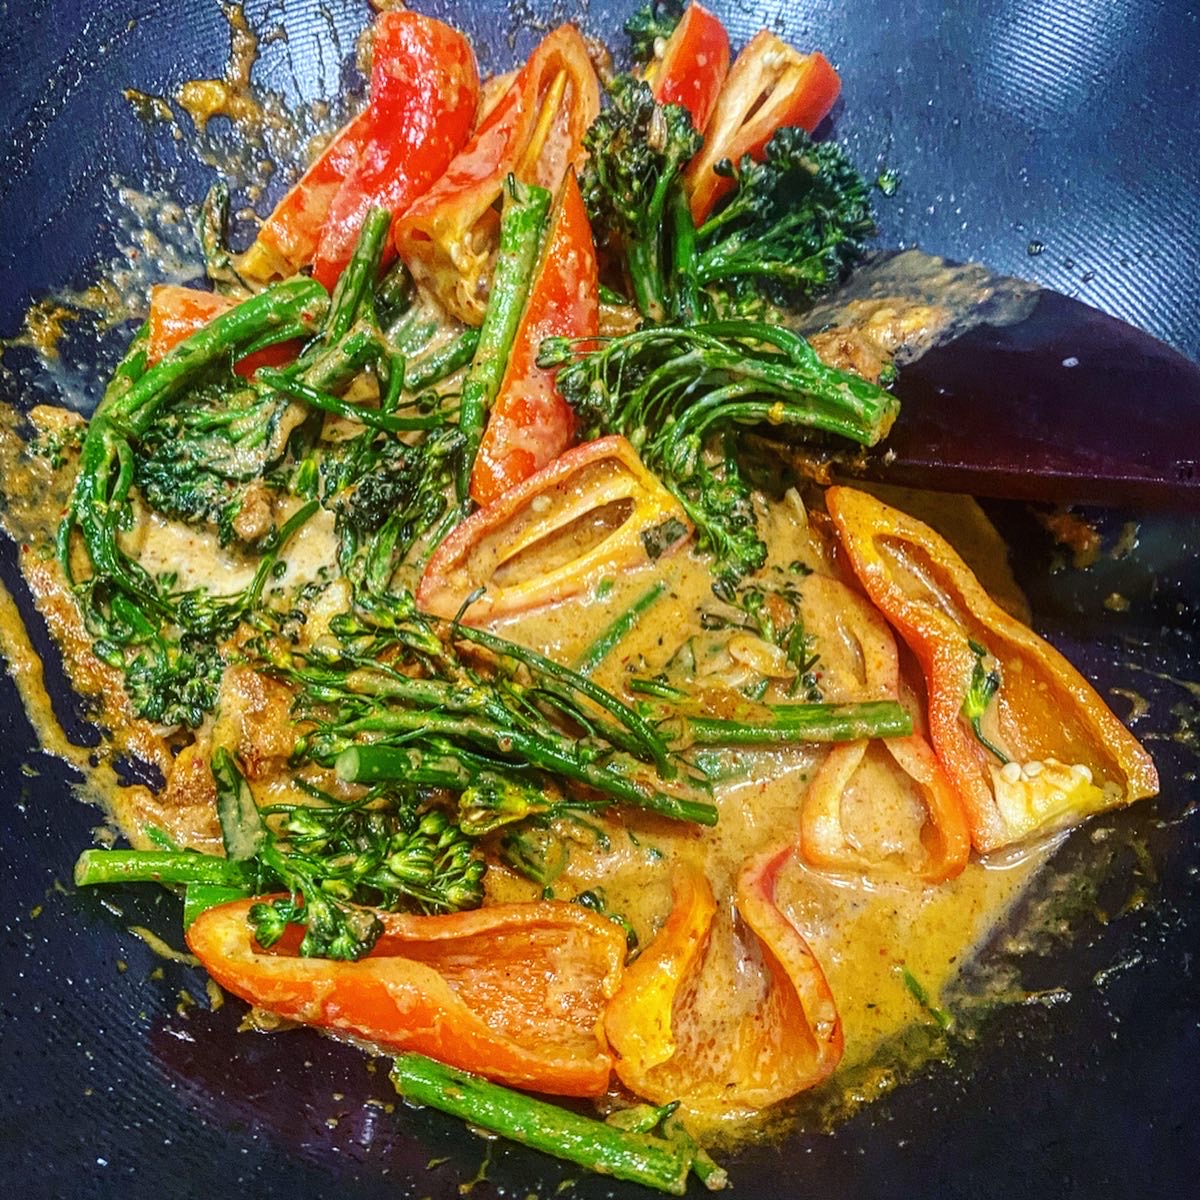
- Turn heat down to medium & add the curry paste – cook for ~3 minutes. Then add half of the coconut milk to deglaze the pan.
- Add the pork (drained – reserving the liquid for later) to the wok and mix well. Add the remaining coconut milk.
- VERY GENTLY fold in the fresh rice noodles so as not to break them down too much.
- Optionally, add some of the liquid from the pork if there isn’t enough liquid to coat your noodles. And add some chili if you like extra spice.
Let me know if you try out this recipe! It was quite delicious & we’ll have a lot of leftovers for lunch tomorrow too 🙂
Happy Cooking!
Huckleberry Kim
- manger seul
 i’ve spent a lot of time putting together complex recipes & extravagant menus for others – from perfecting a chocolate chip cookie for a boy i fell in love with (down to number of granules of volcanic sea salt i sprinkle on top) to going to barcelona for one day to learn how to make paella for a family feast. my mother calls me a word in vietnamese that i cannot actually spell, but all that’s relevant is that it effectively translates to “being v extra”. it’s just who i am – i’m an all-in kind of girl. i truly love cooking for others. to feed the ones i love is an innate instinct for me – a demonstration of care & love that i undoubtedly inherited from the endless matriarchs who raised me. i was pretty much born to become an overbearing grandma conversely, i rarely cook for myself. if i actually have dinner, it’s most often a glass of some red varietal paired with a handful of something produced by Haribo.
we’re going to change that.
my last lengthy personal challenge was to practice playing guitar until i had enough confidence to play in front of another human (shout-out to that housekeeper in mykonos for helping me succeed). this time i want to practice some over-effing-due #selflove. i can’t recall the last time anyone cooked for me (except my homegirl mckittrick who makes me easy mac at the office with so much love). so now, i’m going to take a day at least once a month to make myself a balls-out incredible meal, and no one else is invited. keeping accountable: one fancy meal at a time @mangerseulwhat should I make next?
- Easy & Delicious Mexican Chicken Tortilla Soup Recipe
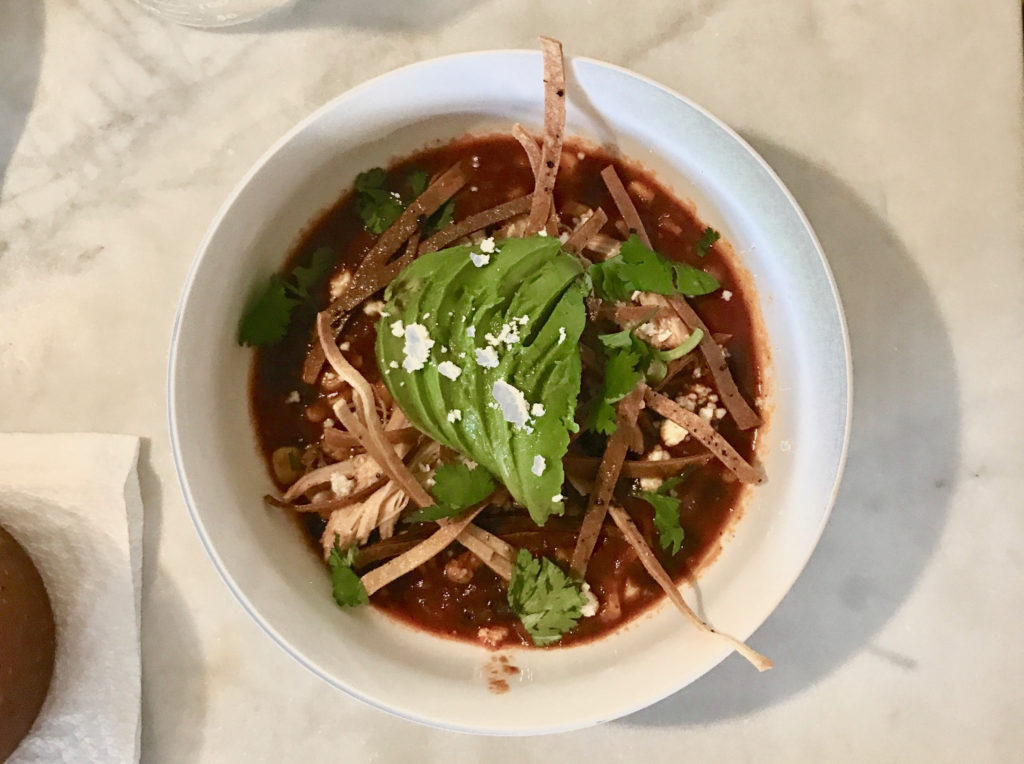
After a long Sunday afternoon at Lake Temescal, I wanted to prepare something really comforting and tasty for our Sunday supper, but I didn’t want it to take too long or require too many ingredients. Drumroll… so since I had some chicken broth & thighs waiting already at home, I decided that I’d try a new recipe for Mexican Chicken Tortilla Soup. And if B’s jumping in for seconds counts as anything, I think it was a success for my first attempt! Try this recipe and let me know what you think!
Huckleberry’s Mexican Chicken Tortilla Soup Recipe
Ingredients:
- 3-4 teaspoons of vegetable oil
- 5 garlic cloves, minced
- 1 tablespoon of fresh ginger, minced
- 6 oz. tomato paste (one of those small cans)
- 14.5 oz diced tomatoes with liquid (one regular sized can)
- 4 teaspoons of chili powder (I used this one from Frontier Co-Op – purchased at Berkeley Bowl.)
- 32 oz. concentrated chicken broth (I used this one from Roli Roti – purchased at Berkeley Bowl.)
- 1 lb. skinless chicken thighs
- Sea salt & ground pepper to taste
- Ghost pepper powder to taste (optional, I’m obsessed with this one from Trader Joe’s – thanks Korey!)
- 3 corn tortillas, cut into thin strips
- 1 cup of sweet corn (I used some frozen corn, you can use whatever works for you)
- 1 cup of black beans
- 1 avocado, thinly sliced
- 1/2 cup of cotija cheese, crumbled
- 1/4 cup fresh cilantro leaves
- Key lime wedges, for serving
Directions:
-
Preheat oven to 400 degrees.
- Slice tortillas into strips and toss with 2 teaspoons of oil. (I also added a few turns of the ghost pepper powder for some extra kick.) Bake them until crisp and golden (about 5 minutes – tossing them halfway through). *Note: the tortilla strips will crisp up quickly, so keep an eye on them!
-
In a large pot, heat 1-2 teaspoon oil over medium-high. Add garlic & ginger and cook until fragrant, 30 seconds. (To make my life easier and to save time, I threw the garlic & ginger into my mini food-processor to mince). Add tomato paste, diced tomatoes and liquid, corn, black beans, and chili powder and cook until most of liquid is evaporated, 2 to 3 minutes.
-
Add chicken broth and bring to a boil; season with salt, pepper, and optional ghost peppers.
-
Add chicken thighs and cook for at least 20 minutes.
- Remove chicken thighs and let cool. Once cool, shred the chicken using two forks in a separate bowl. Return bones to the broth.
-
To prepare: Scoop a generous helping of soup into a bowl, add chicken, avocado, cotija, and cilantro. Top with some more broth and tortilla strips, and serve with key limes (cut in half).
Bon appétit!
Huckleberry Kim

…savor every moment slowly…
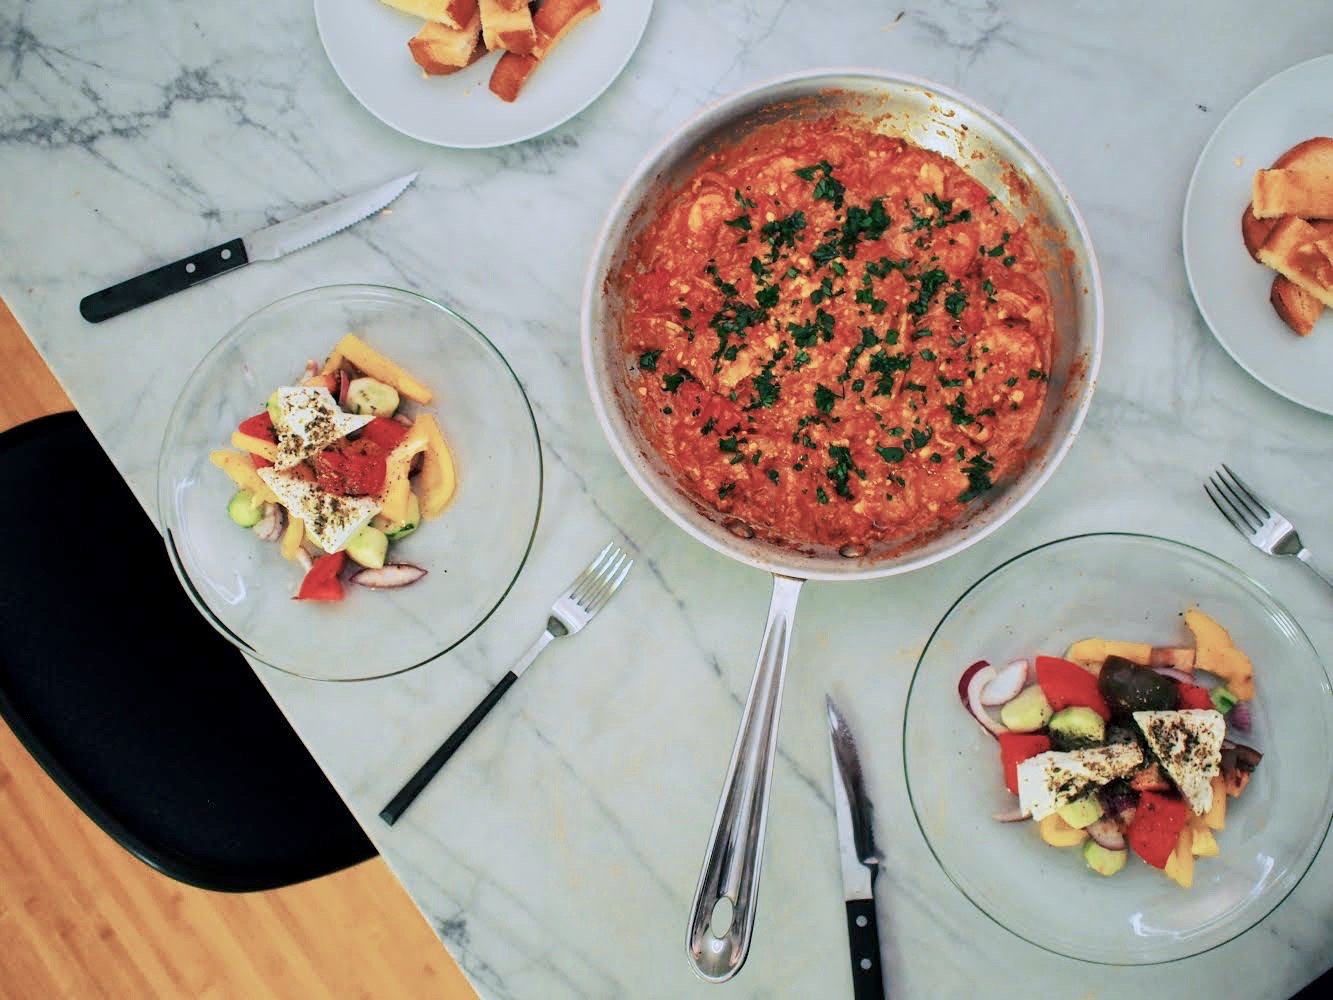
- Prawn Saganaki
Post-vacation depression is:
The. Worst.
Mostly because, Sweetheart, everyday life is so far from sunshine, beaches and rosé all day – especially if you live in the SF Bay Area. But, more on that later.
I recently returned from two weeks in Greece where I adventured to different parts of the islands of Mykonos and Santorini on the back of an ATV, slept in a lot, read novels on the beach, and frolicked in the glorious sunshine and Agean Sea. Despite the fact that Greek cuisine is absolutely delicious, my travel partner and I actually skipped a lot of meals to happily prioritize the aforementioned. But on one of the few days we totally over-ate, we tried this traditional Greek dish that we saw everyone ordering at the restaurant – Argo – we’d been recommended to try during our exploration of Fira.
It was Prawn Saganaki.
The name totally sounds like a Japanese cartoon that features a ninja shrimp as the main protagonist, amiright? In any case, we became pretty obsessed. And after the first bite, as expected, my Huckleberry mind was already picking apart how I could create this Greek magic wizardry. Like, was it only good because we were deluded from drunk-on-vacation vibes with no expectations?
Spoiler:
It’s completely brilliant in real, non-vacation, life too!
Huckleberry Kim’s Prawn Saganaki
Serves 3ish.
Ingredients:
Please note: I’m one of those people who cooks by feelies and to taste (and doesn’t usually measure things much); so most of the following measurements are estimates based upon how much I think I used. Next time I make this dish, I might update this – but the following should be close!
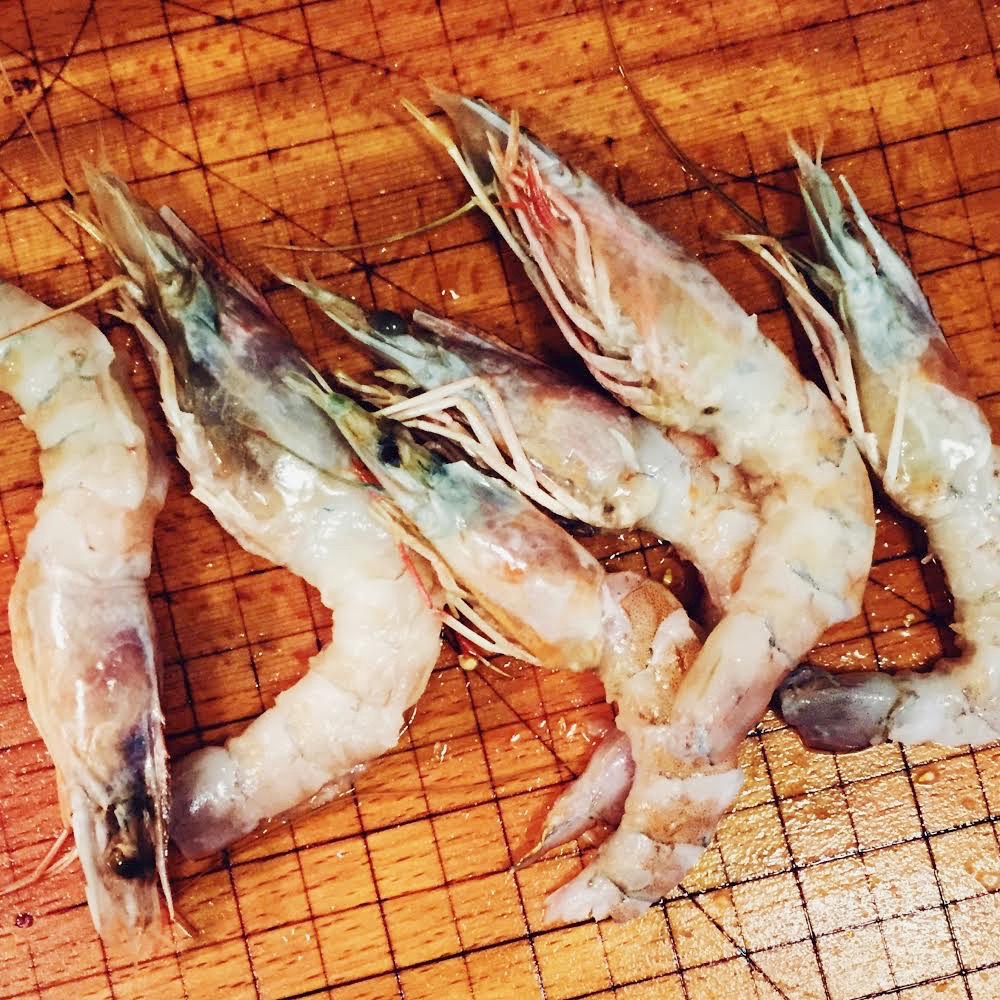
- 6 large full-bodied prawns, and by that I mean with heads intact to their tails!
( ↑ The heads/bodies are super important for a truly prawny base – learnt from my time in Barcelona learning how to make paella ↑ ).
- 6 medium-large shrimps
( ↑ Honestly, I think the supplemental shrimp can be of any size you’d like. I like to play with the juxtaposition of textures and things in meals because I’m a mad scientist, but you do you, Babe. ↑ )
- 3 cloves of garlic – minced
- Half of an onion – chopped
- 1 tablespoon of extra virgin olive oil
- 2 tablespoons of coconut oil
- 4 tomatoes – chopped
- 2 tablespoons tomato paste (optional)
- 1 cup of Greek feta
- 3 tablespoons of honey
- 3 tablespoons of granulated sugar
- A dash of cayenne pepper (optional, but do it like Guy Fieri would)
- Salt and pepper to taste
- Parsley – chopped (optional, for garnish)
Directions:
- Heat up a skillet on medium-heat with your EVOO and add the chopped onions – cook until softened
- Add coconut oil and garlic – cook all until nicely browned
- *IMPORTANT: Peel the tails of the large prawns and squeeze their heads over the pan (some weird prawn brains will ooze into the pan) – reserve the prawns – still intact – for later
- Add tomatoes and optional tomato paste
- Cook down for 10-15 minutes – or until the garlic, onions, and tomatoes embrace each other like best friends
- Add the large prawns and cook until less translucent – maybe 3 minutes
- Add the other shrimps
- Add in the honey, sugar, and cayenne – stir well
- Very gradually add in the feta while keeping the Saganaki moving around the pan – it will slowly melt to combine with the other ingredients #bffs
- Add salt and pepper to taste
- Optionally, garnish with chopped parsley 🙂
Served with some toasted brioche for mopping up all the goodness; though this would pair well with anything! I might try doing a pasta next time. Let me know what you think!
Have you ever made a dish you tried for the first time on a trip? How did it work out?!
xo,
Huckleberry Kim
S O N G O F T H E M O M E N T
- delightful star alignments & dirty drinks

A friend introduced me recently to the wonderful merits of a classic dirty martini. The basic recipe for a dirty martini includes: vodka, olive brine, dry vermouth, and a green olive garnish (see following).
 …though I’ve never been the most keen of basic..recipes. So a few days ago I soaked 6 green olives, a slice of pickled jalapeño, and a slice of pickled beet in about 1.5 cups of Hangar1 vodka. It gives the vodka a lovely blush color!
 And this is the recipe I came up with after a few nights of experimentation for my ideal super dirty martini.
Huckleberry Kim’s Super Dirty Martini
- 4 oz. of soaked dirty vodka
- 2 oz. dry vermouth
- 1 oz. olive brine
- olives to garnish (I like 3 olives in my dirty martini because yum.)
Good tips for mixing your drink:
- Vigorously shake the ingredients with ice for no more than 45 seconds; if you’re going to stir, use a large hunk of super cold ice so it doesn’t melt too fast; don’t stir for more than 30 seconds.
- Freeze your martini glass ahead of time to keep it all super cold.
- Use a fine strainer when pouring the drink from the shaker into your glass; lots of olive/pickley gunk should be filtered out 🙂

New favorite Major Lazer jammy; thanks for the share T.
xx, Huckleberry Kim
- The Perfect Cup of Coffee
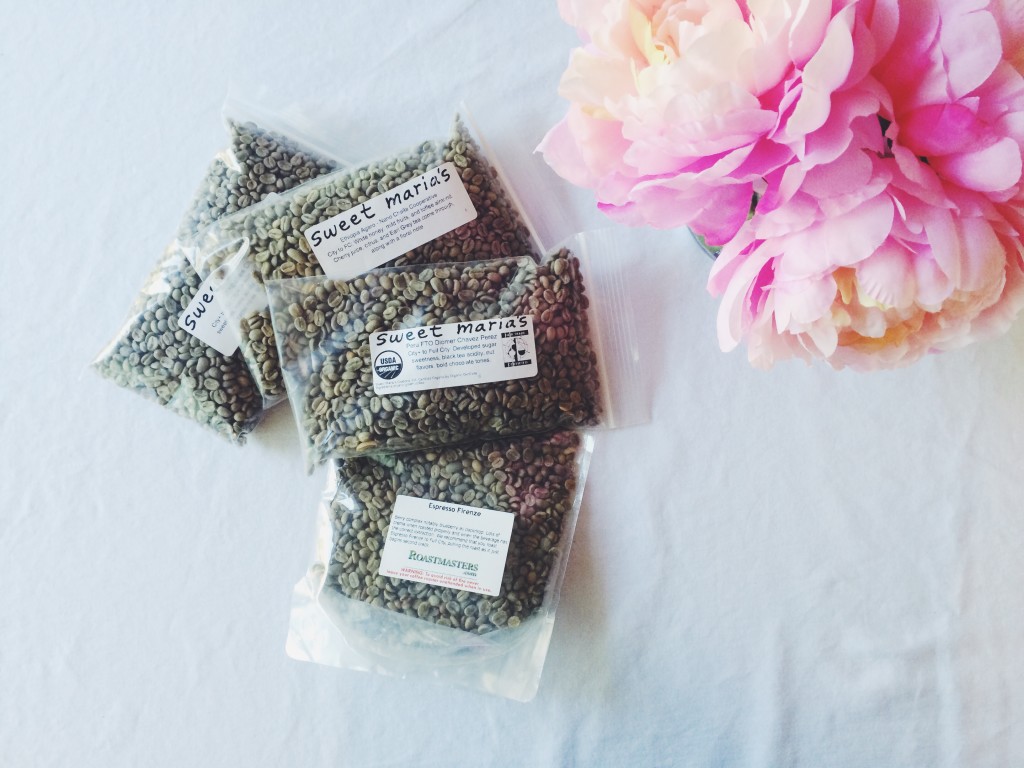
Did you know that coffee beans are green? (And turn shades of brown once they’re roasted.)
I learned that this weekend while playing at-home barista. The following is a little anecdote about my inspiration…
xx
Generally, I don’t like to use over-used quotes, but I’ve been pondering a lot about work-life balances, purpose, and roots of happiness of late, so I’m going to make this exception for that one Confucius jammie:
Choose a job you love, and you will never have to work a day in your life.
I’m a very fortunate person in that I have found a job that I really do love. Though since my early years in college, I’ve always asked myself, “But maybe I’d be really happy if I was a barista…” I love coffee (caffeine is
probablymy greatest vice), although, I have never worked in the industry. There is something that has always drawn me to the idea of being a person who provides a carefully crafted, artisanal dose of enjoyment and daily ritual to a local ecosystem of regular patrons. Really though, how many people ever make it into being a part of your daily ritual? To me it seems so simple and powerful, and I’m into that.In the last three years, there have been three men who’ve made an effect on my simple, mundane daily ritual with the products they’ve crafted: Mike Kreiger & Kevin Systrom (who created this little mobile application called Instagram), and of course my rat-tail barista. I never knew his name, but he always remembered my order – it was our ritual, “TK USA” in Sharpie on paper cup.
———————————————————
Since my rat-tailed barista long ago moved on to a new daily ritual, I thought of him this past weekend and wanted to make the perfect cup of coffee. Here are a few things I learned:
i. LEARN SOME ROAST BASICS (mostly will depend on how long and at what temperature you roast your beans at; the following is from Sweet Maria‘s – an Oakland, CA based home green coffee bean purveyor):
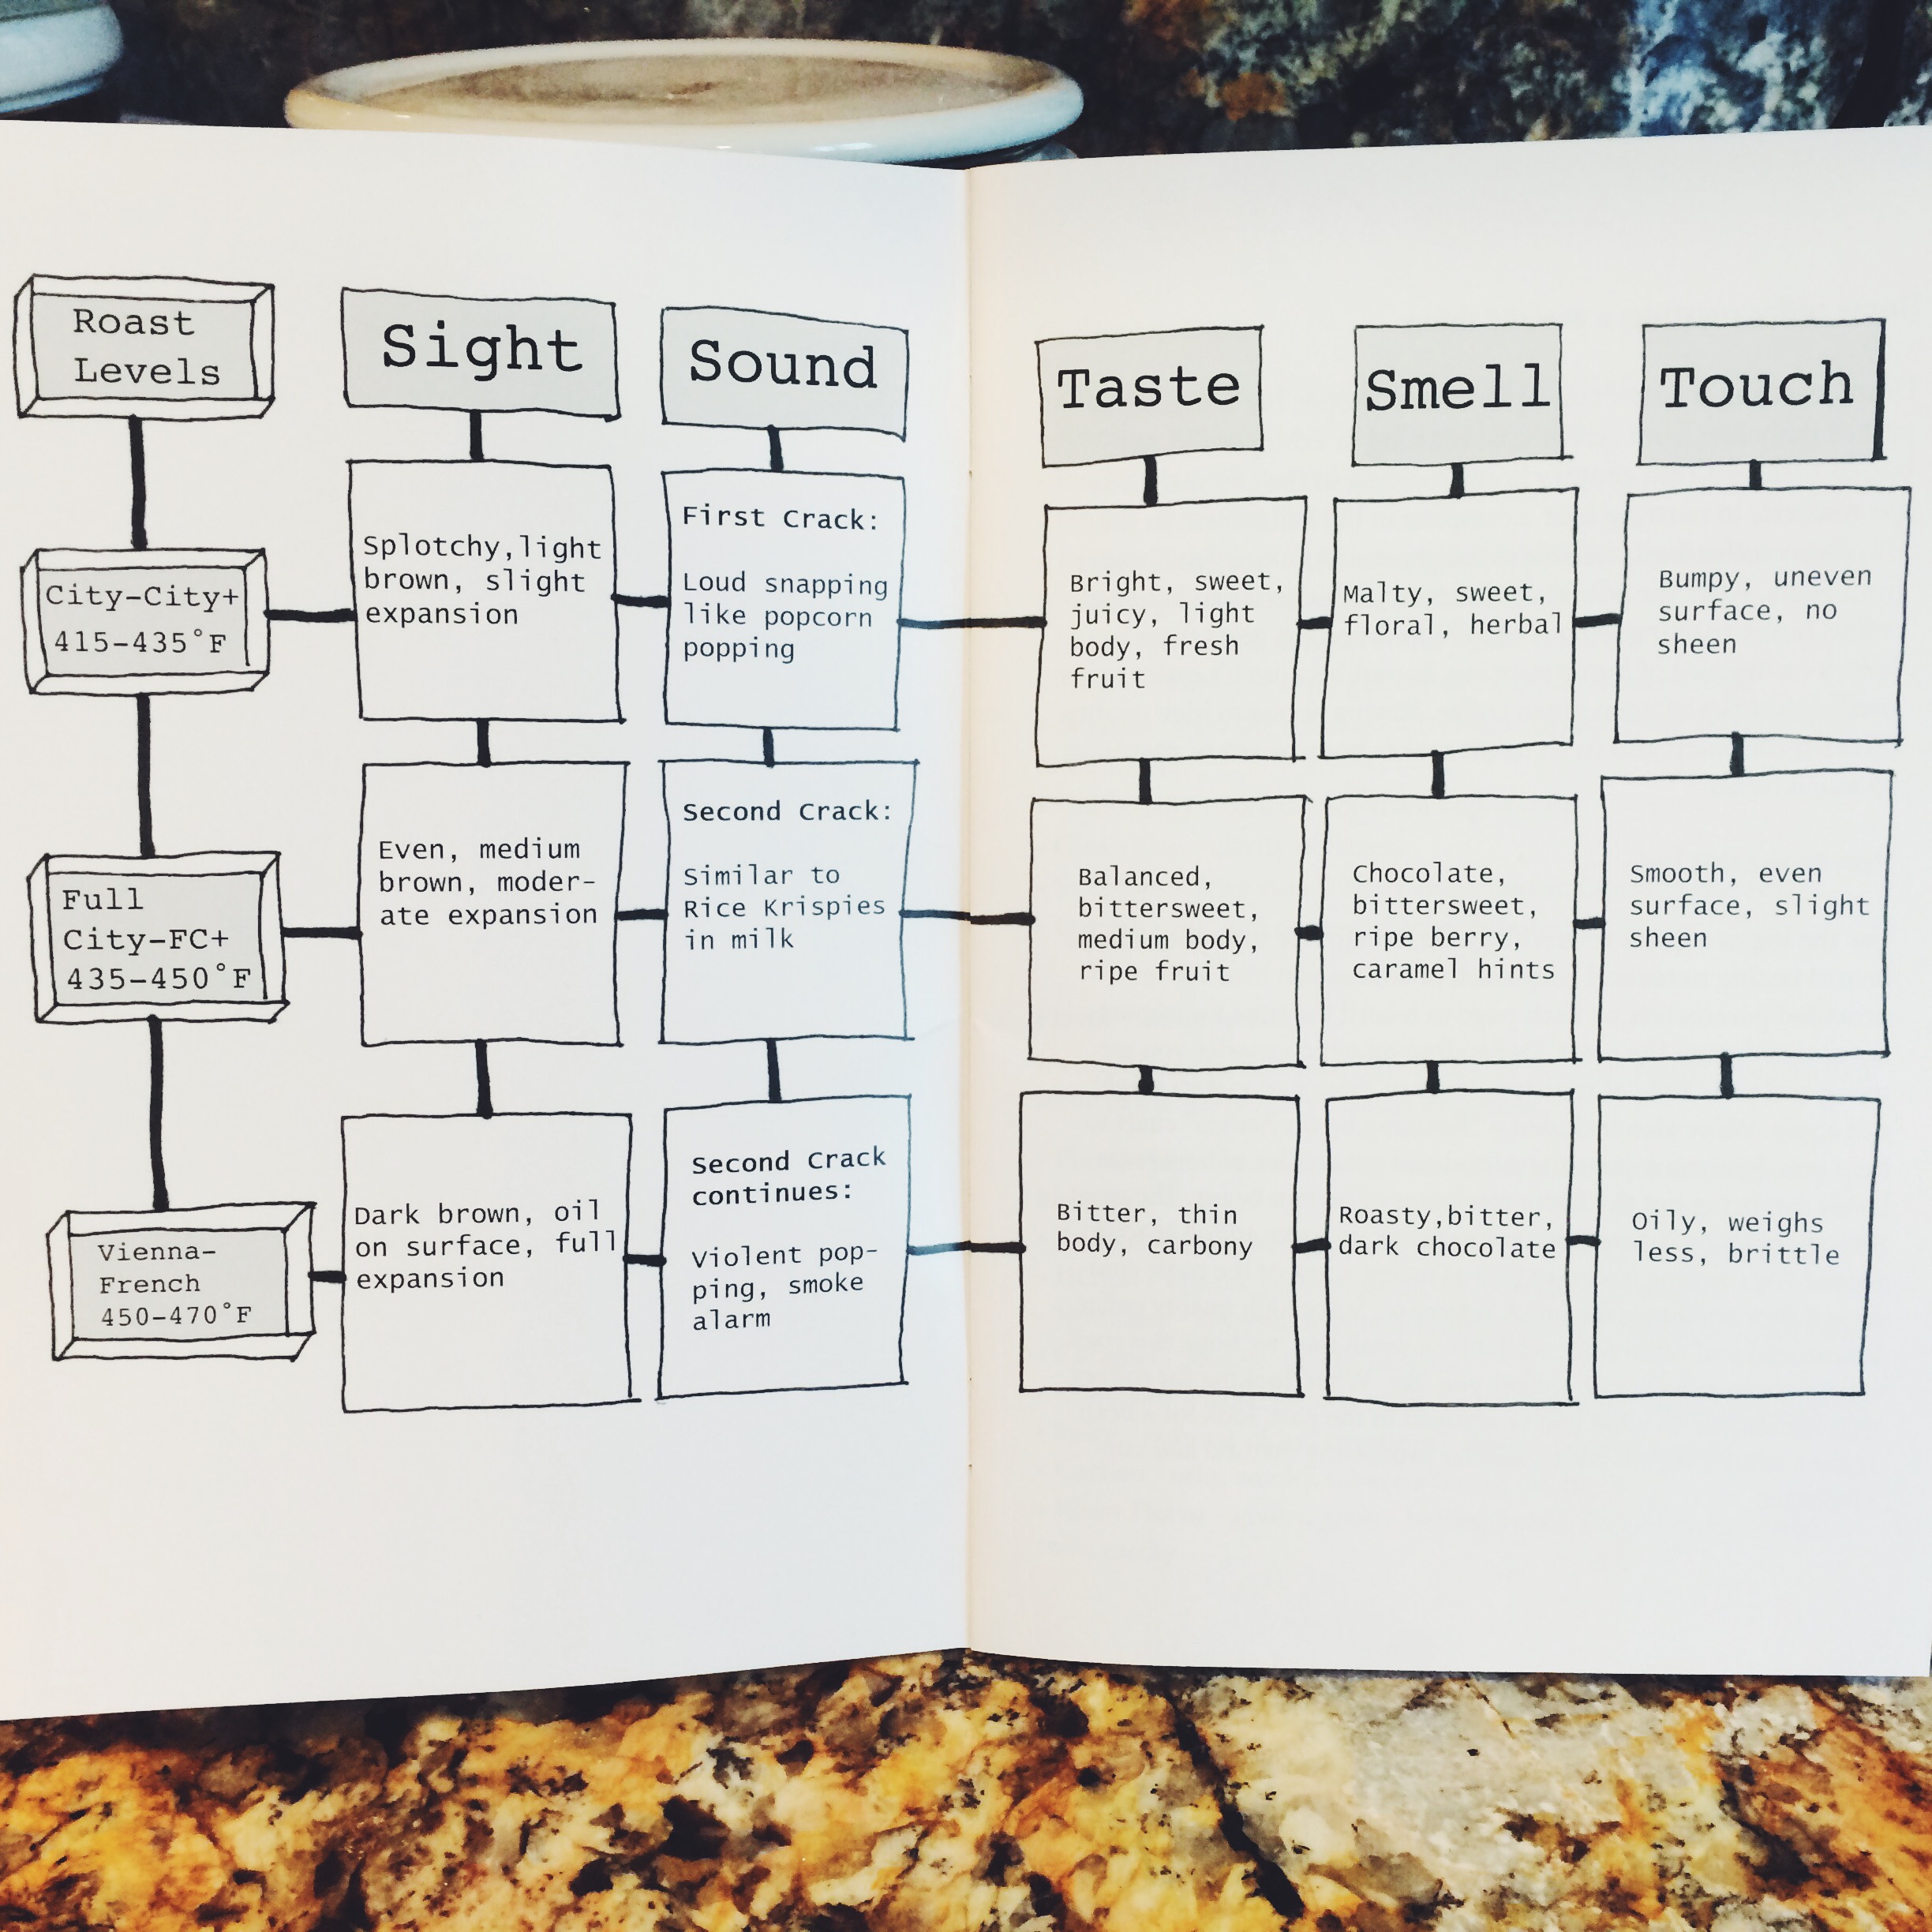
For this cup, I chose a Zimbabwe Chipinge.
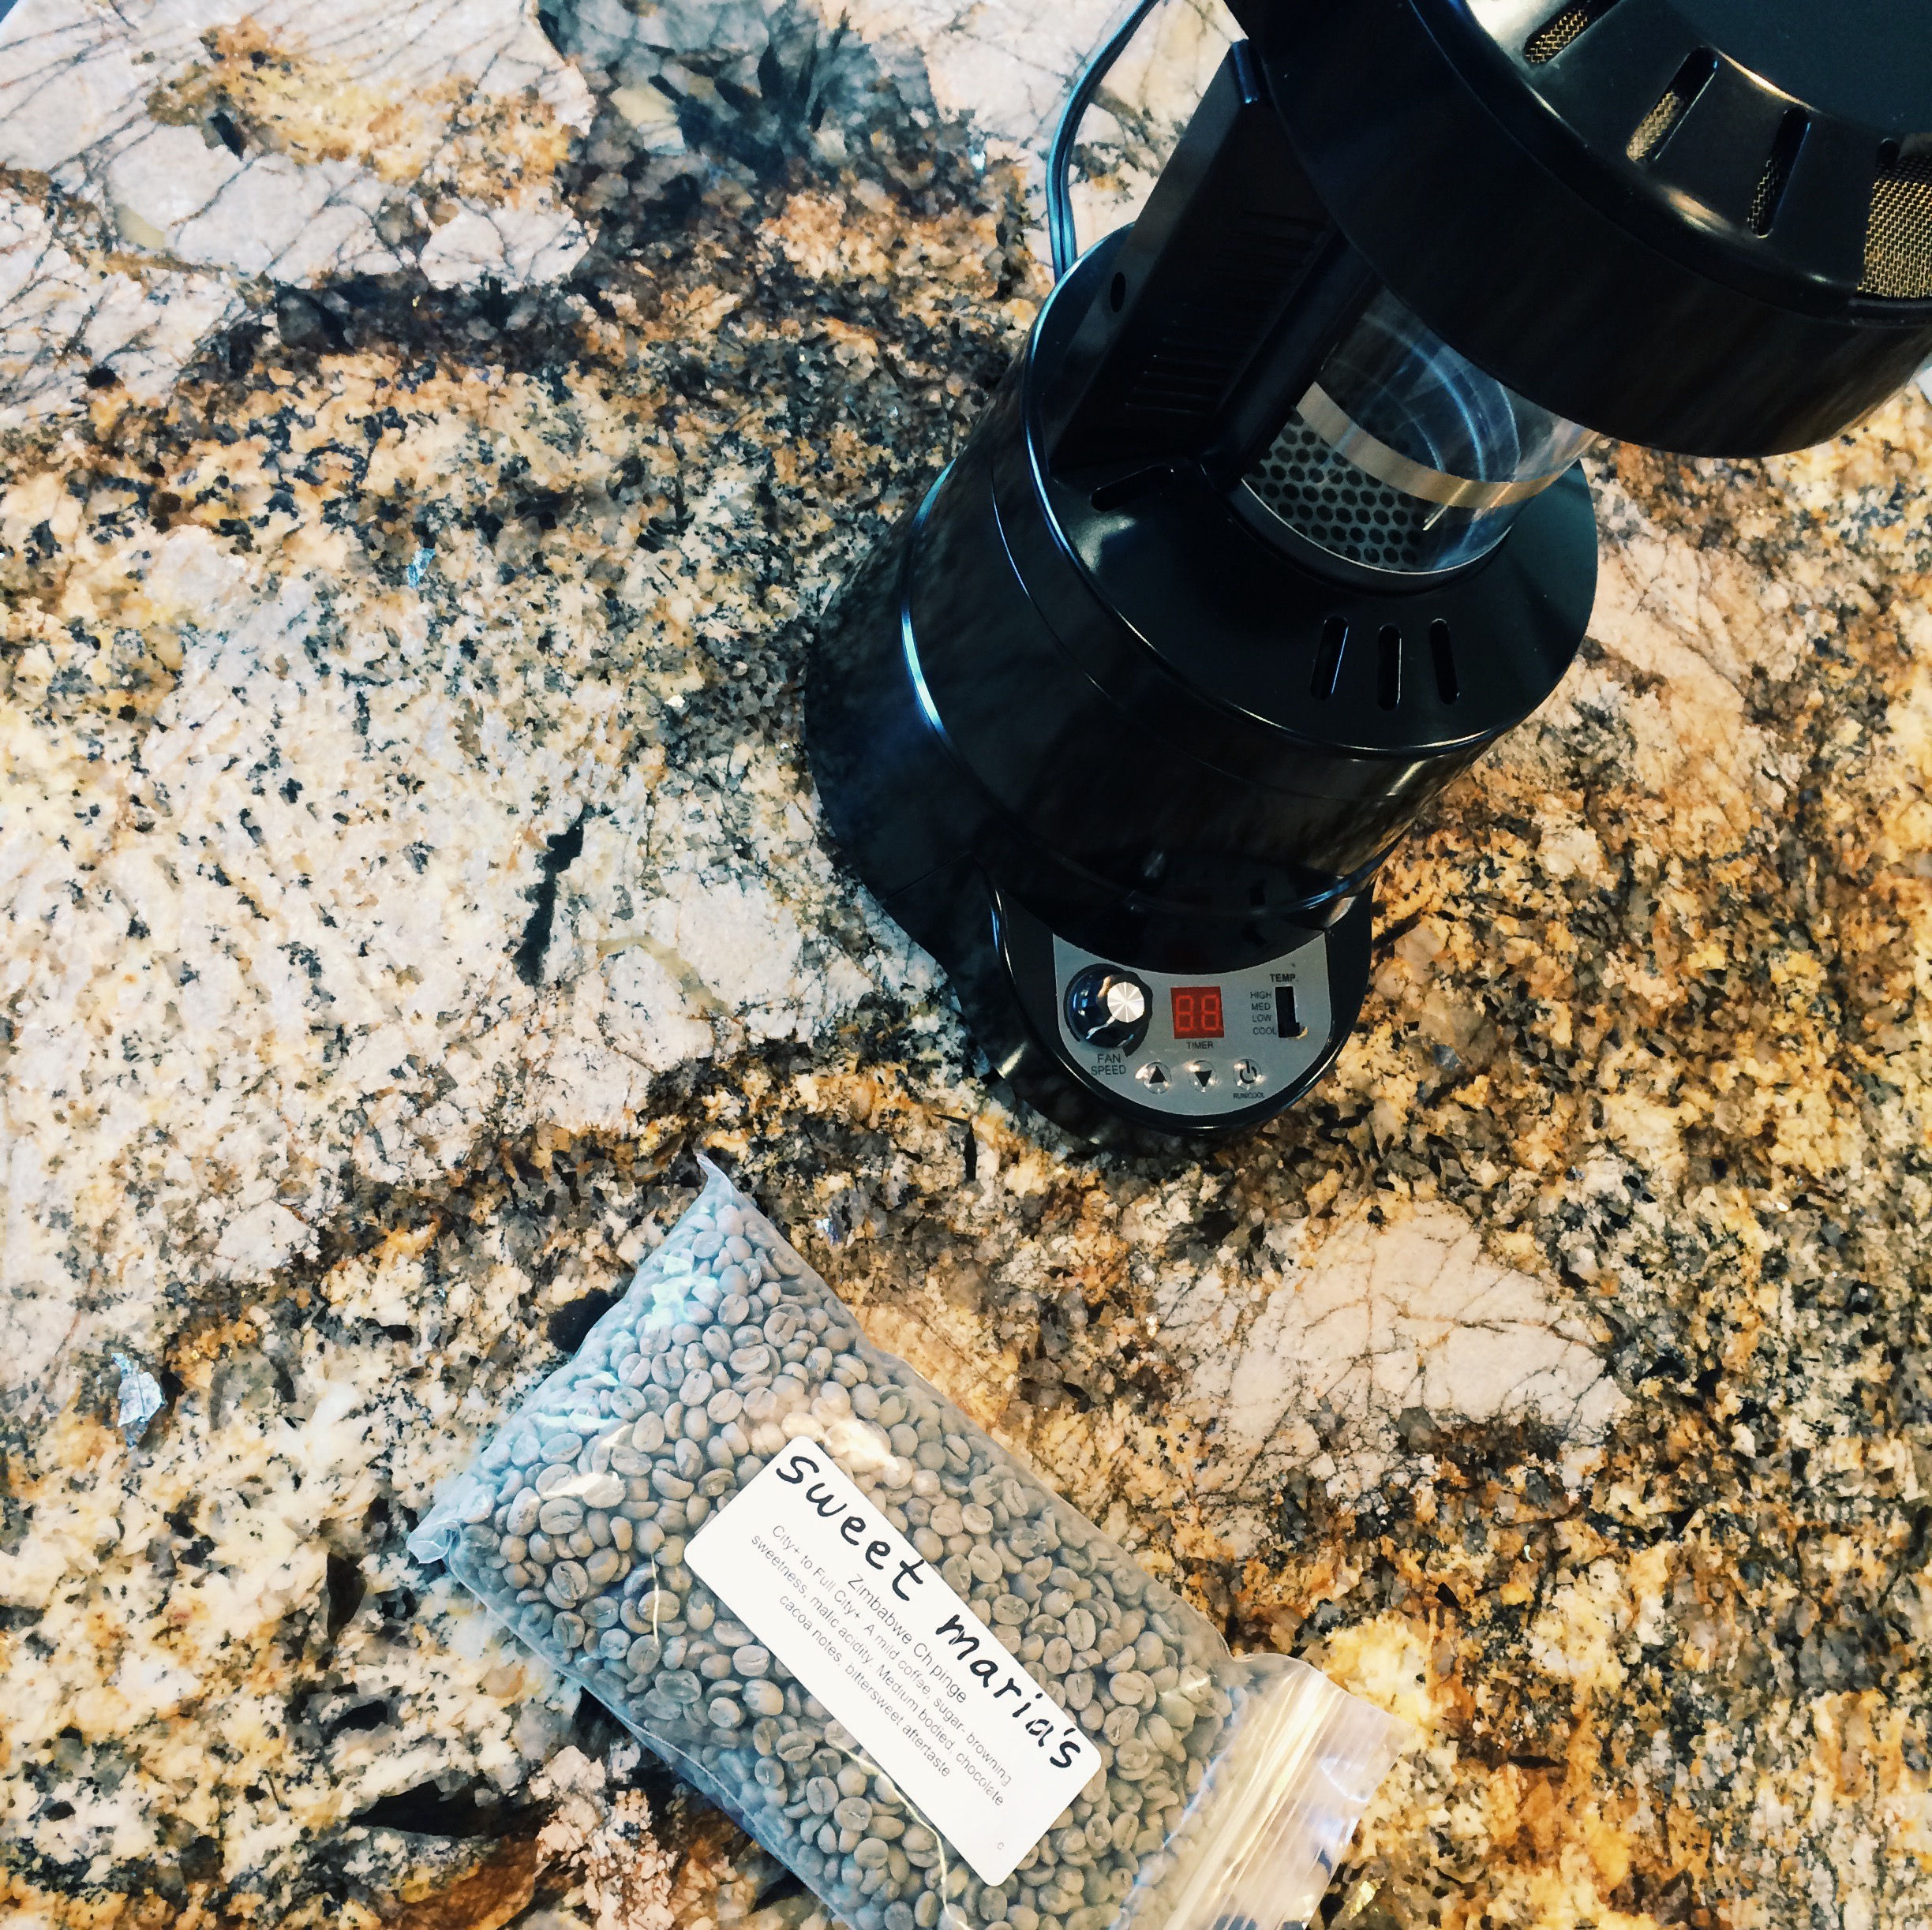
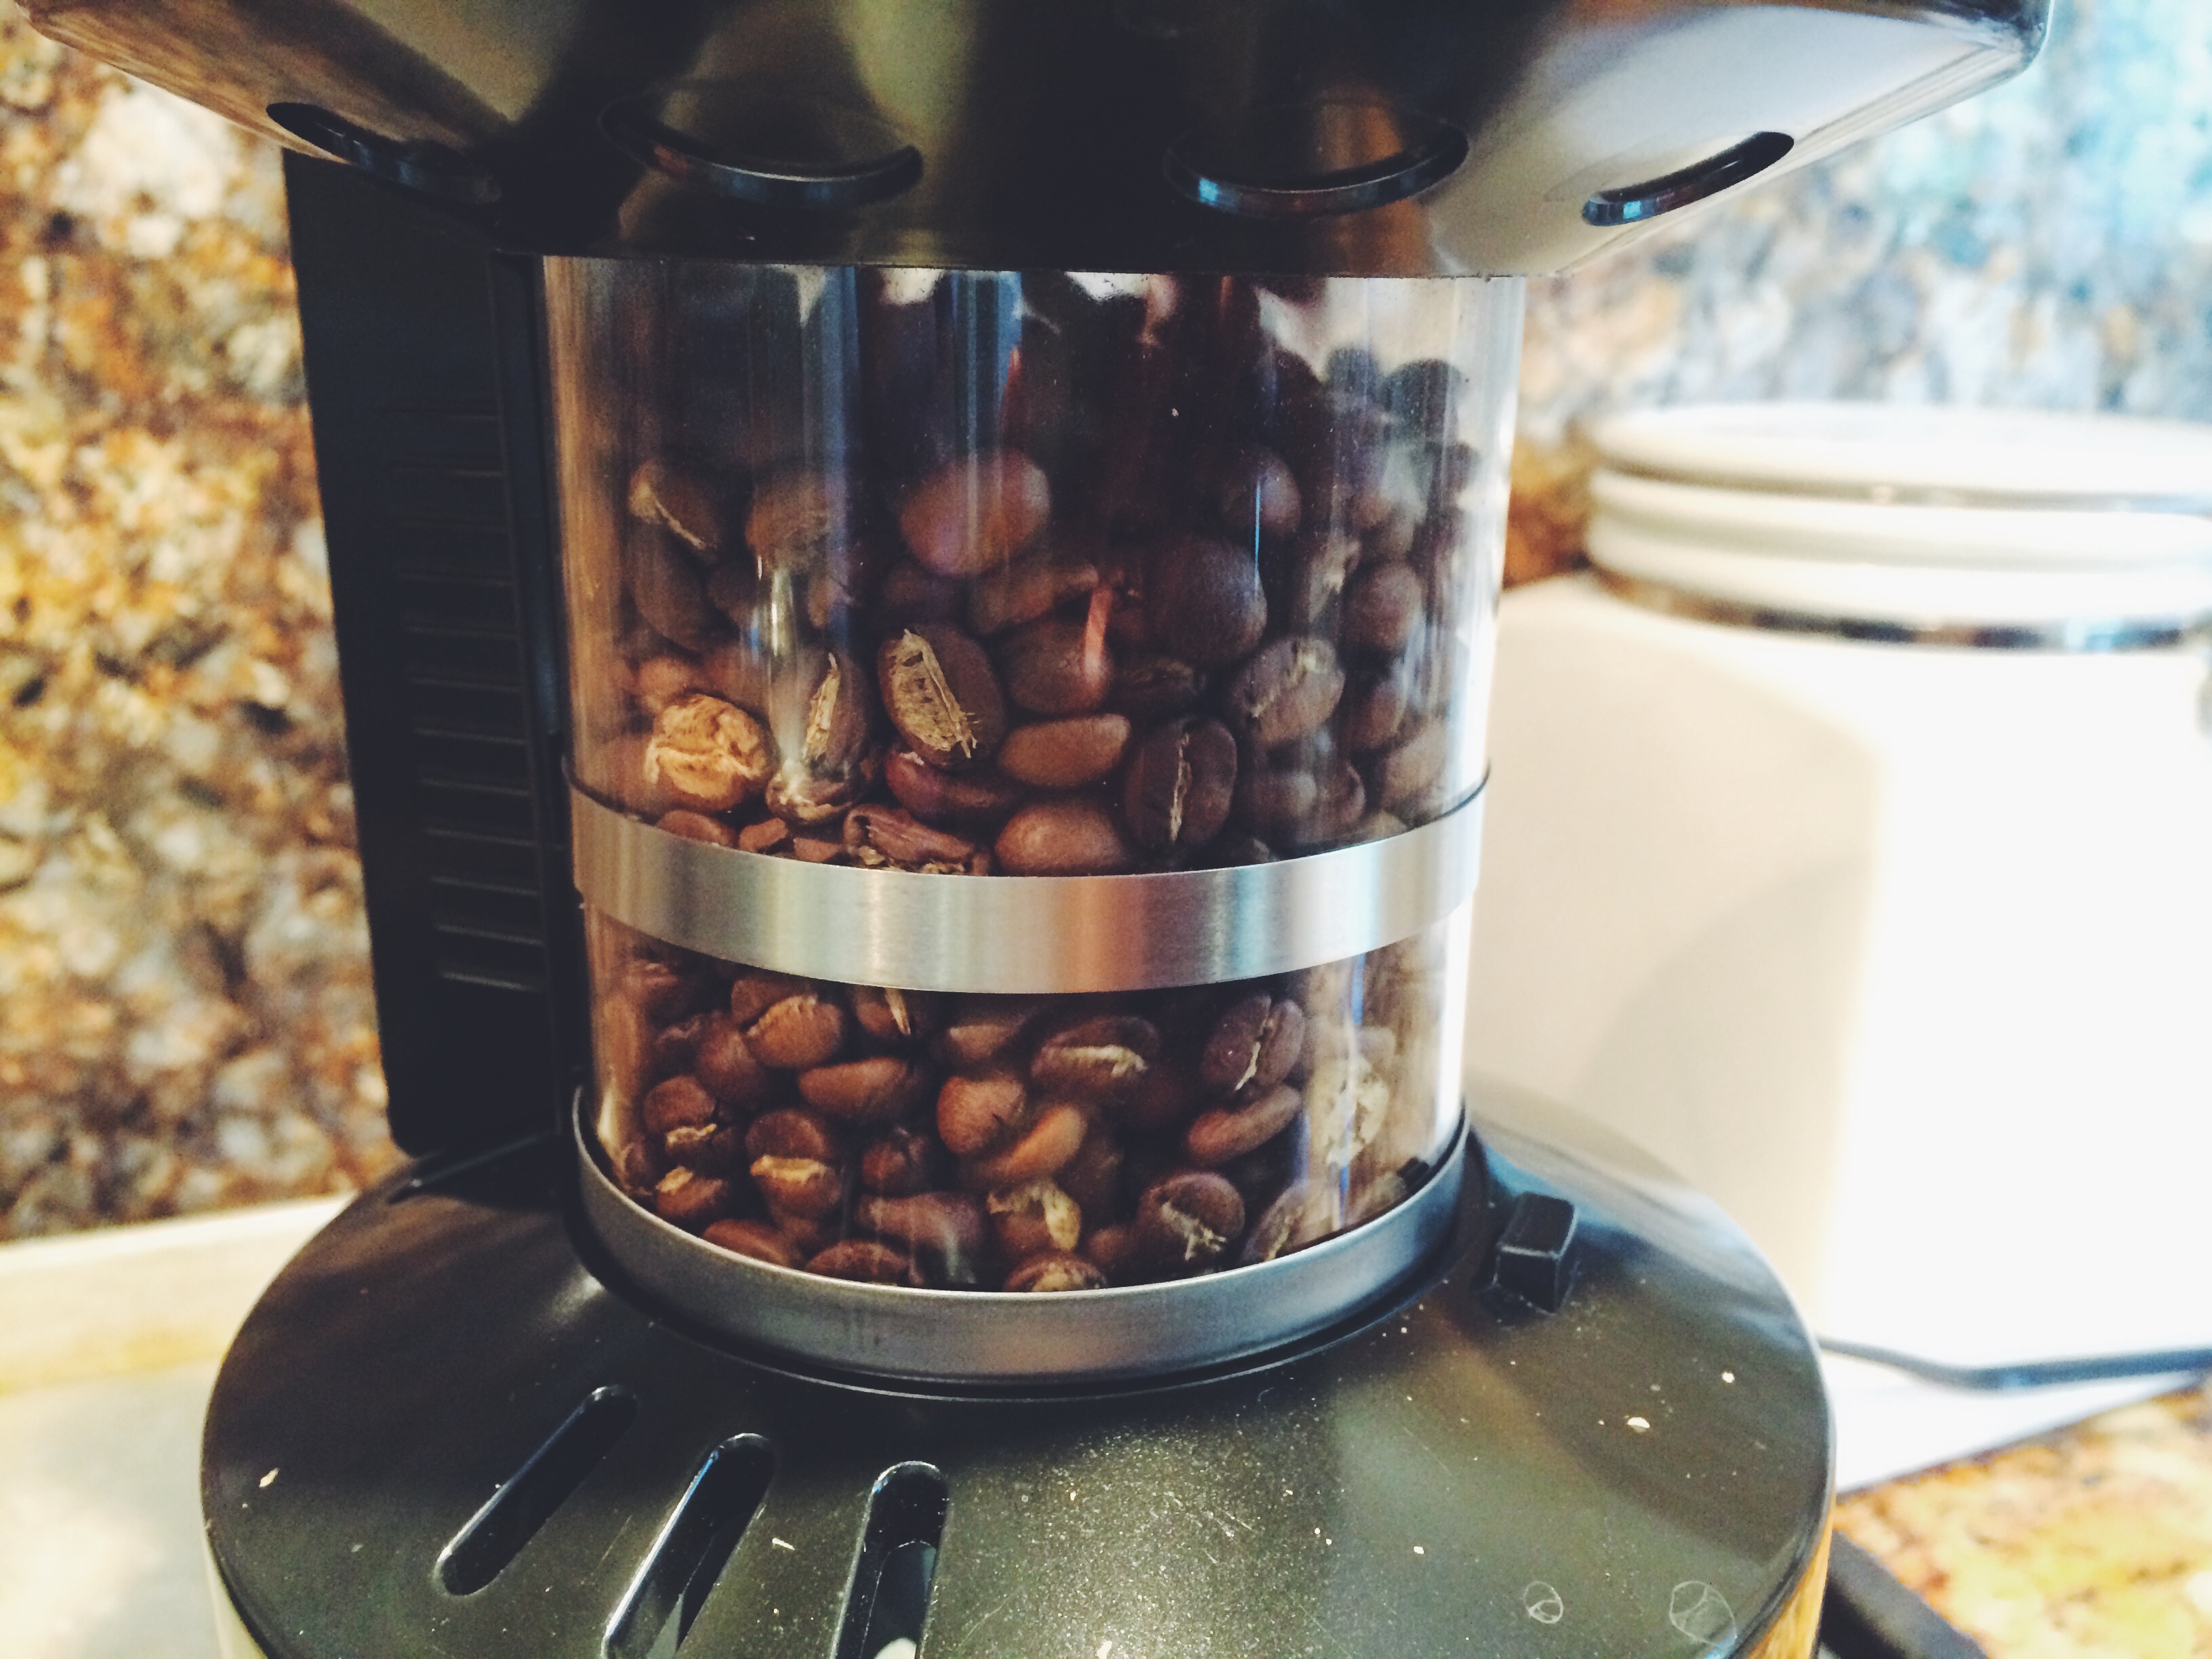
ii. DON’T OVERFILL YOUR ROASTER; your beans will become aerated and increase in volume when roasting (see before and after below):
Fresh Roast SR500 Home Coffee Roaster

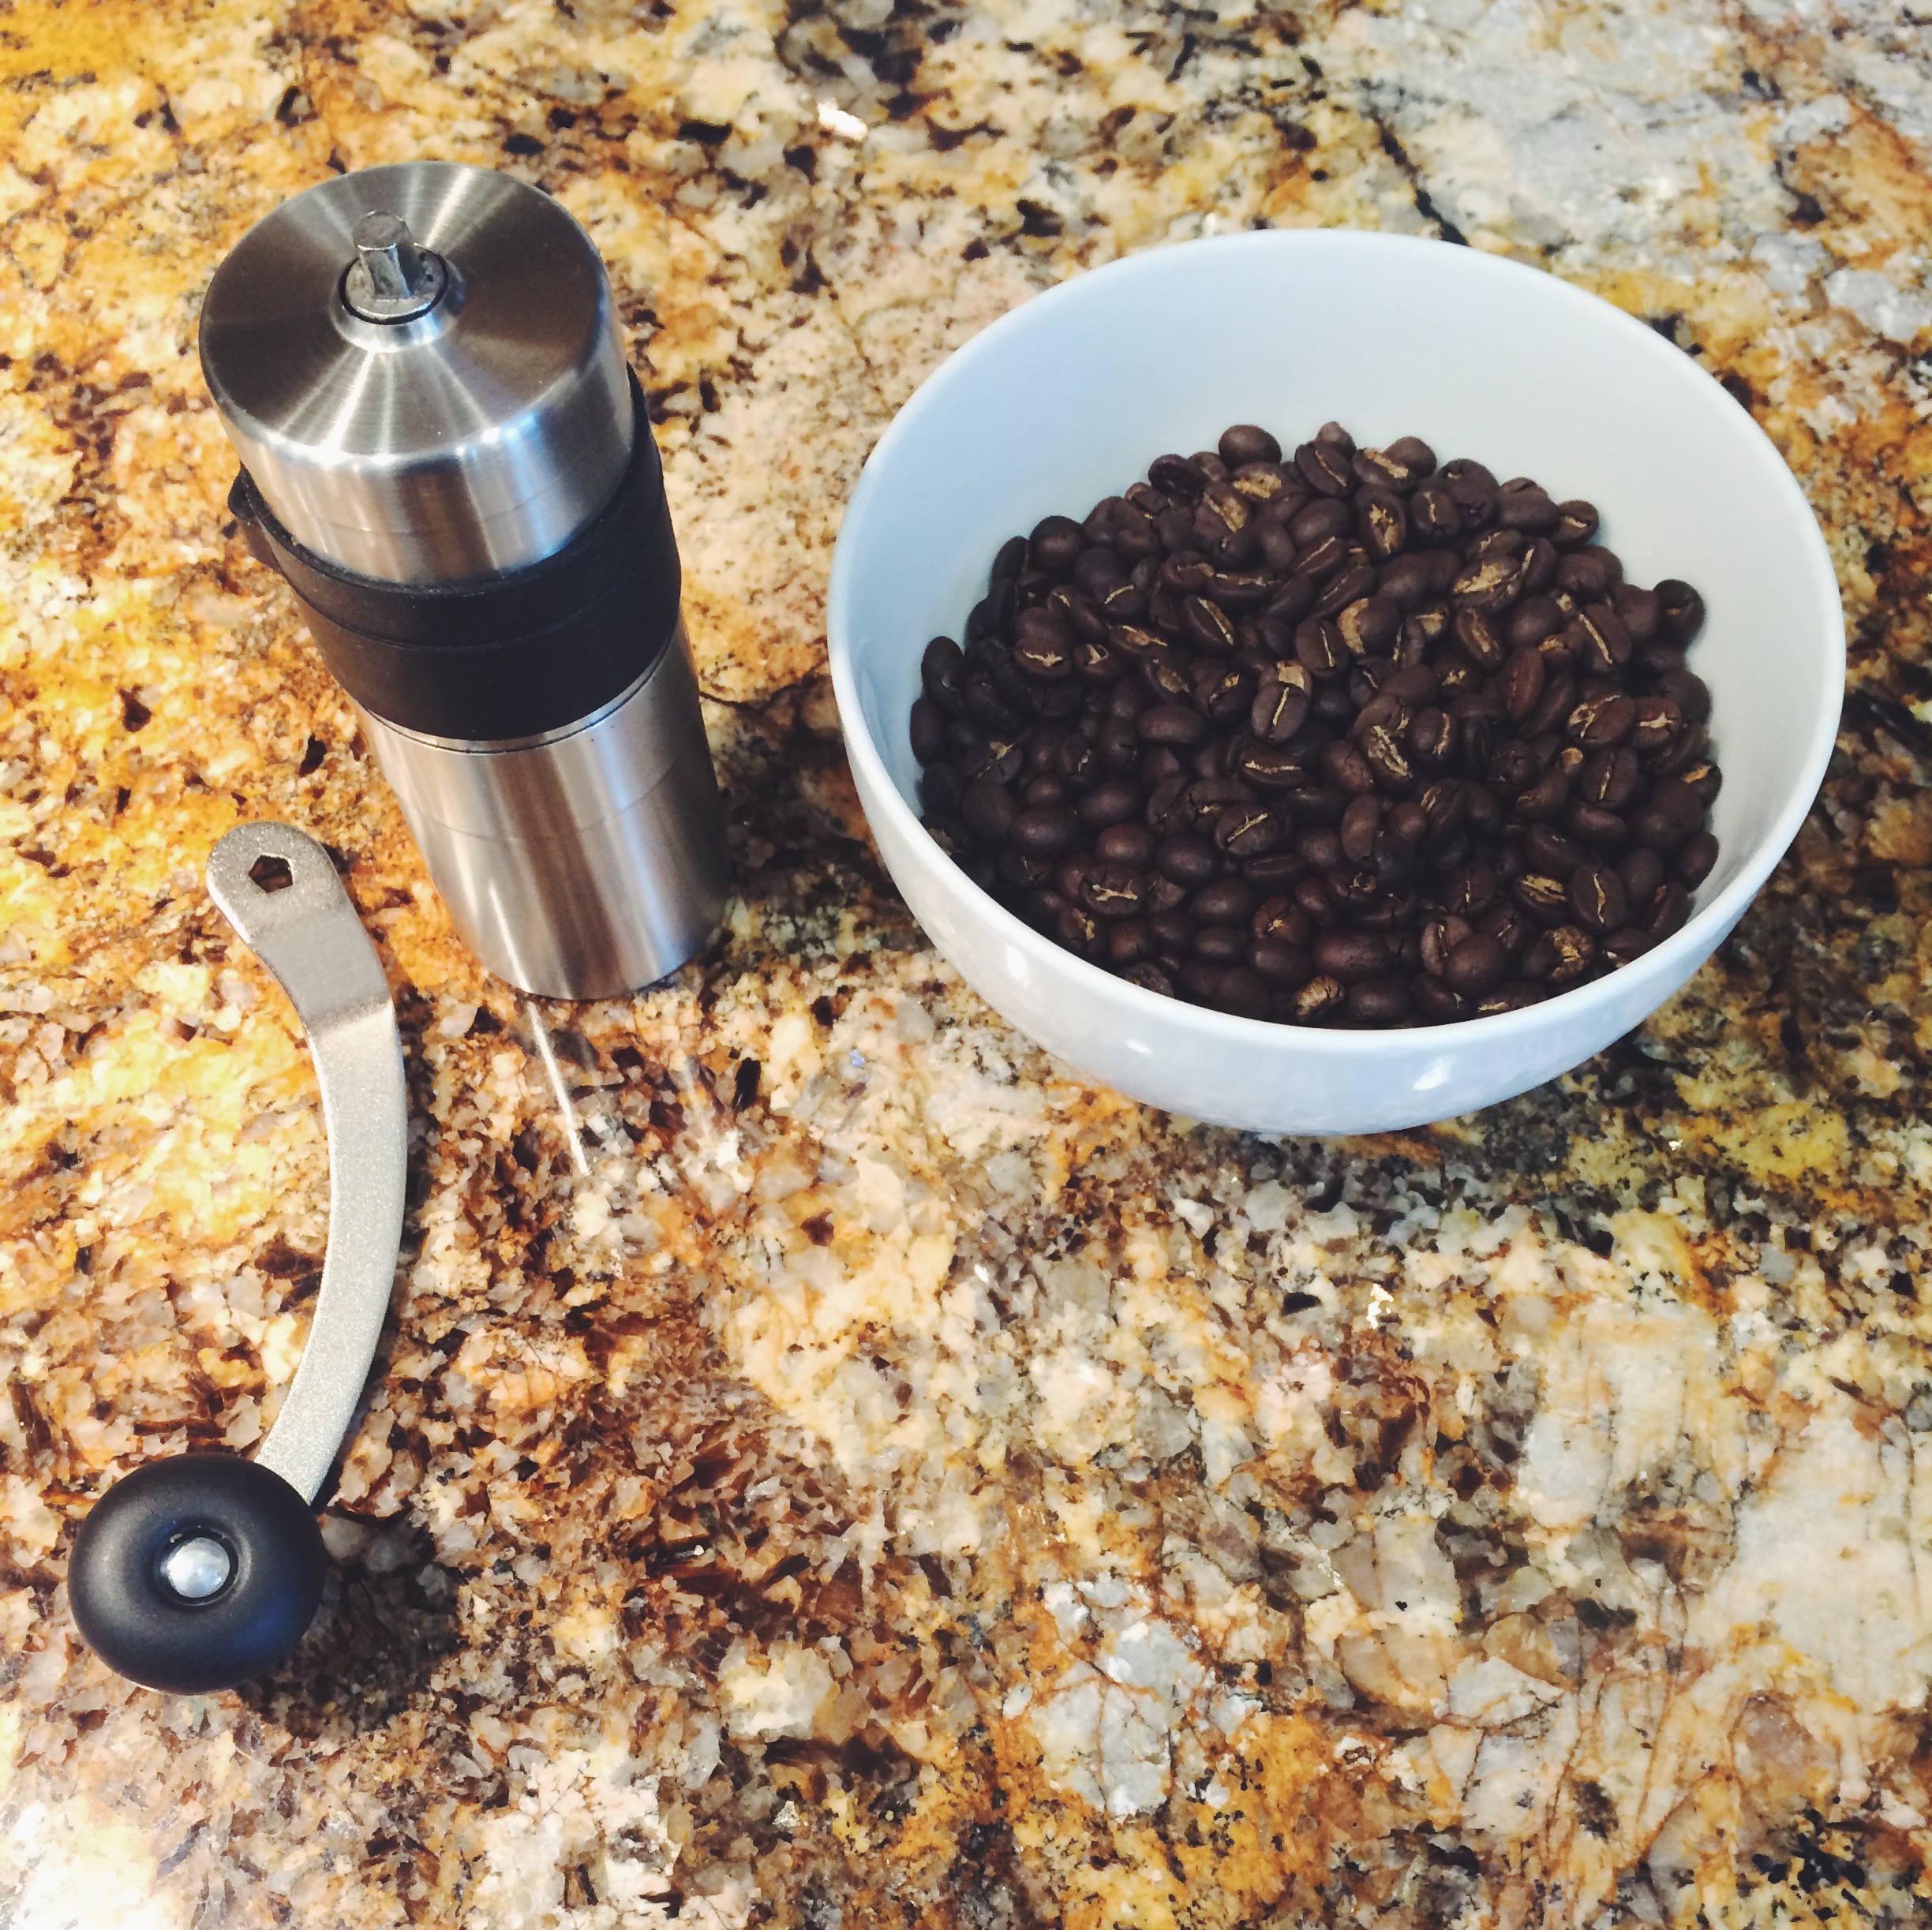
iii. LEARN HOW TO GRIND FOR YOUR BREW METHOD; I like this guide with photos from I Need Coffee:
Porlex Stainless Steel Coffee Grinder
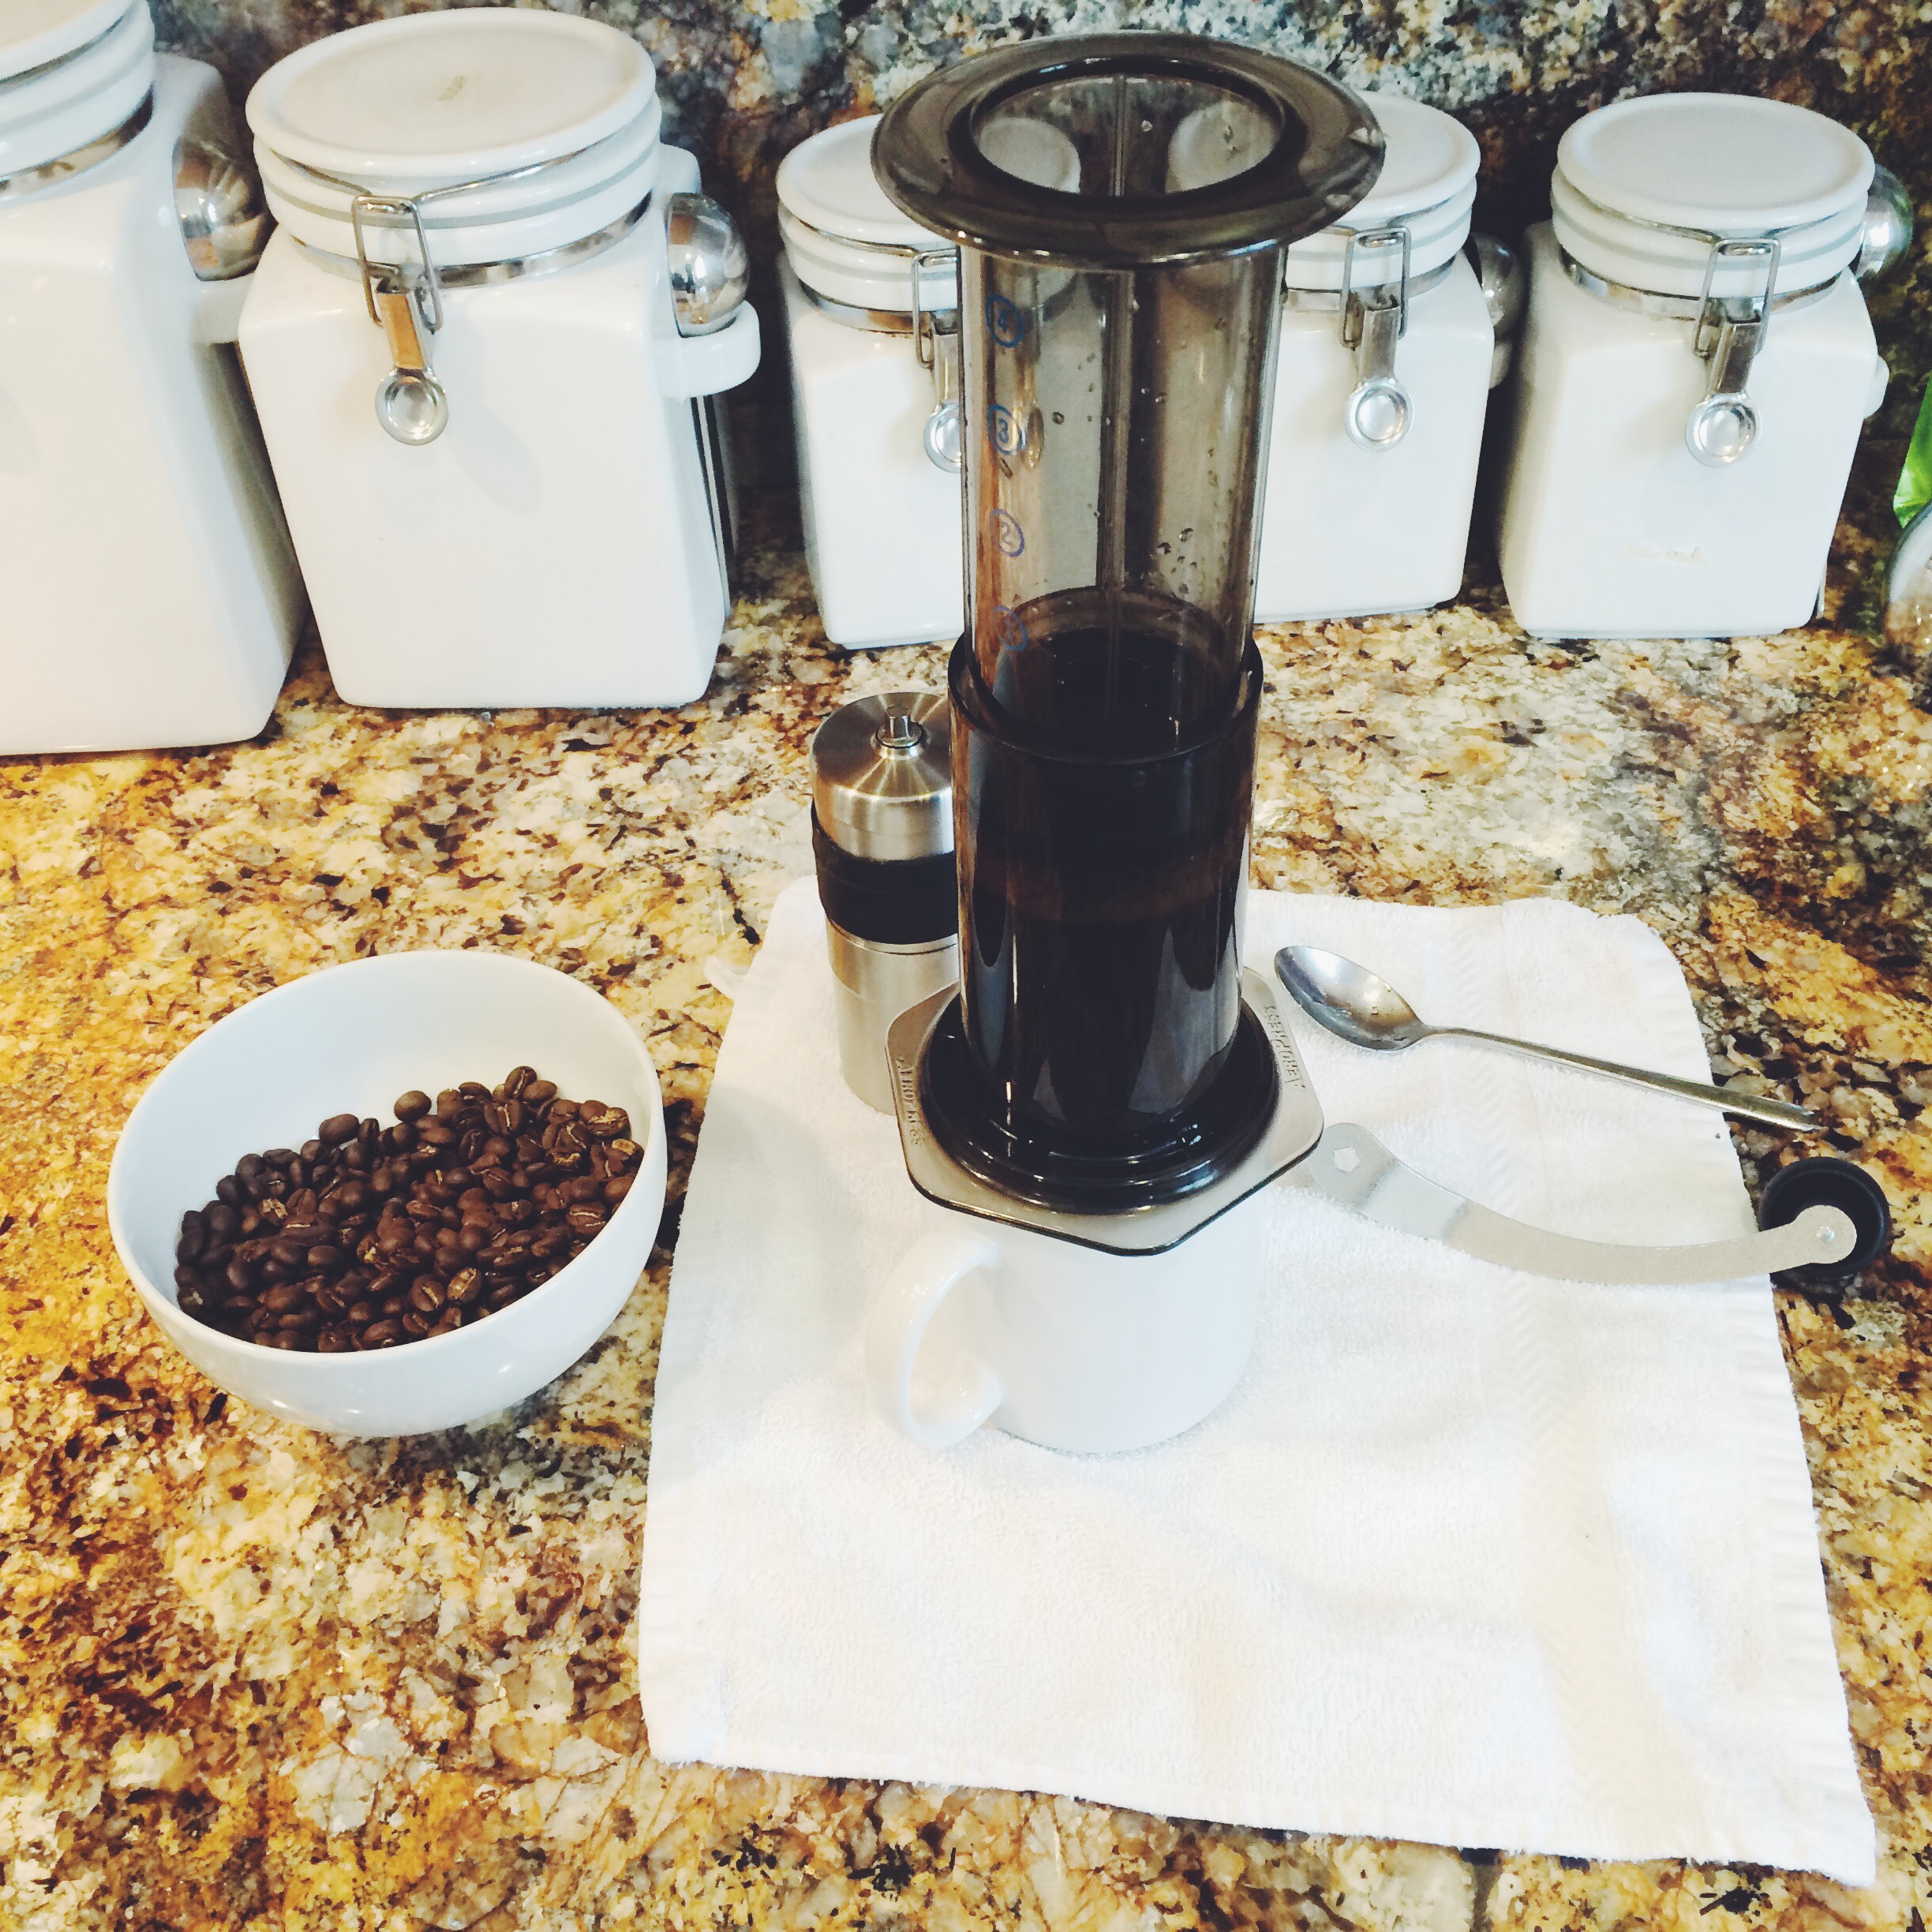
iv. TAKE TIME TO ENJOY your creation! You don’t even need cream or sweetener for a perfect cup of joe like this (though I’ll admit, on indulgent days, I will add a tablespoon of sweetened condensed milk to my coffee…#sorrynotsorry)

- Nighttime Americano

throwback to yolanda be cool
It was one of those Tuesdays, you know. So I decided to make a special dinner: a hybrid negroni x americano. Easy peezy orange-squeezy, try it.
5 ingredients you will need:
- a lovely gin of your choosing; I used Hendrick’s, a Scottish gin that is infused with rose & cucumber
- Campari
- a sweet vermouth; I used Martini’s
- oranges
- club soda

In wee old fashioned glass with a big cube of ice, add 1 oz of gin:

Then add 1 oz of vermouth:

Add 1 oz of of Campari

Add a generous slice and squeeze of orange

Top it off with club soda and enjoy!

May this recipe help prepare you for many solid tomorrows to come.
xx, Huckleberry Kim
#huckleberryeats #huckleberrydrinks
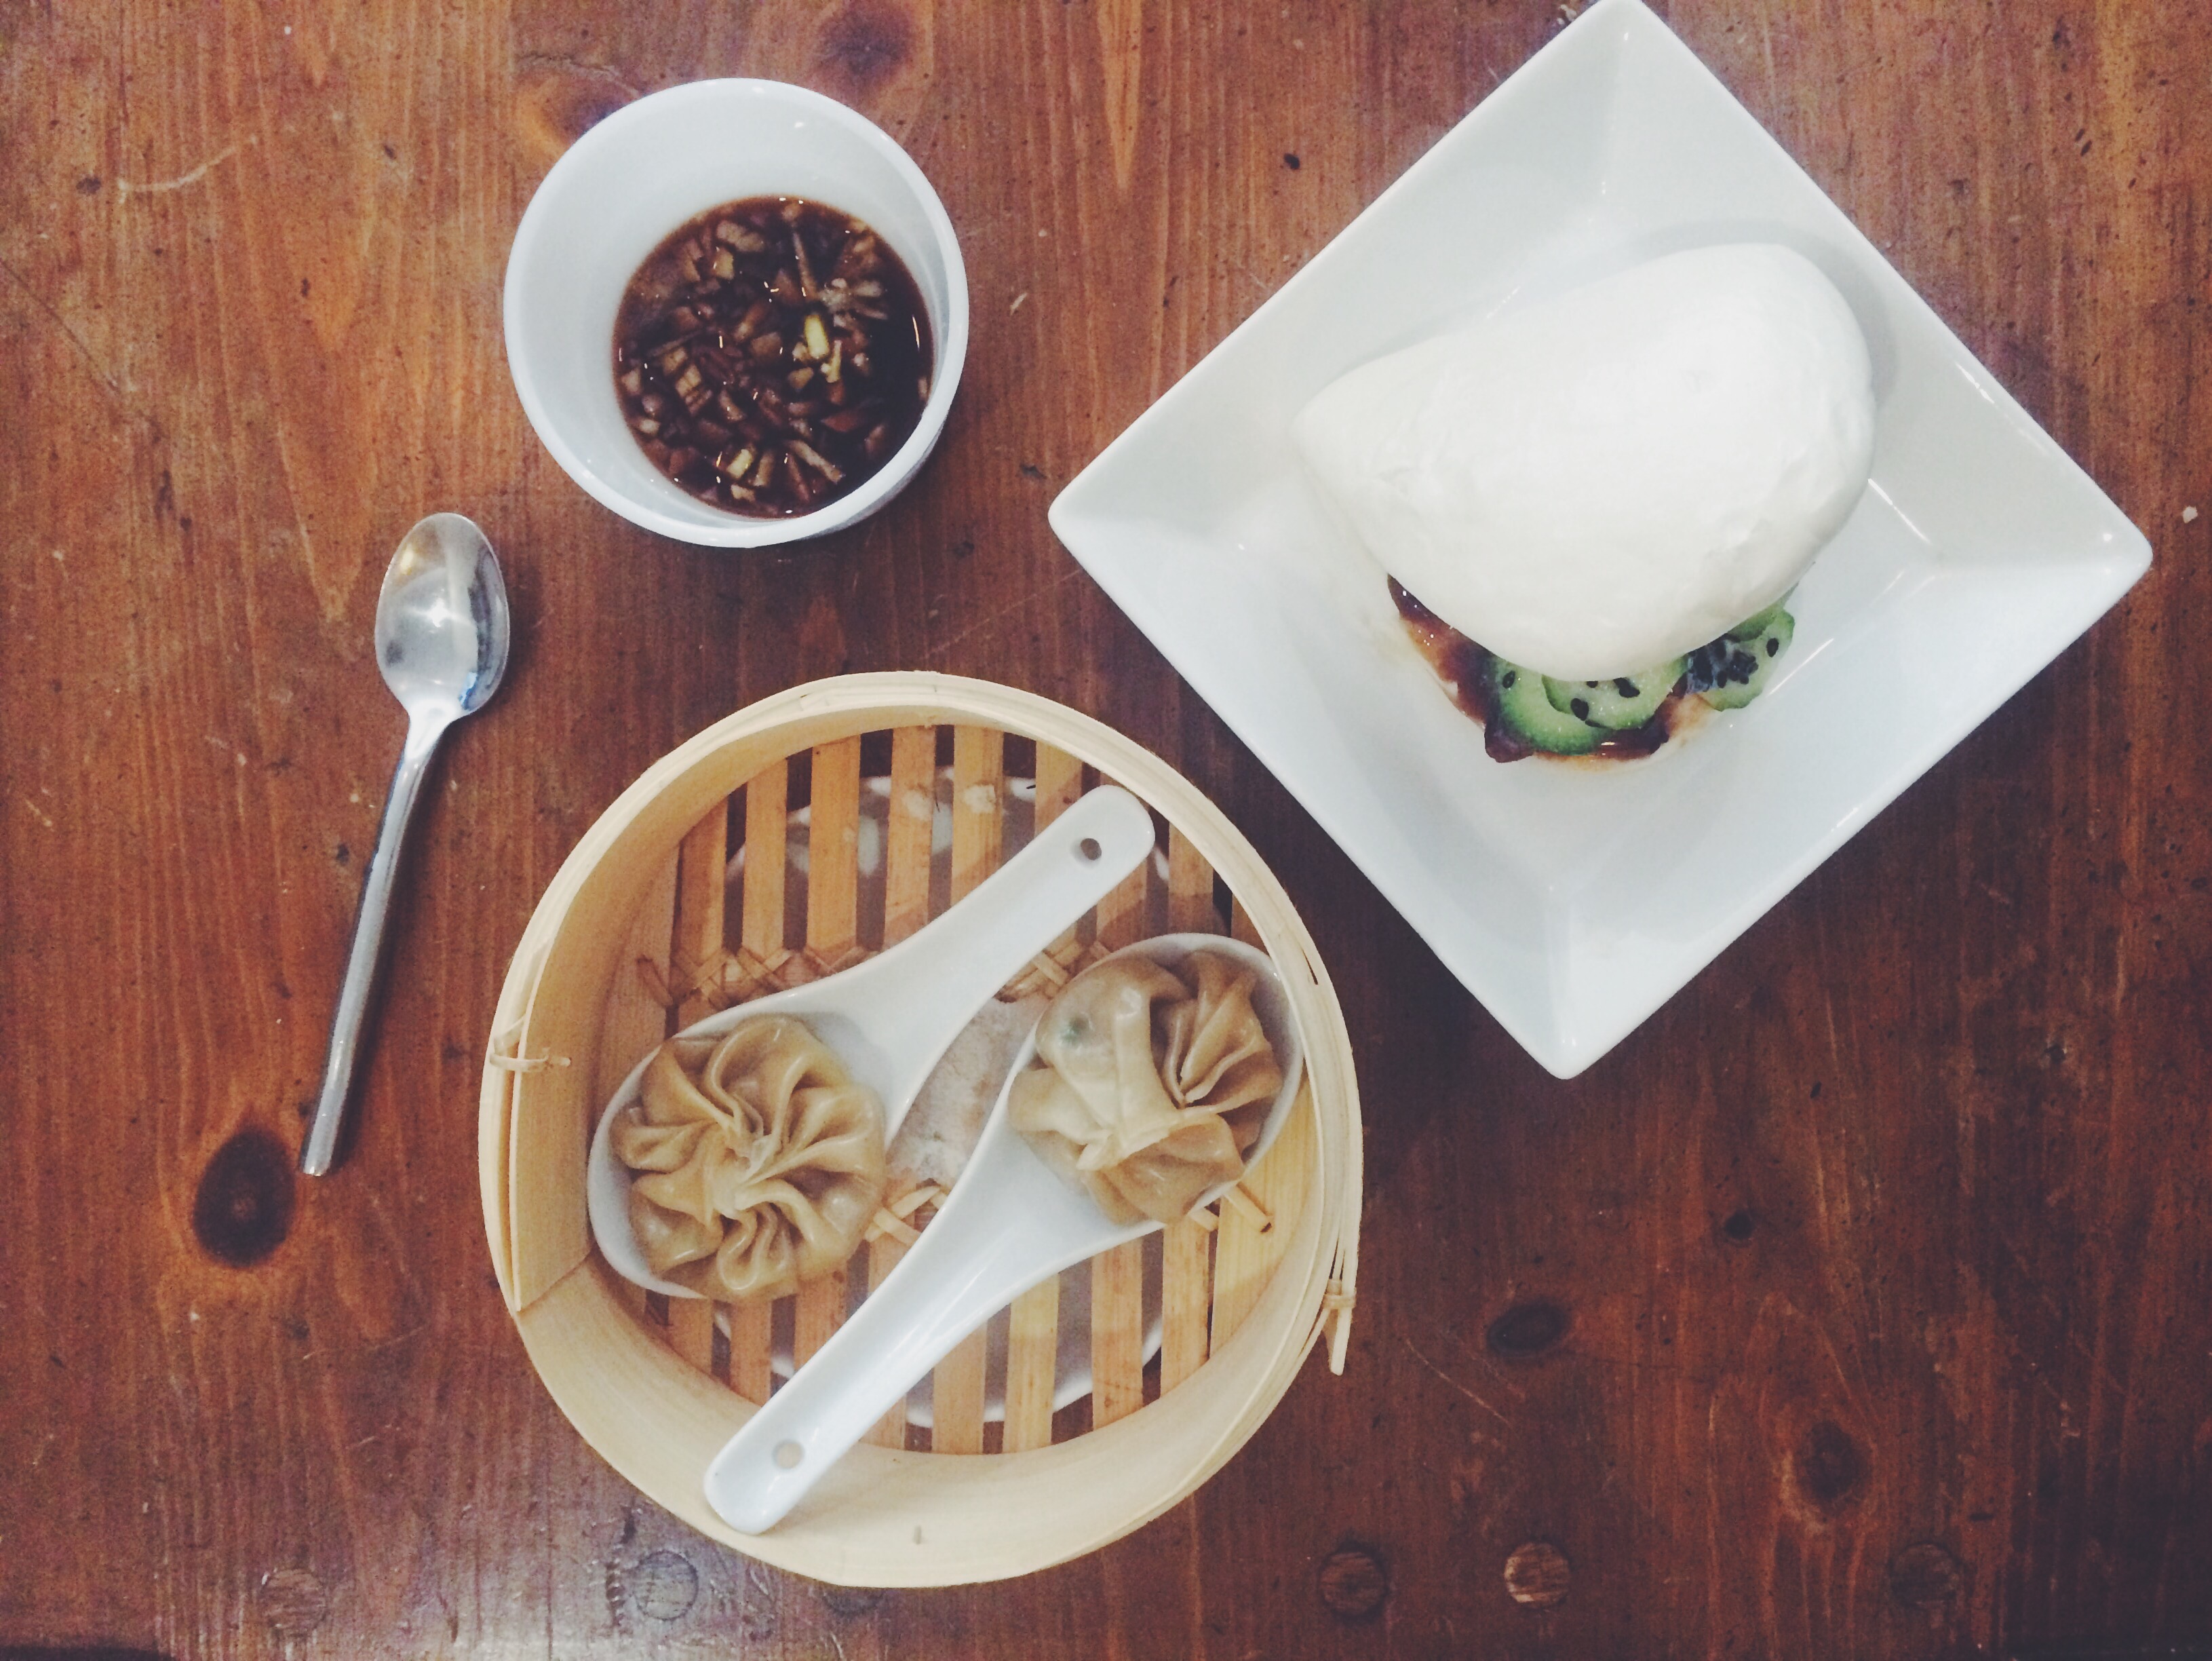
- xiao long bao (小籠包) at home

I spent a lot of my day listening to Ginuwine hits from the early 2000s, doing a little vacation-daydreaming, and getting nostalgic about being in Asia on this dreary Sunday; so, I decided to make some soup dumplings (aka 小籠包). This is my first time making XLBs, and it won’t be the last…
The following is my v1 recipe for XLB; overall I thought the filling was perfect, though I’ll be iterating on the dumpling skins and “meat jelly” sounds gross, right? but that’s the yum that turns in to soup inside the dumplings when you steam them. If this is too crucial for you, I guess: I DON’T THINK YOU’RE READY FOR THIS JELLY.)
HERE IT GOES:
- In a pot of about 4 cups of boiling water, add a pound of skin-on pork belly for about 5 minutes.
- Remove the pork rind, rinse in cool water and cut into small strips.
- Add back to a clean pot of 4 cups of water, 5 smashed ginger medallions and several green onion ends. Cook for 2 hours on low heat.
- Using a food processor or emersion blender, pulse the soup for a few seconds and put into a container and refrigerate for at least 5 hours (preferably over night).
- In another bowl, add about 6 tablespoons of finely minced ginger, 3 tablespoons of minced green onion, 1 pound of ground pork, 2 tablespoons of Maggi seasoning, 2 teaspoons of sea salt, 1 tablespoon of sesame oil, 1 tablespoon of sugar, 1 tablespoon of hoisin sauce. Mix well.
- Pulse this mixture with your blender/food processor until it becomes like a paste. Add in the meat jelly.
- In another bowl, add 2 cups of flour and 1 cup of cold water into a large bowl and knead well until the dough is smooth and stretchy. Let it rest in a covered bowl for 25 minutes before rolling it out.
- Roll out your dough and cut into even pieces
- Roll dough pieces into little balls about 4cm in diameter
- Roll out the little dough balls into circles a few millimeters thick
- be firm but delicate when making your dumplings!
- Add about 1.5 teaspoons of your filling in the center of a dough circle and pleat and pinch around until the dumpling is closed.
- I steamed my XLBs on porcelain spoons lined with thinly sliced carrots
- Steam each batch for about 8 minutes
- Enjoy with some black vinegar and grated ginger!


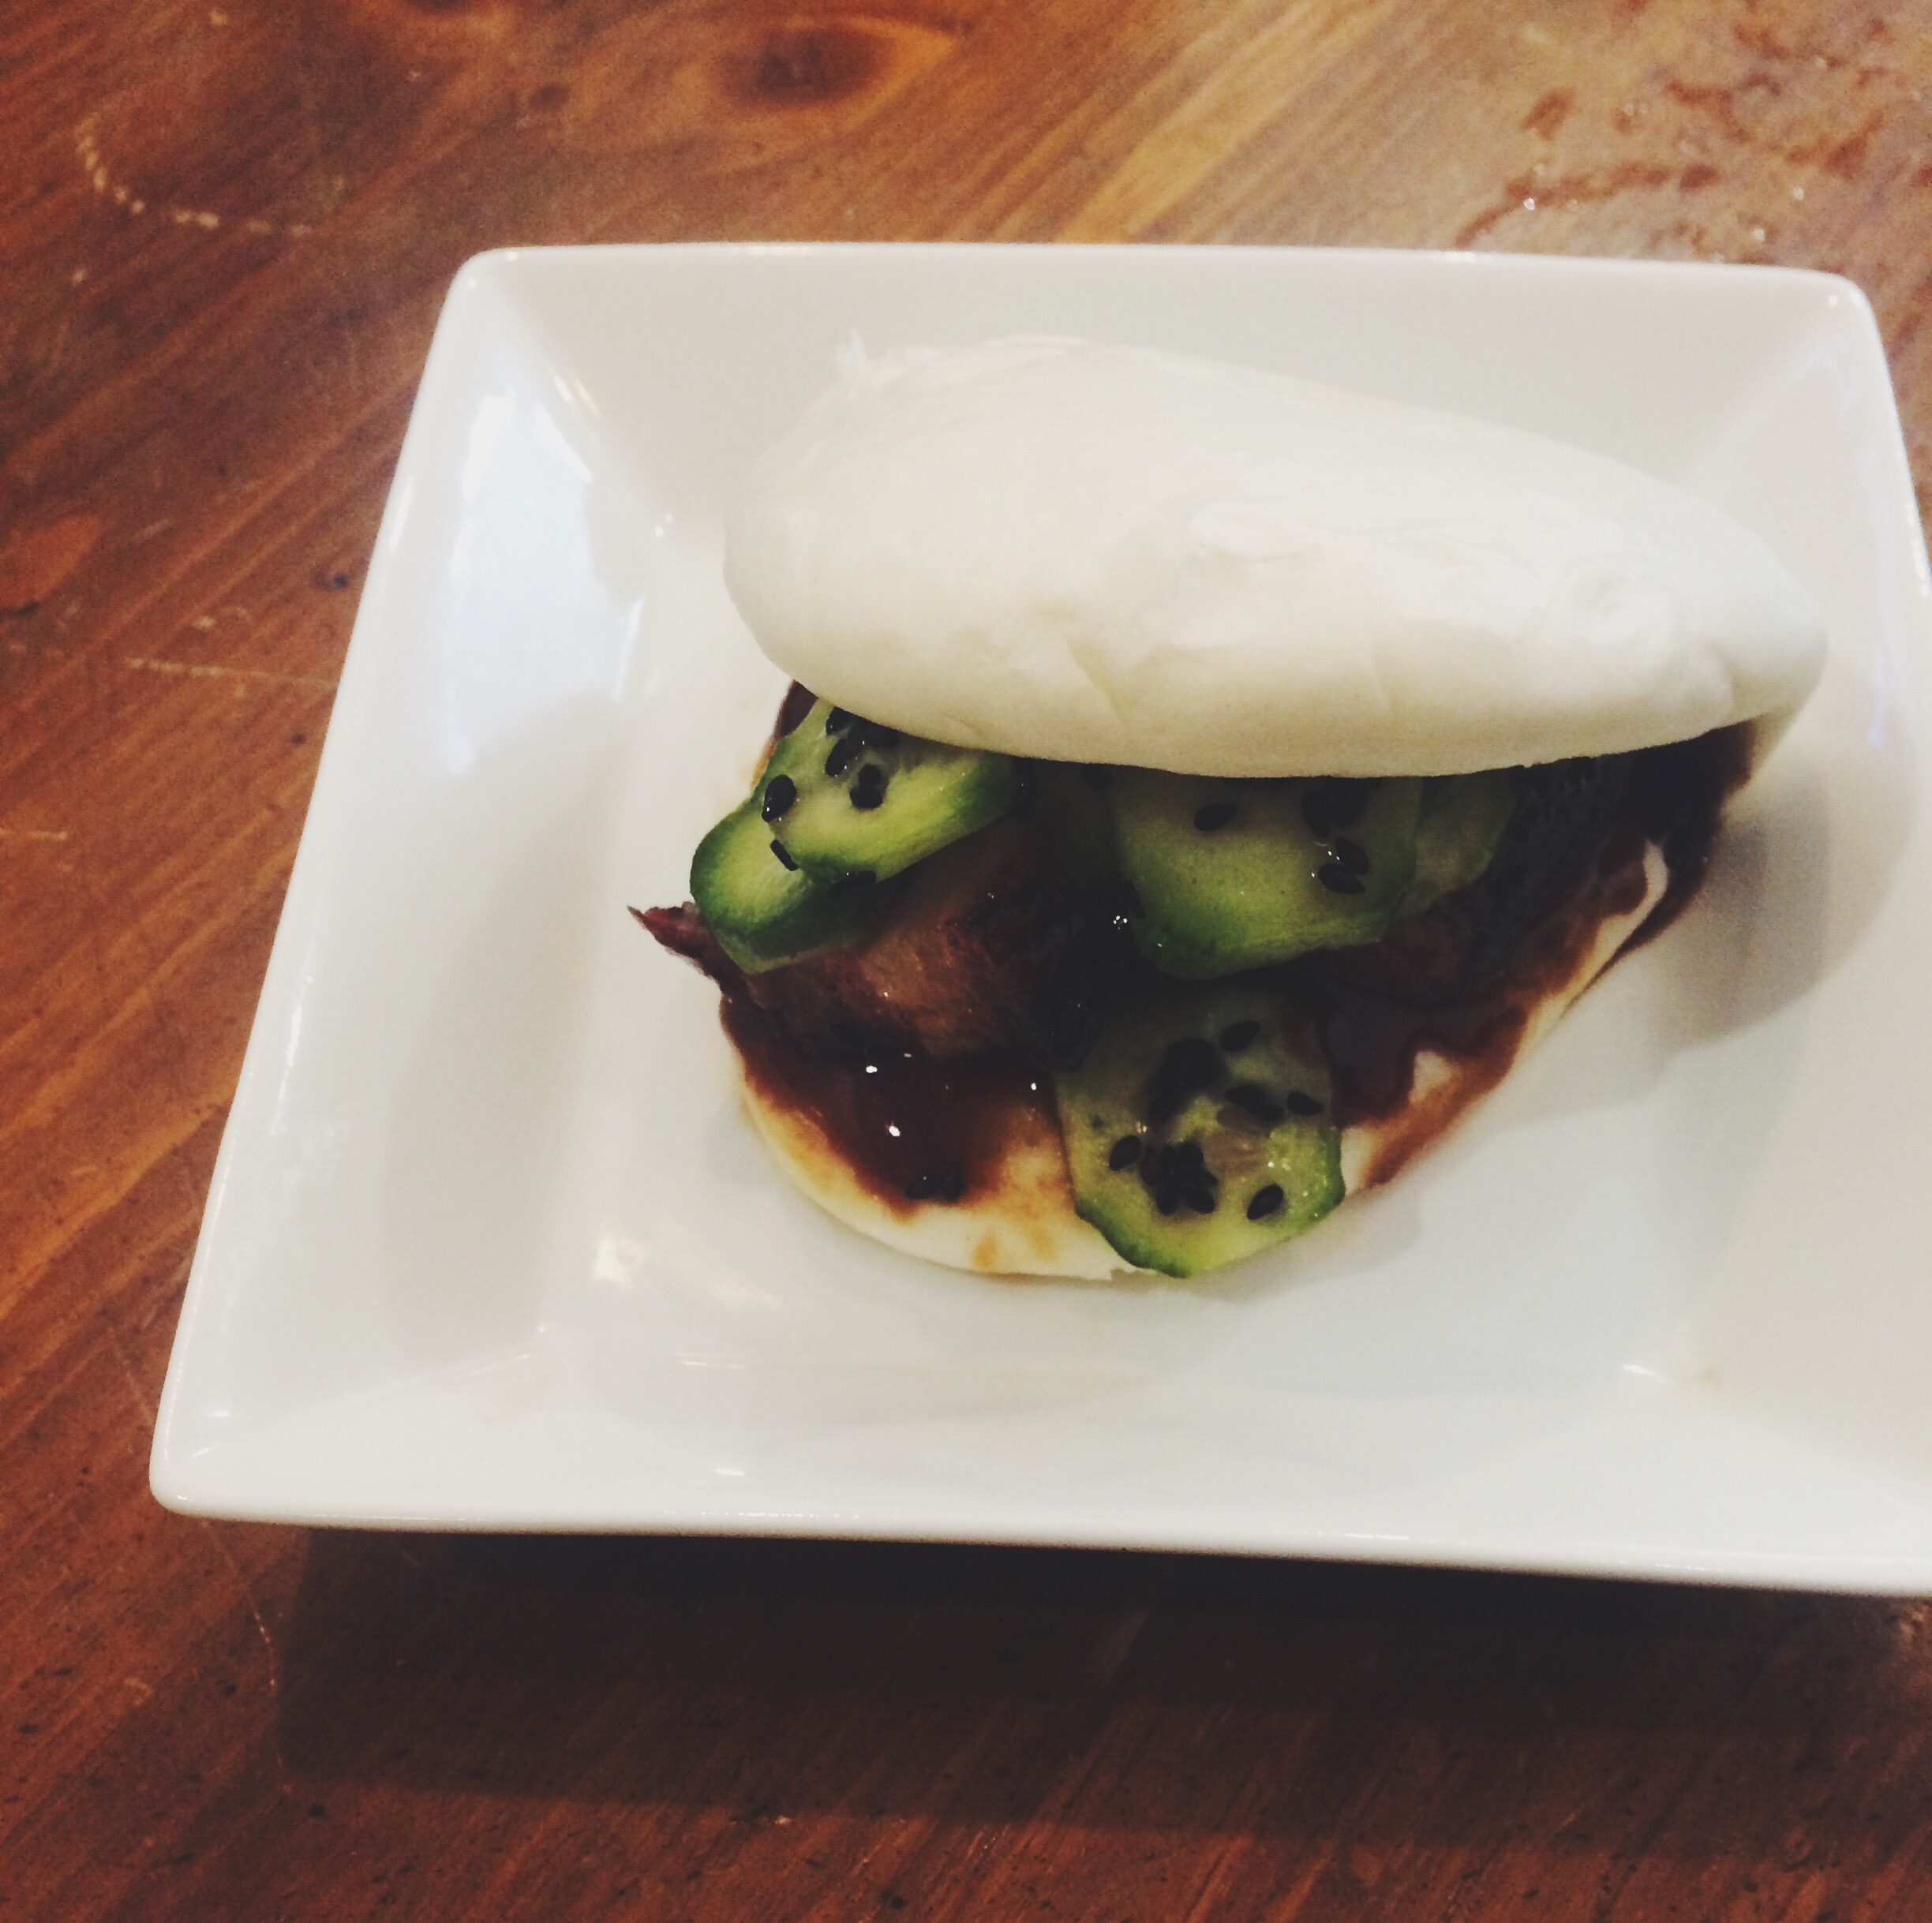
And of course because I CAN; I made myself a few pork belly buns too. HA!

goodbye.
- Easy Gluten-Free Spaghetti and Meatballs
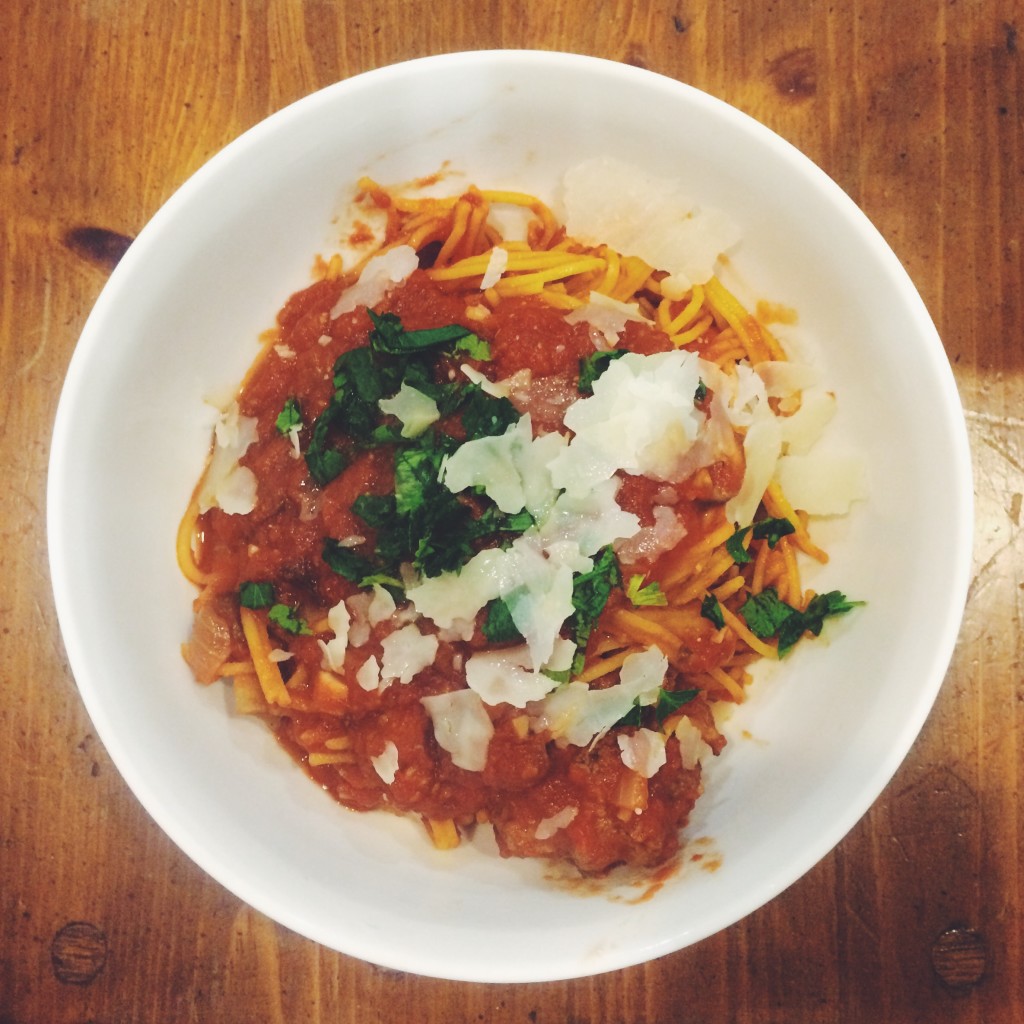
There’s nothing like a home-cooked meal after a long day at work; and to be honest, sometimes, nothing will do the trick like a big bowl of spaghetti and meatballs with your favorite glass of wine. I didn’t grow up with an Italian nonna teaching me how to make this meatball-magic happen, so I decided to experiment with my own recipe. Please note, the following recipe is an attempt to optimize for:
| 1. prep time | 2. cook time | 3. taste satisfaction/time spent |
Spaghetti and Meatballs (Approx. prep to eat time 45 minutes)
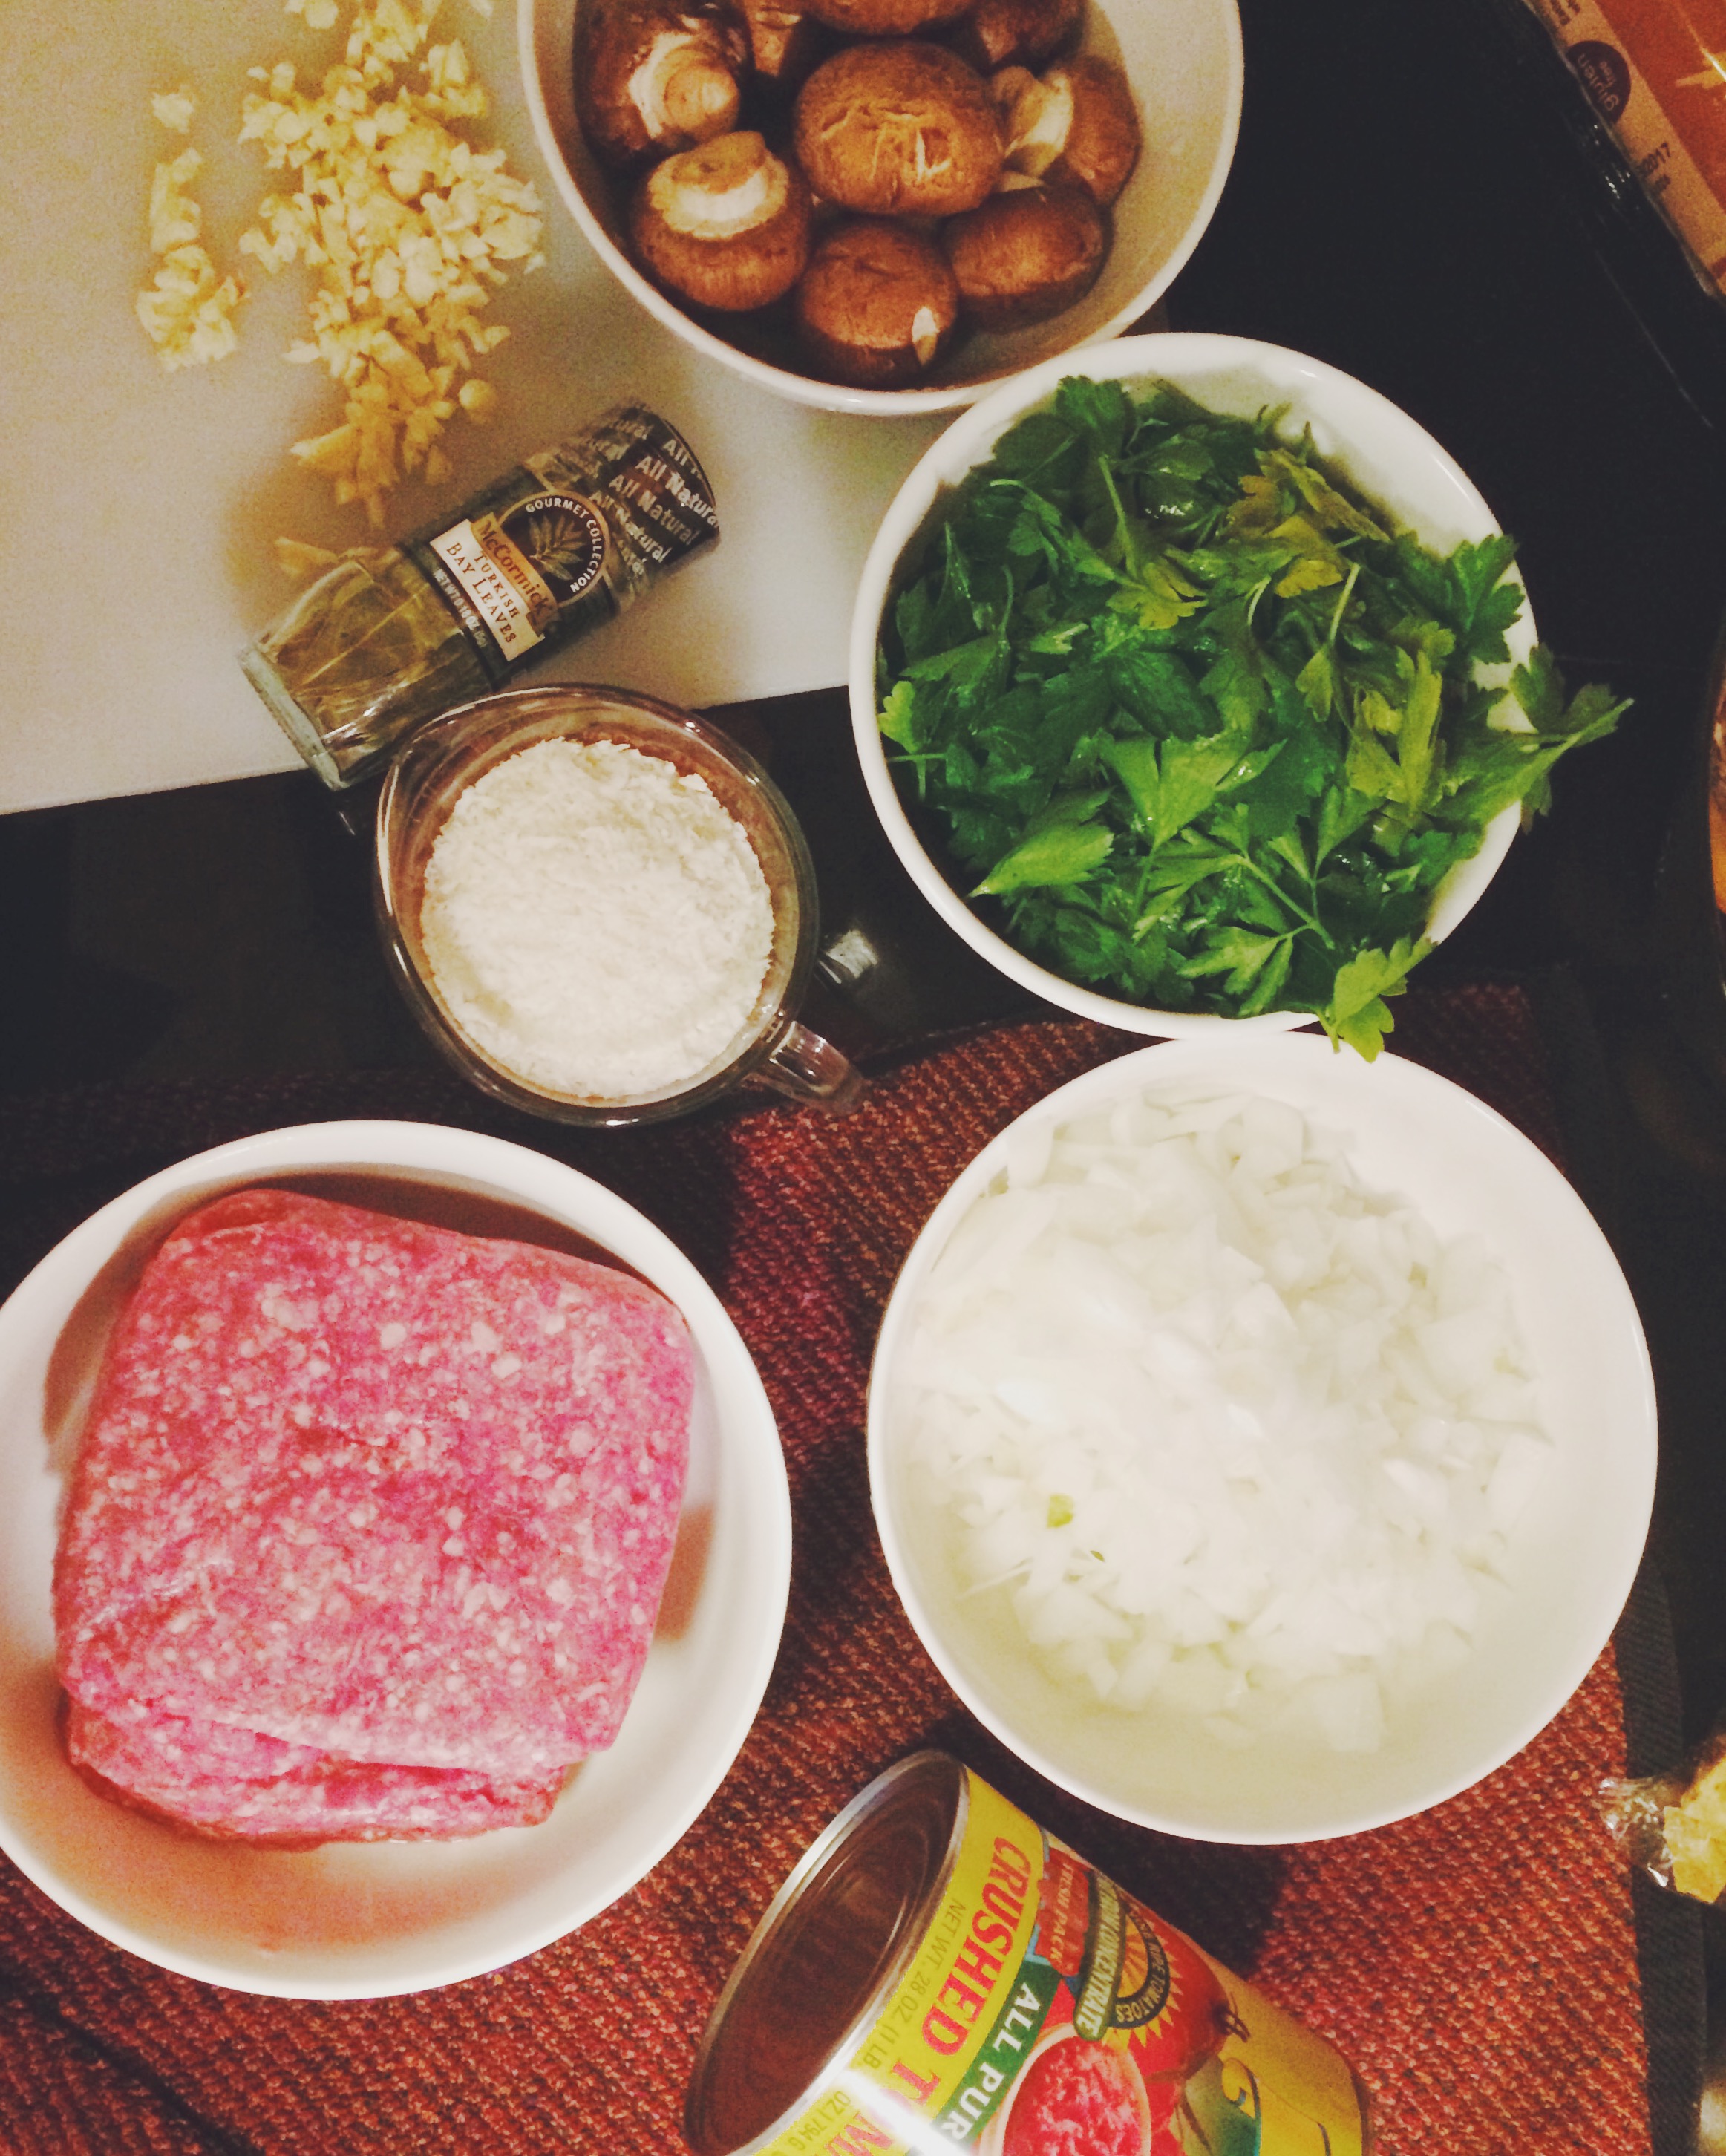
STEP ONE: PREP YOUR INGREDIENTS | grass fed ground beef | onions | baby crimini mushrooms | breadcrumbs | bay leaves | garlic | crushed tomatoes |
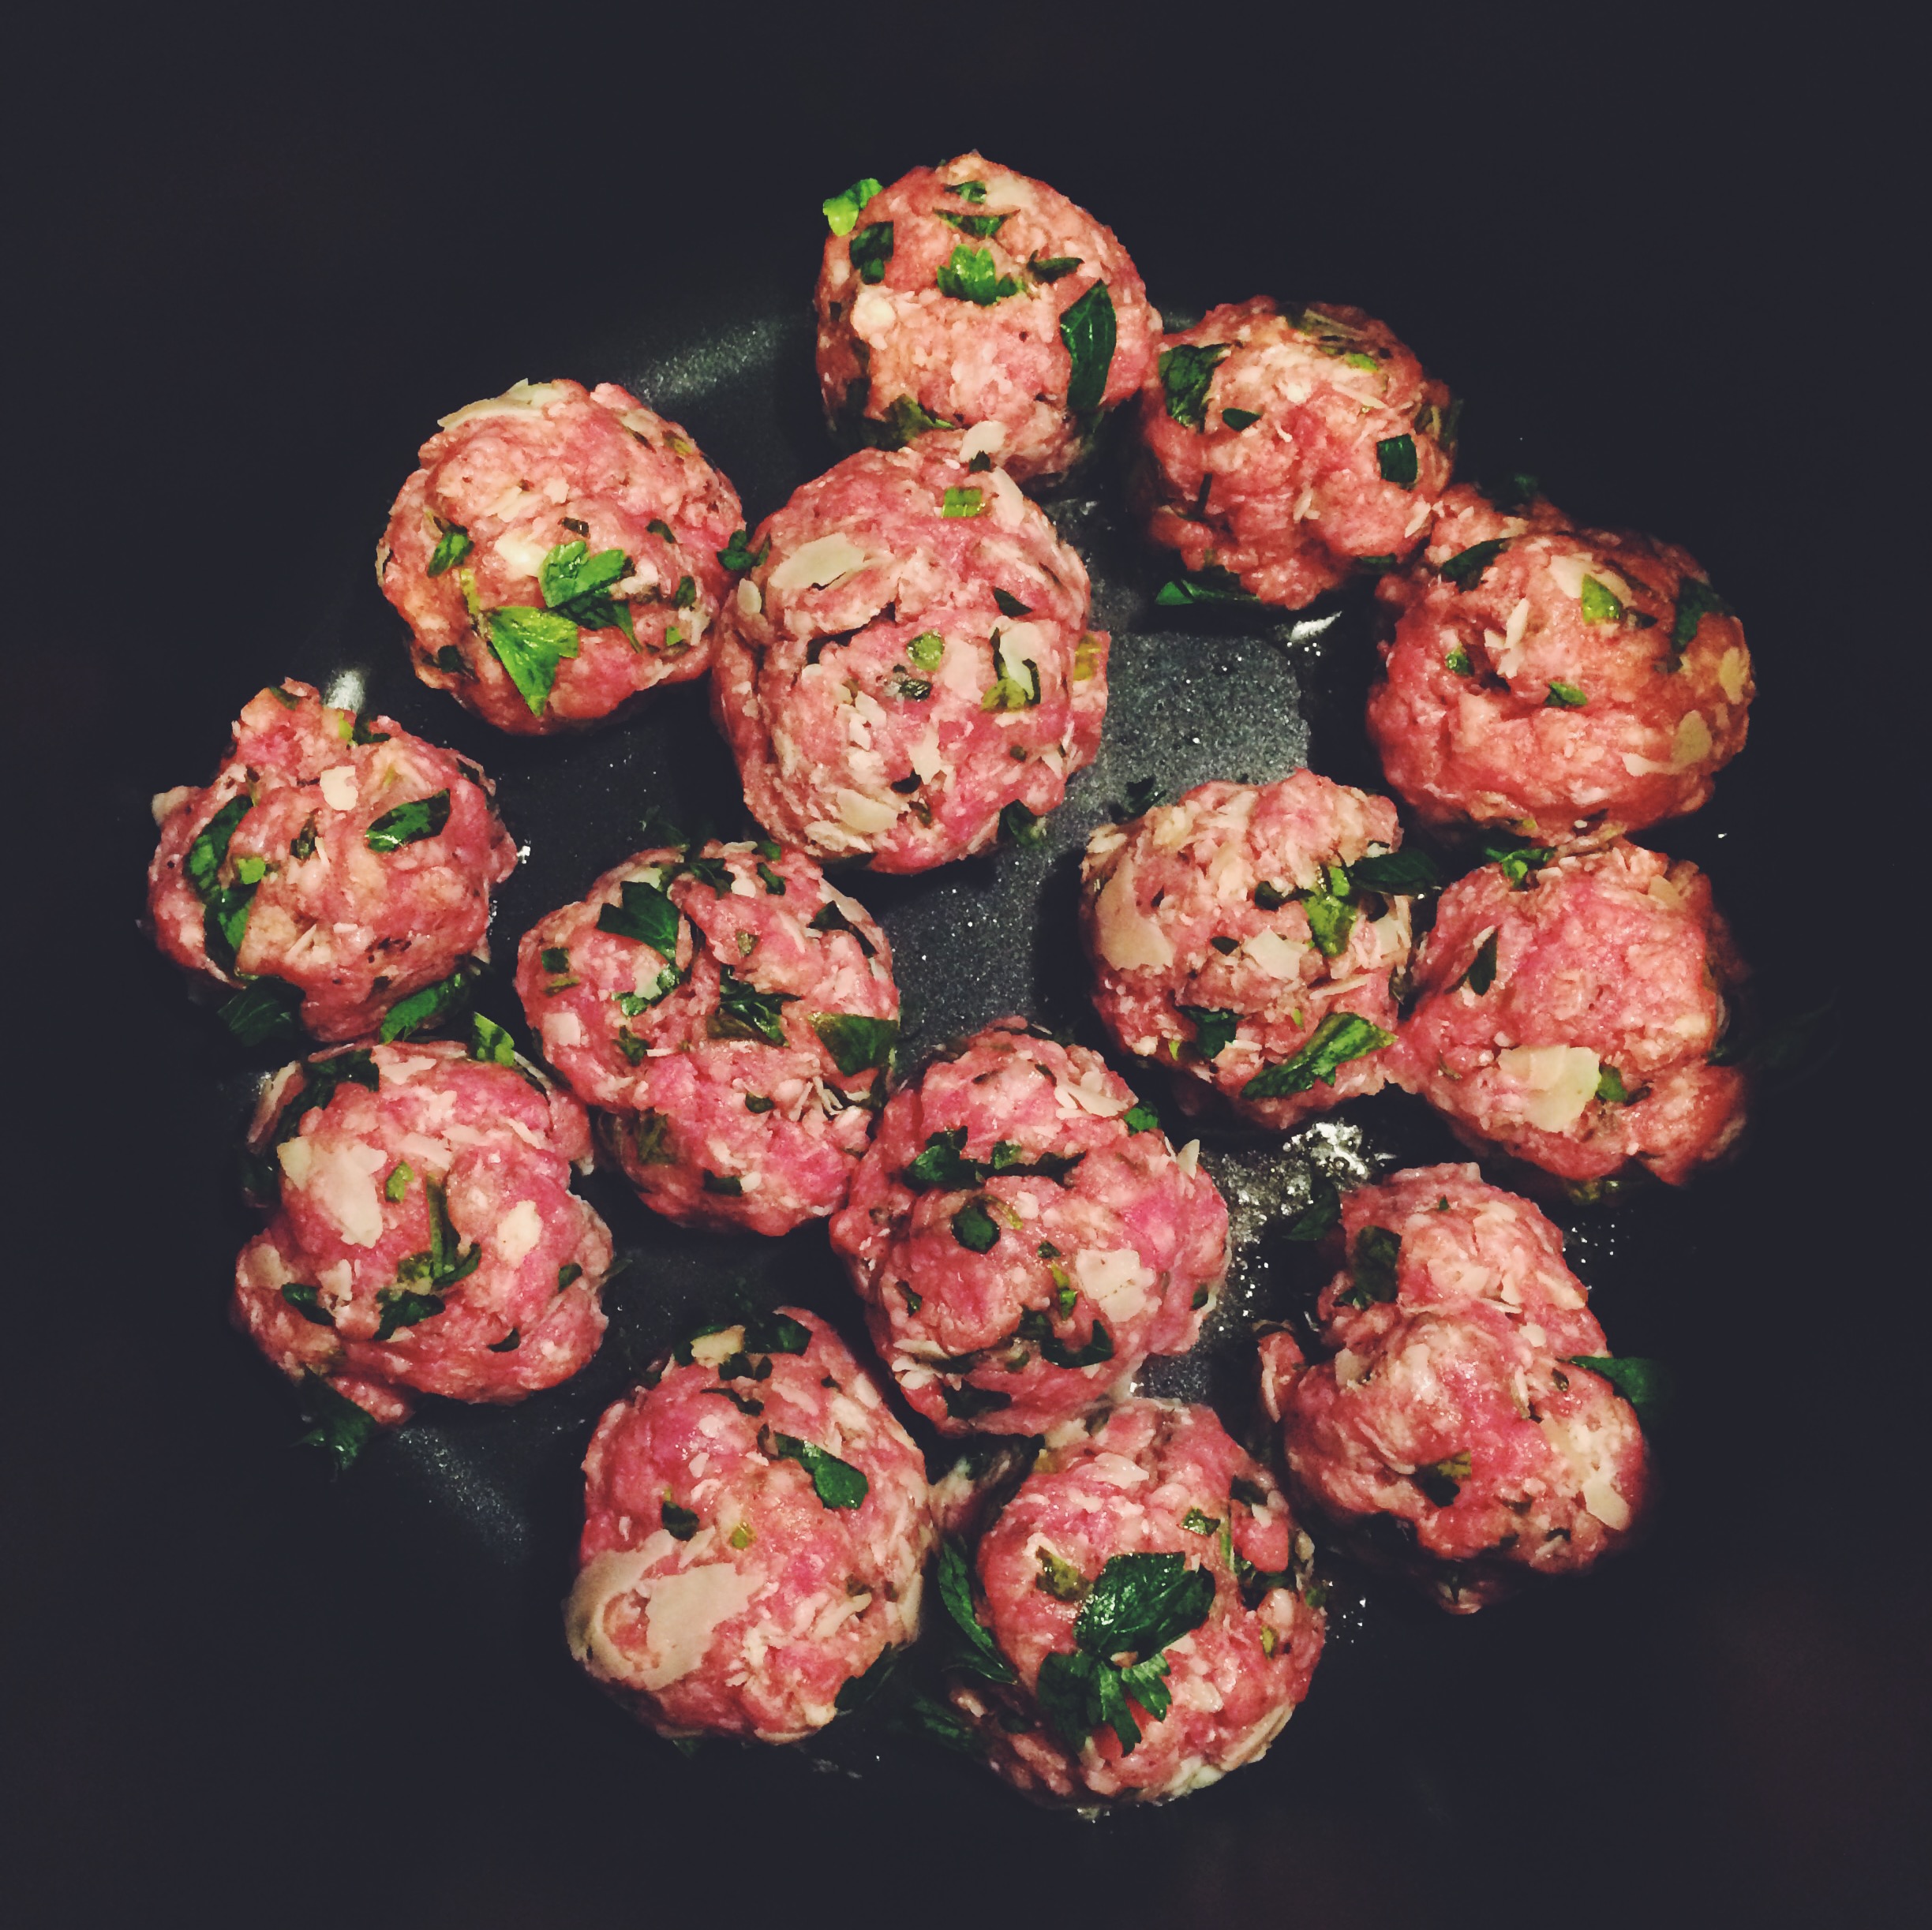
STEP TWO: MAKE SOME MEATBALLS
| Combine the ground beef (~ 2 lbs), breadcrumbs (~ 2 cups), about half a bunch of parsley (chopped), shredded parmesan (~ 0.5 cup), some salt and pepper | Form into balls |
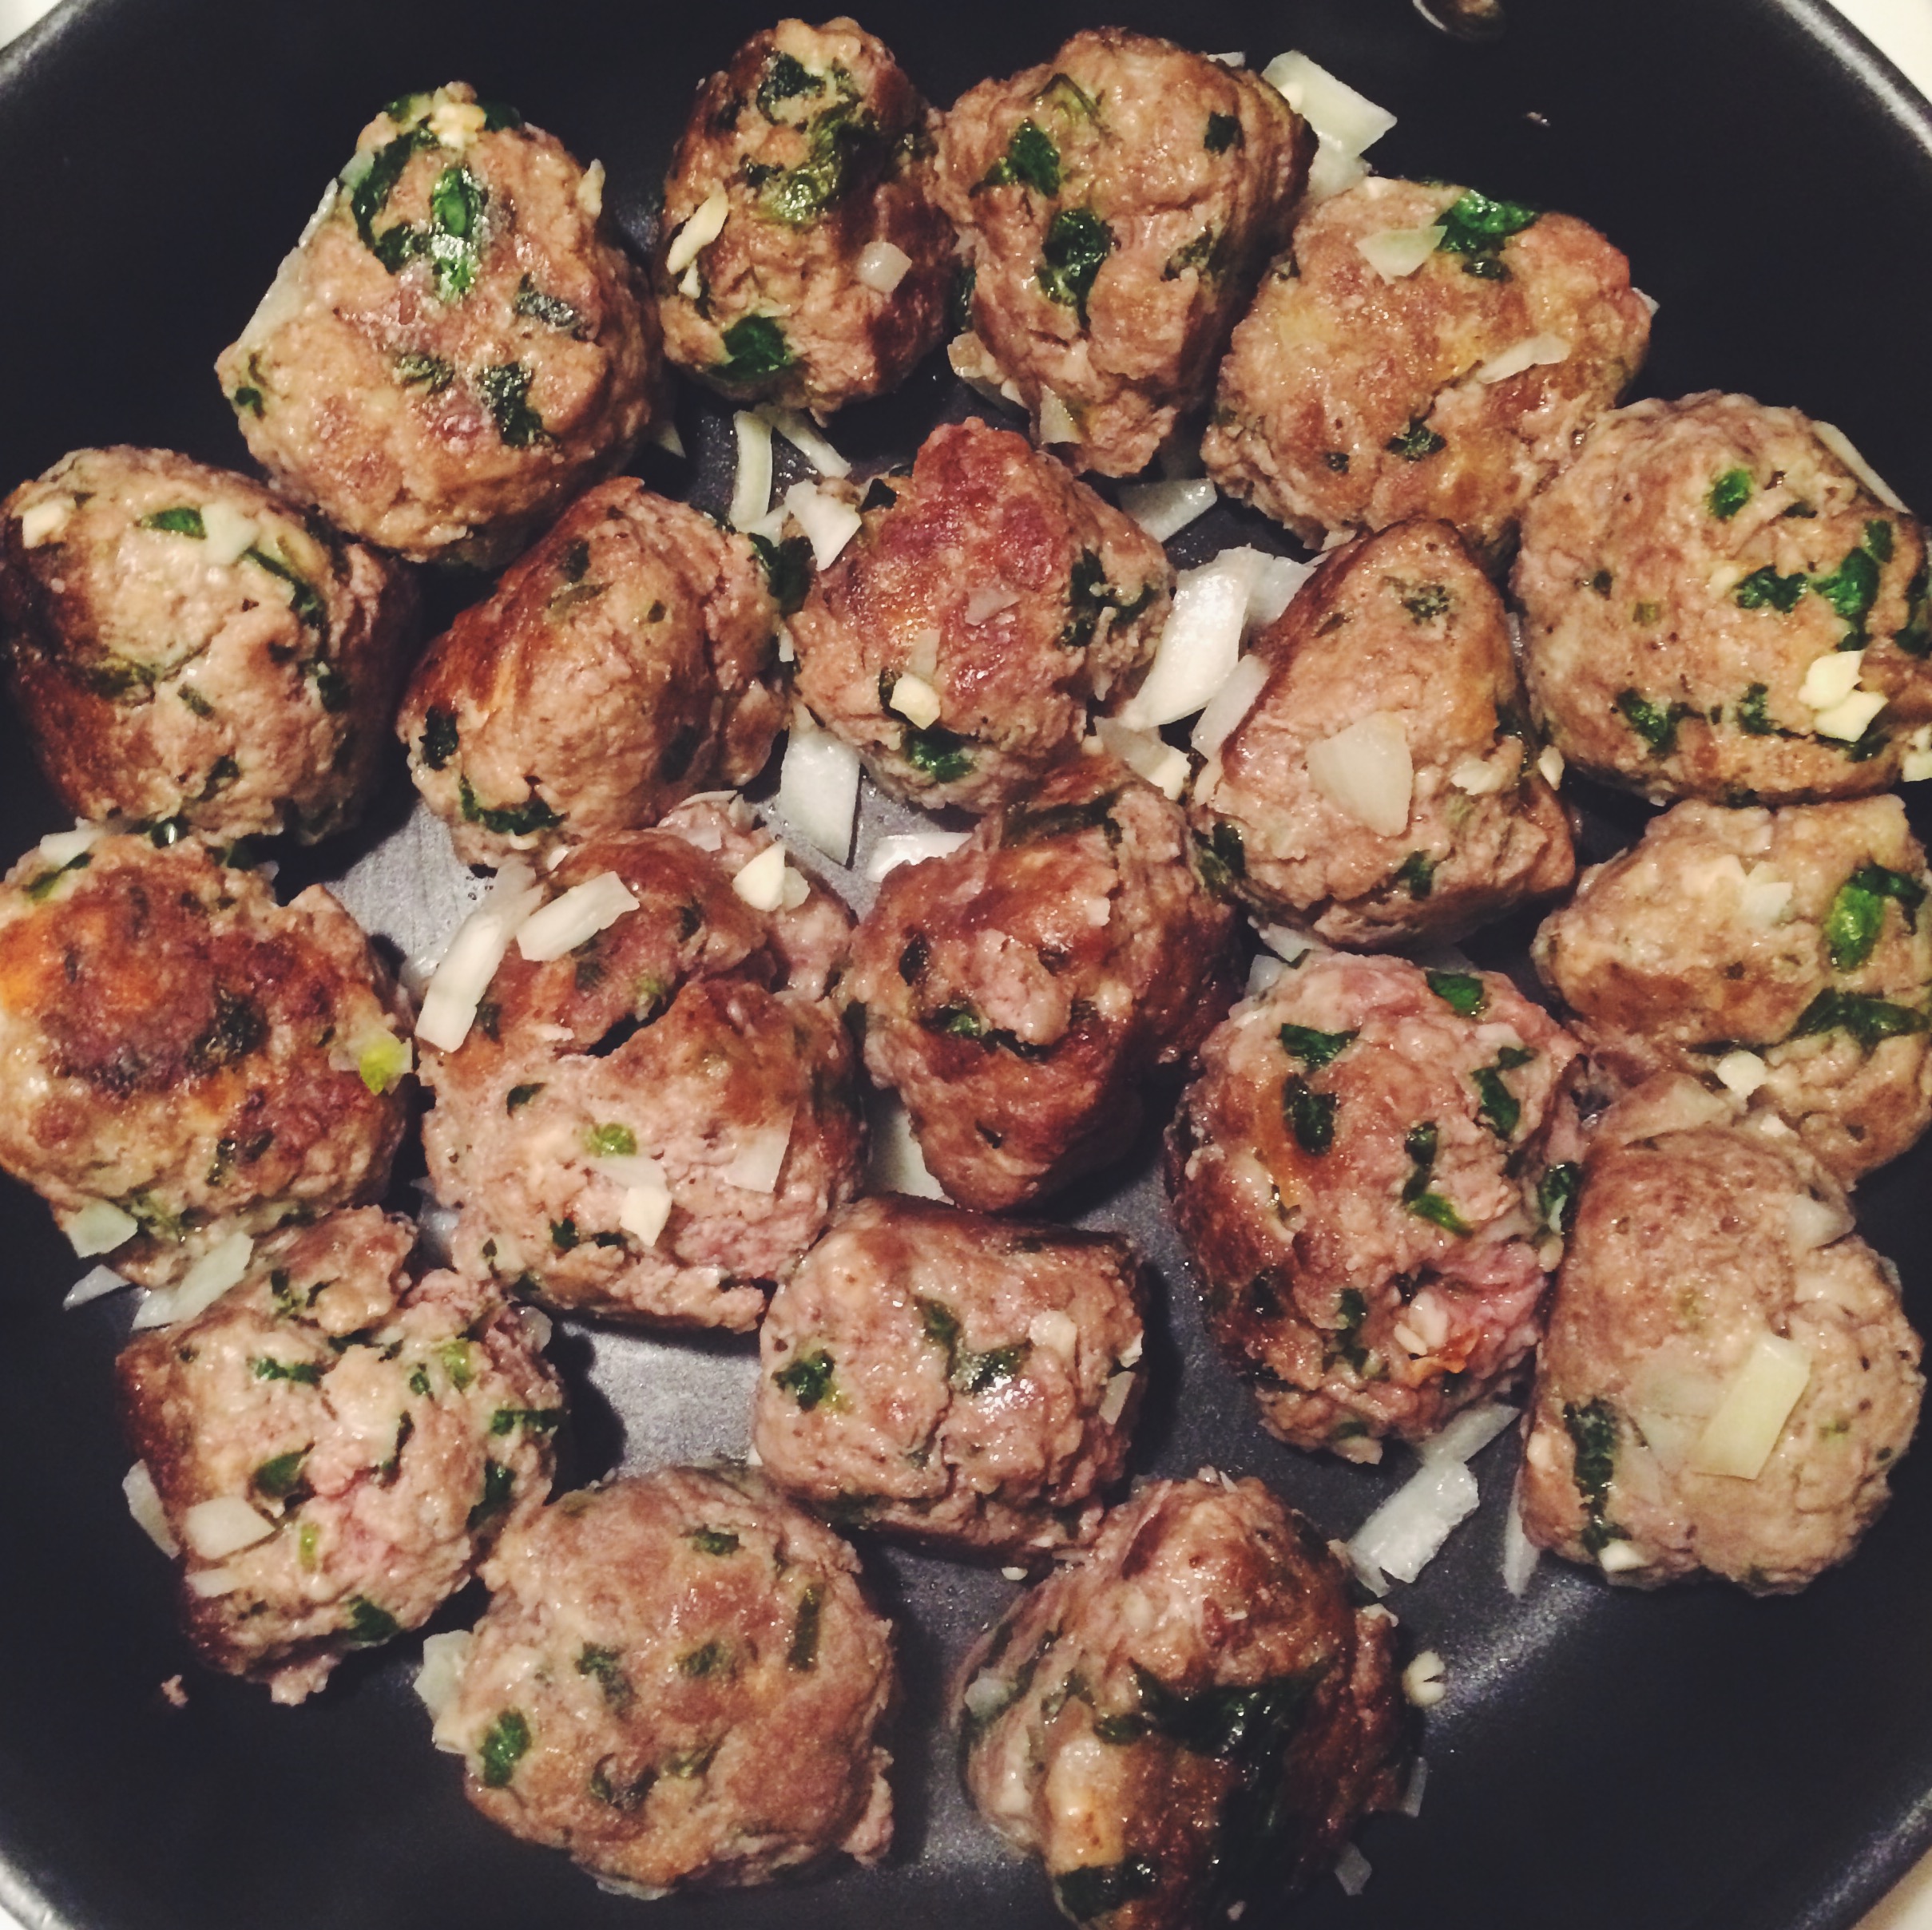
STEP THREE: COOK THOSE MEATBALLS
| In a large pot, start cooking your meatballs until they’re browned all around; this will help them keep their shape in your sauce |
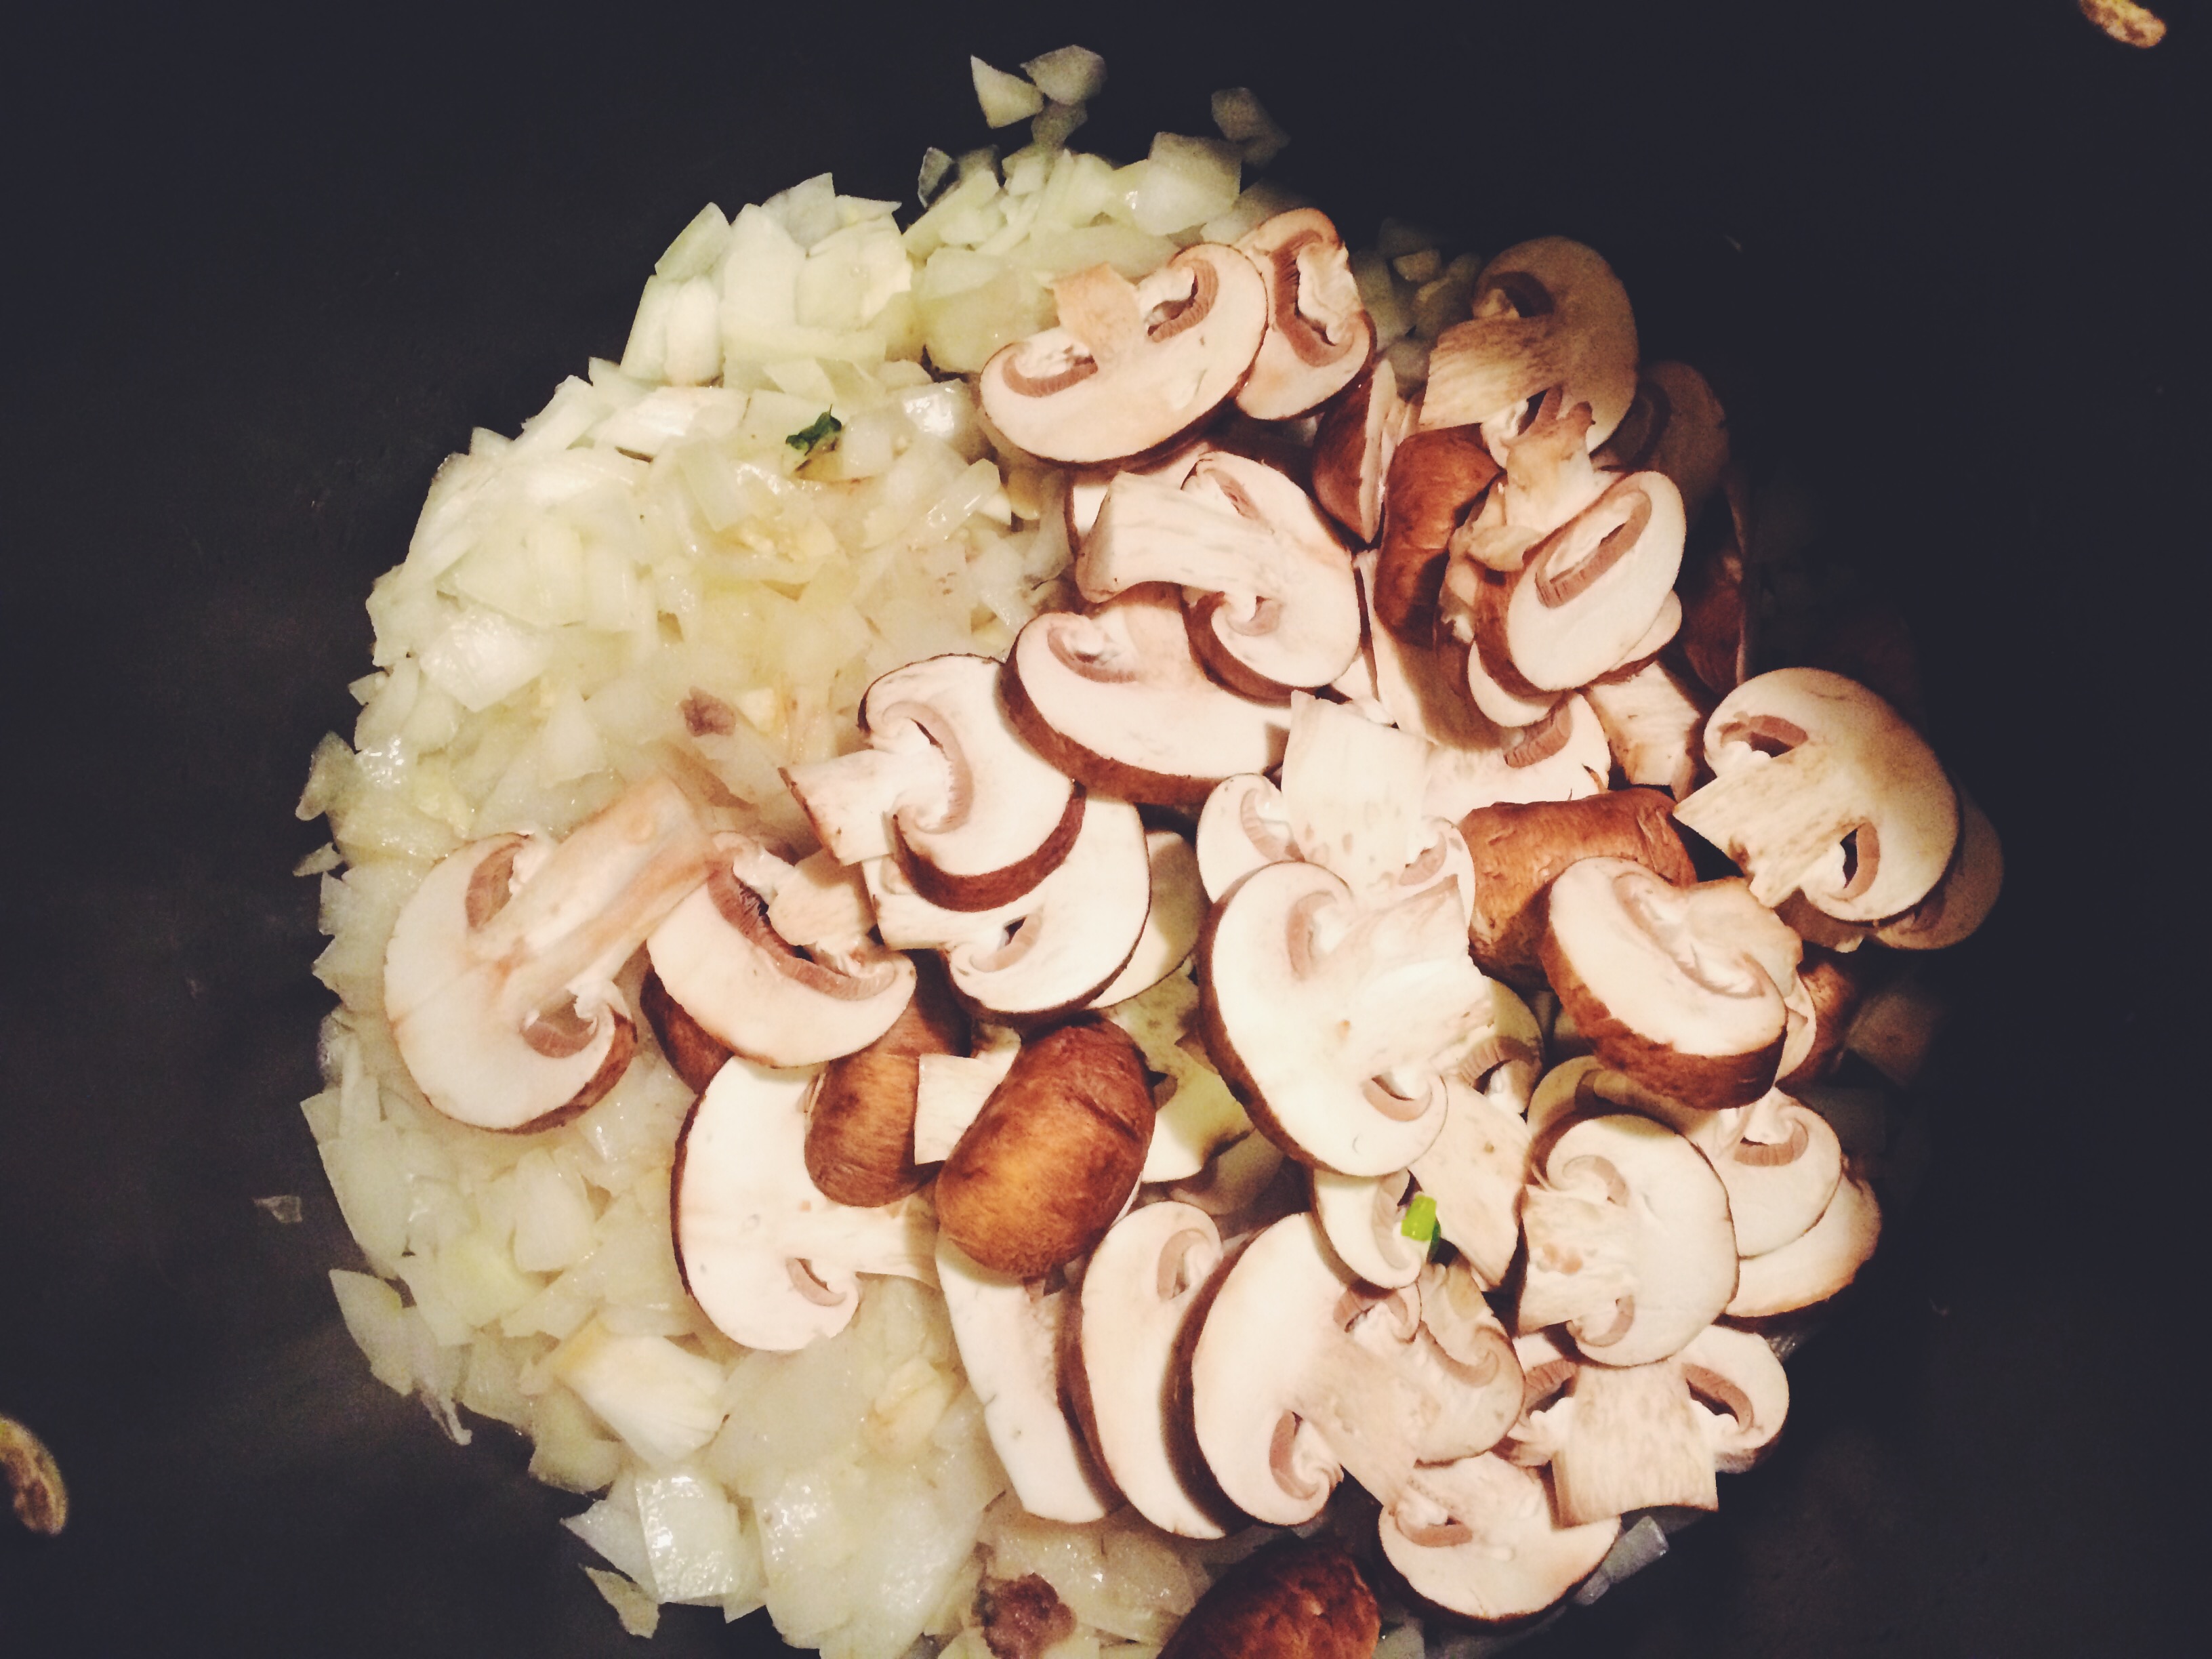
STEP FOUR: START THE SAUCE
| Add your onions, garlic, and mushrooms to the pot with your meatballs and let those aromatics soften up |
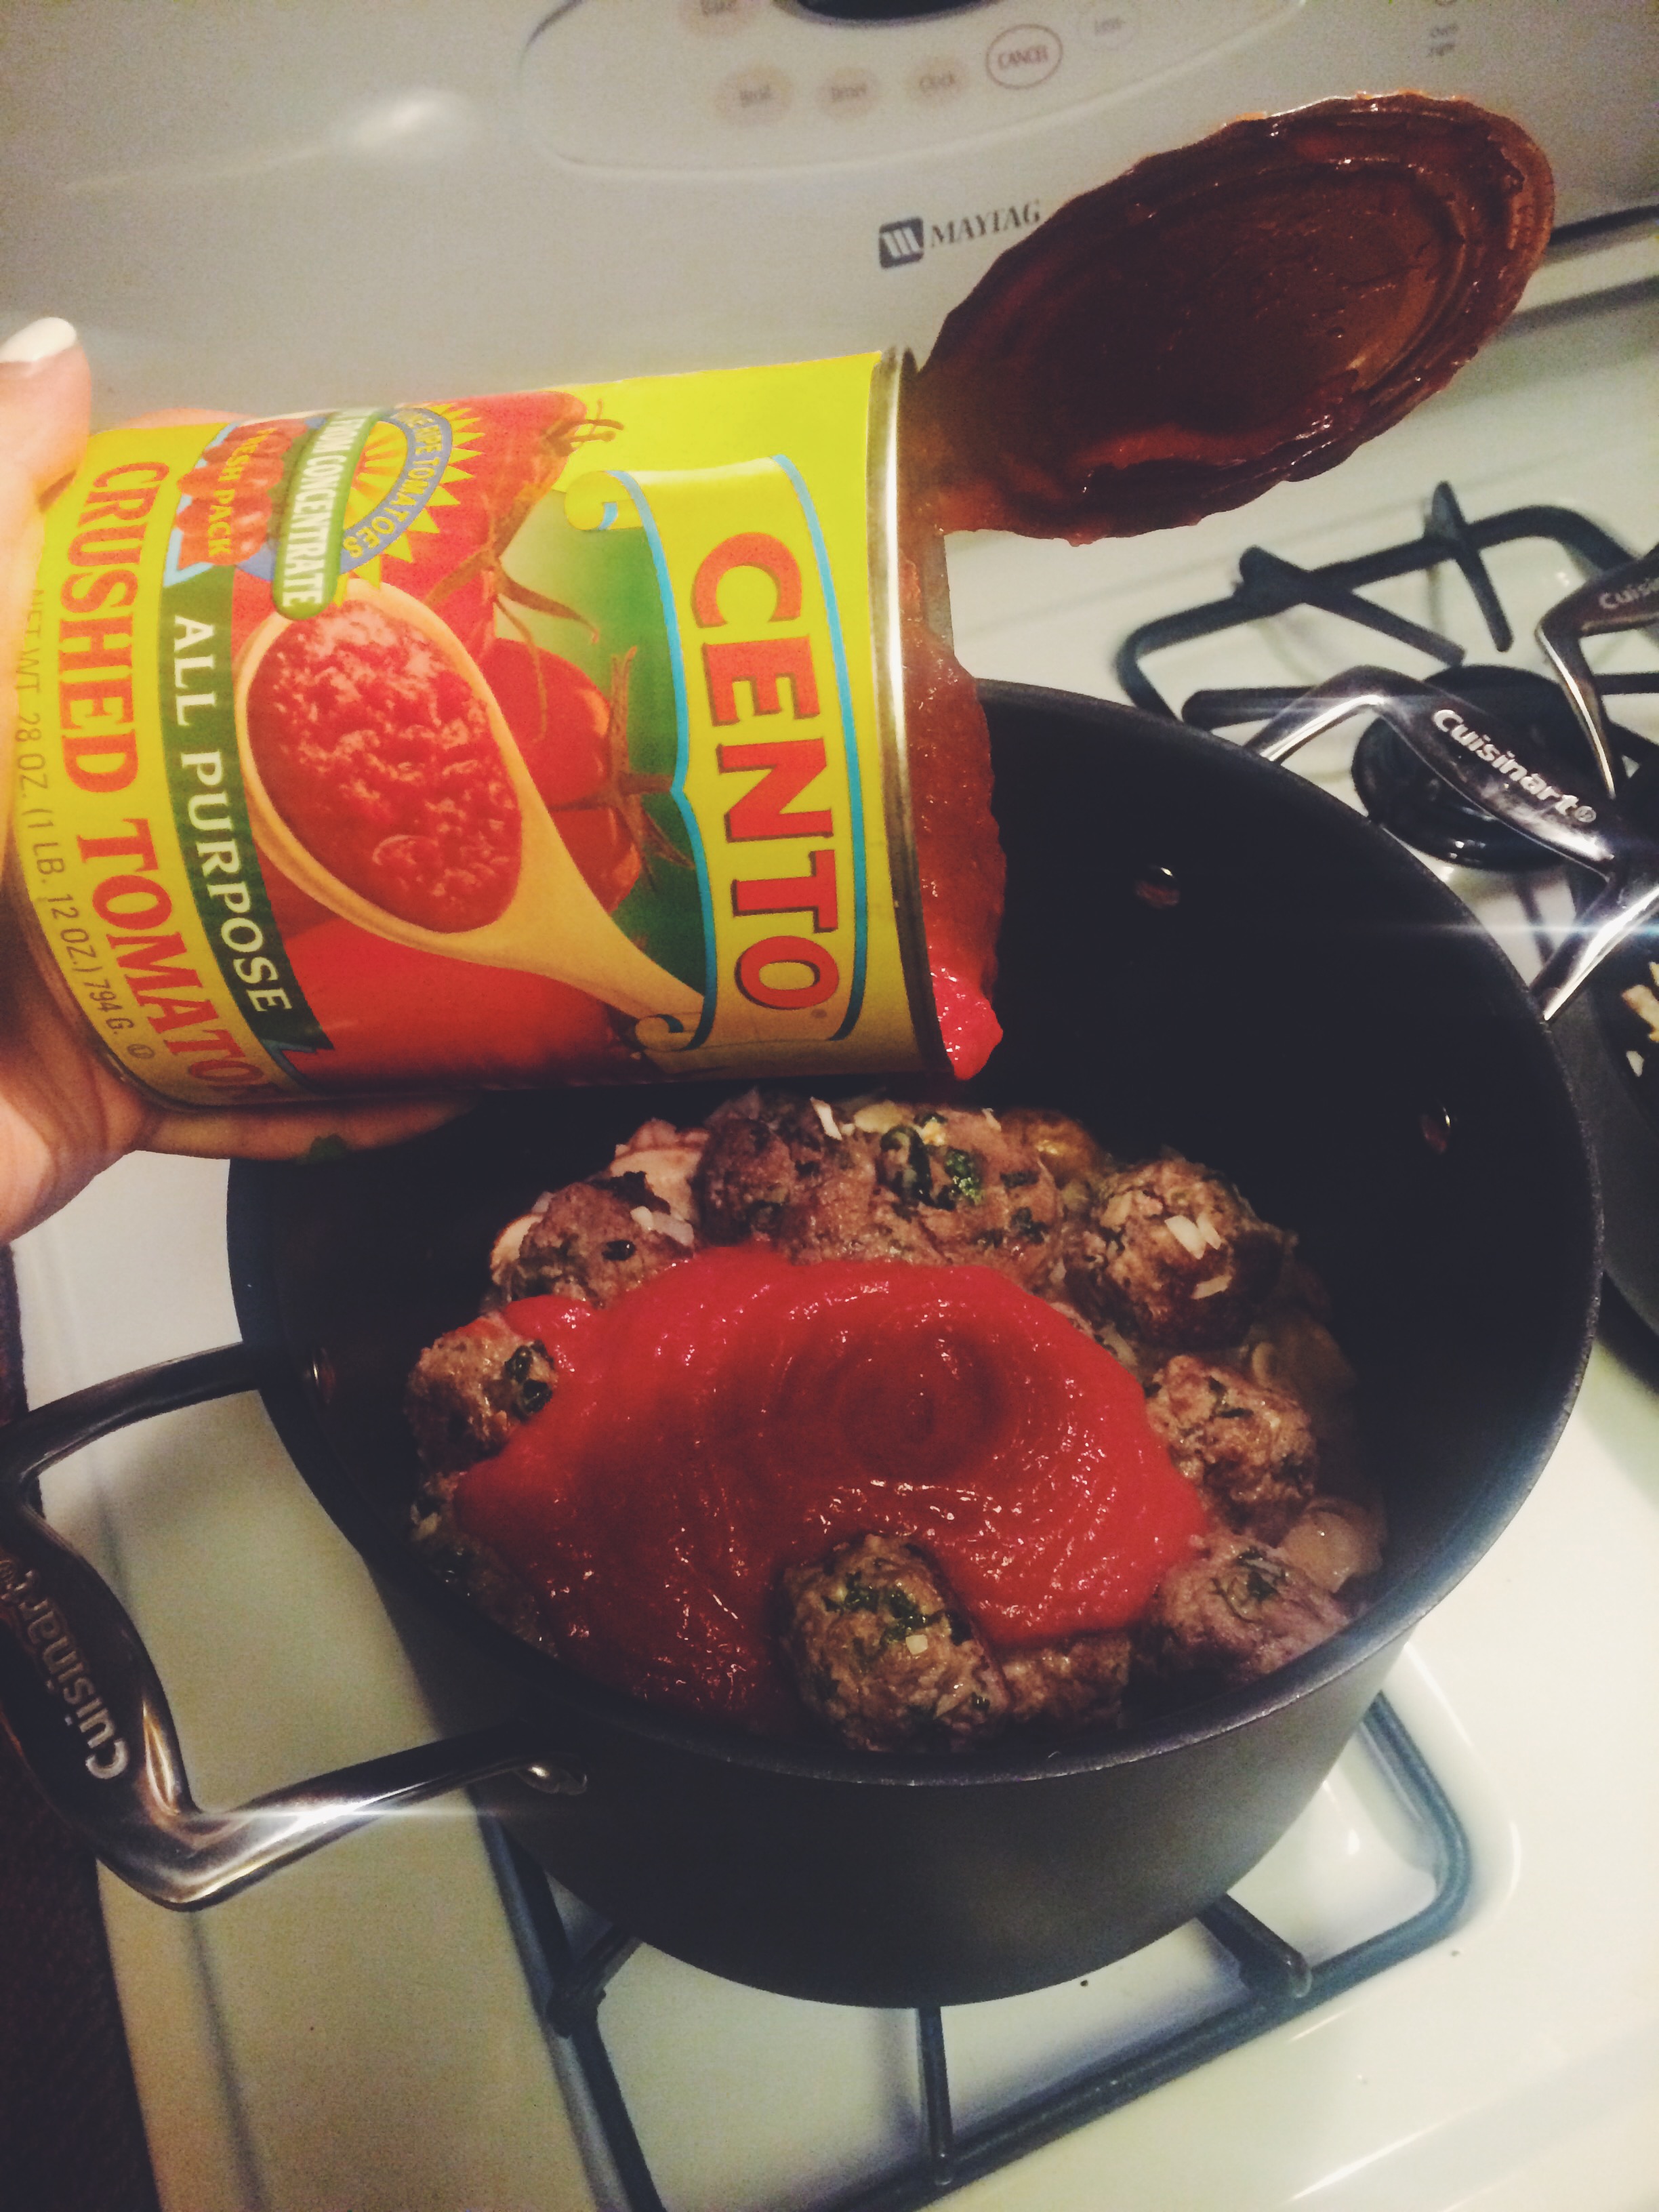
STEP FIVE: ADD CRUSHED TOMATOES
| Add ~56 oz. of crushed tomatoes |
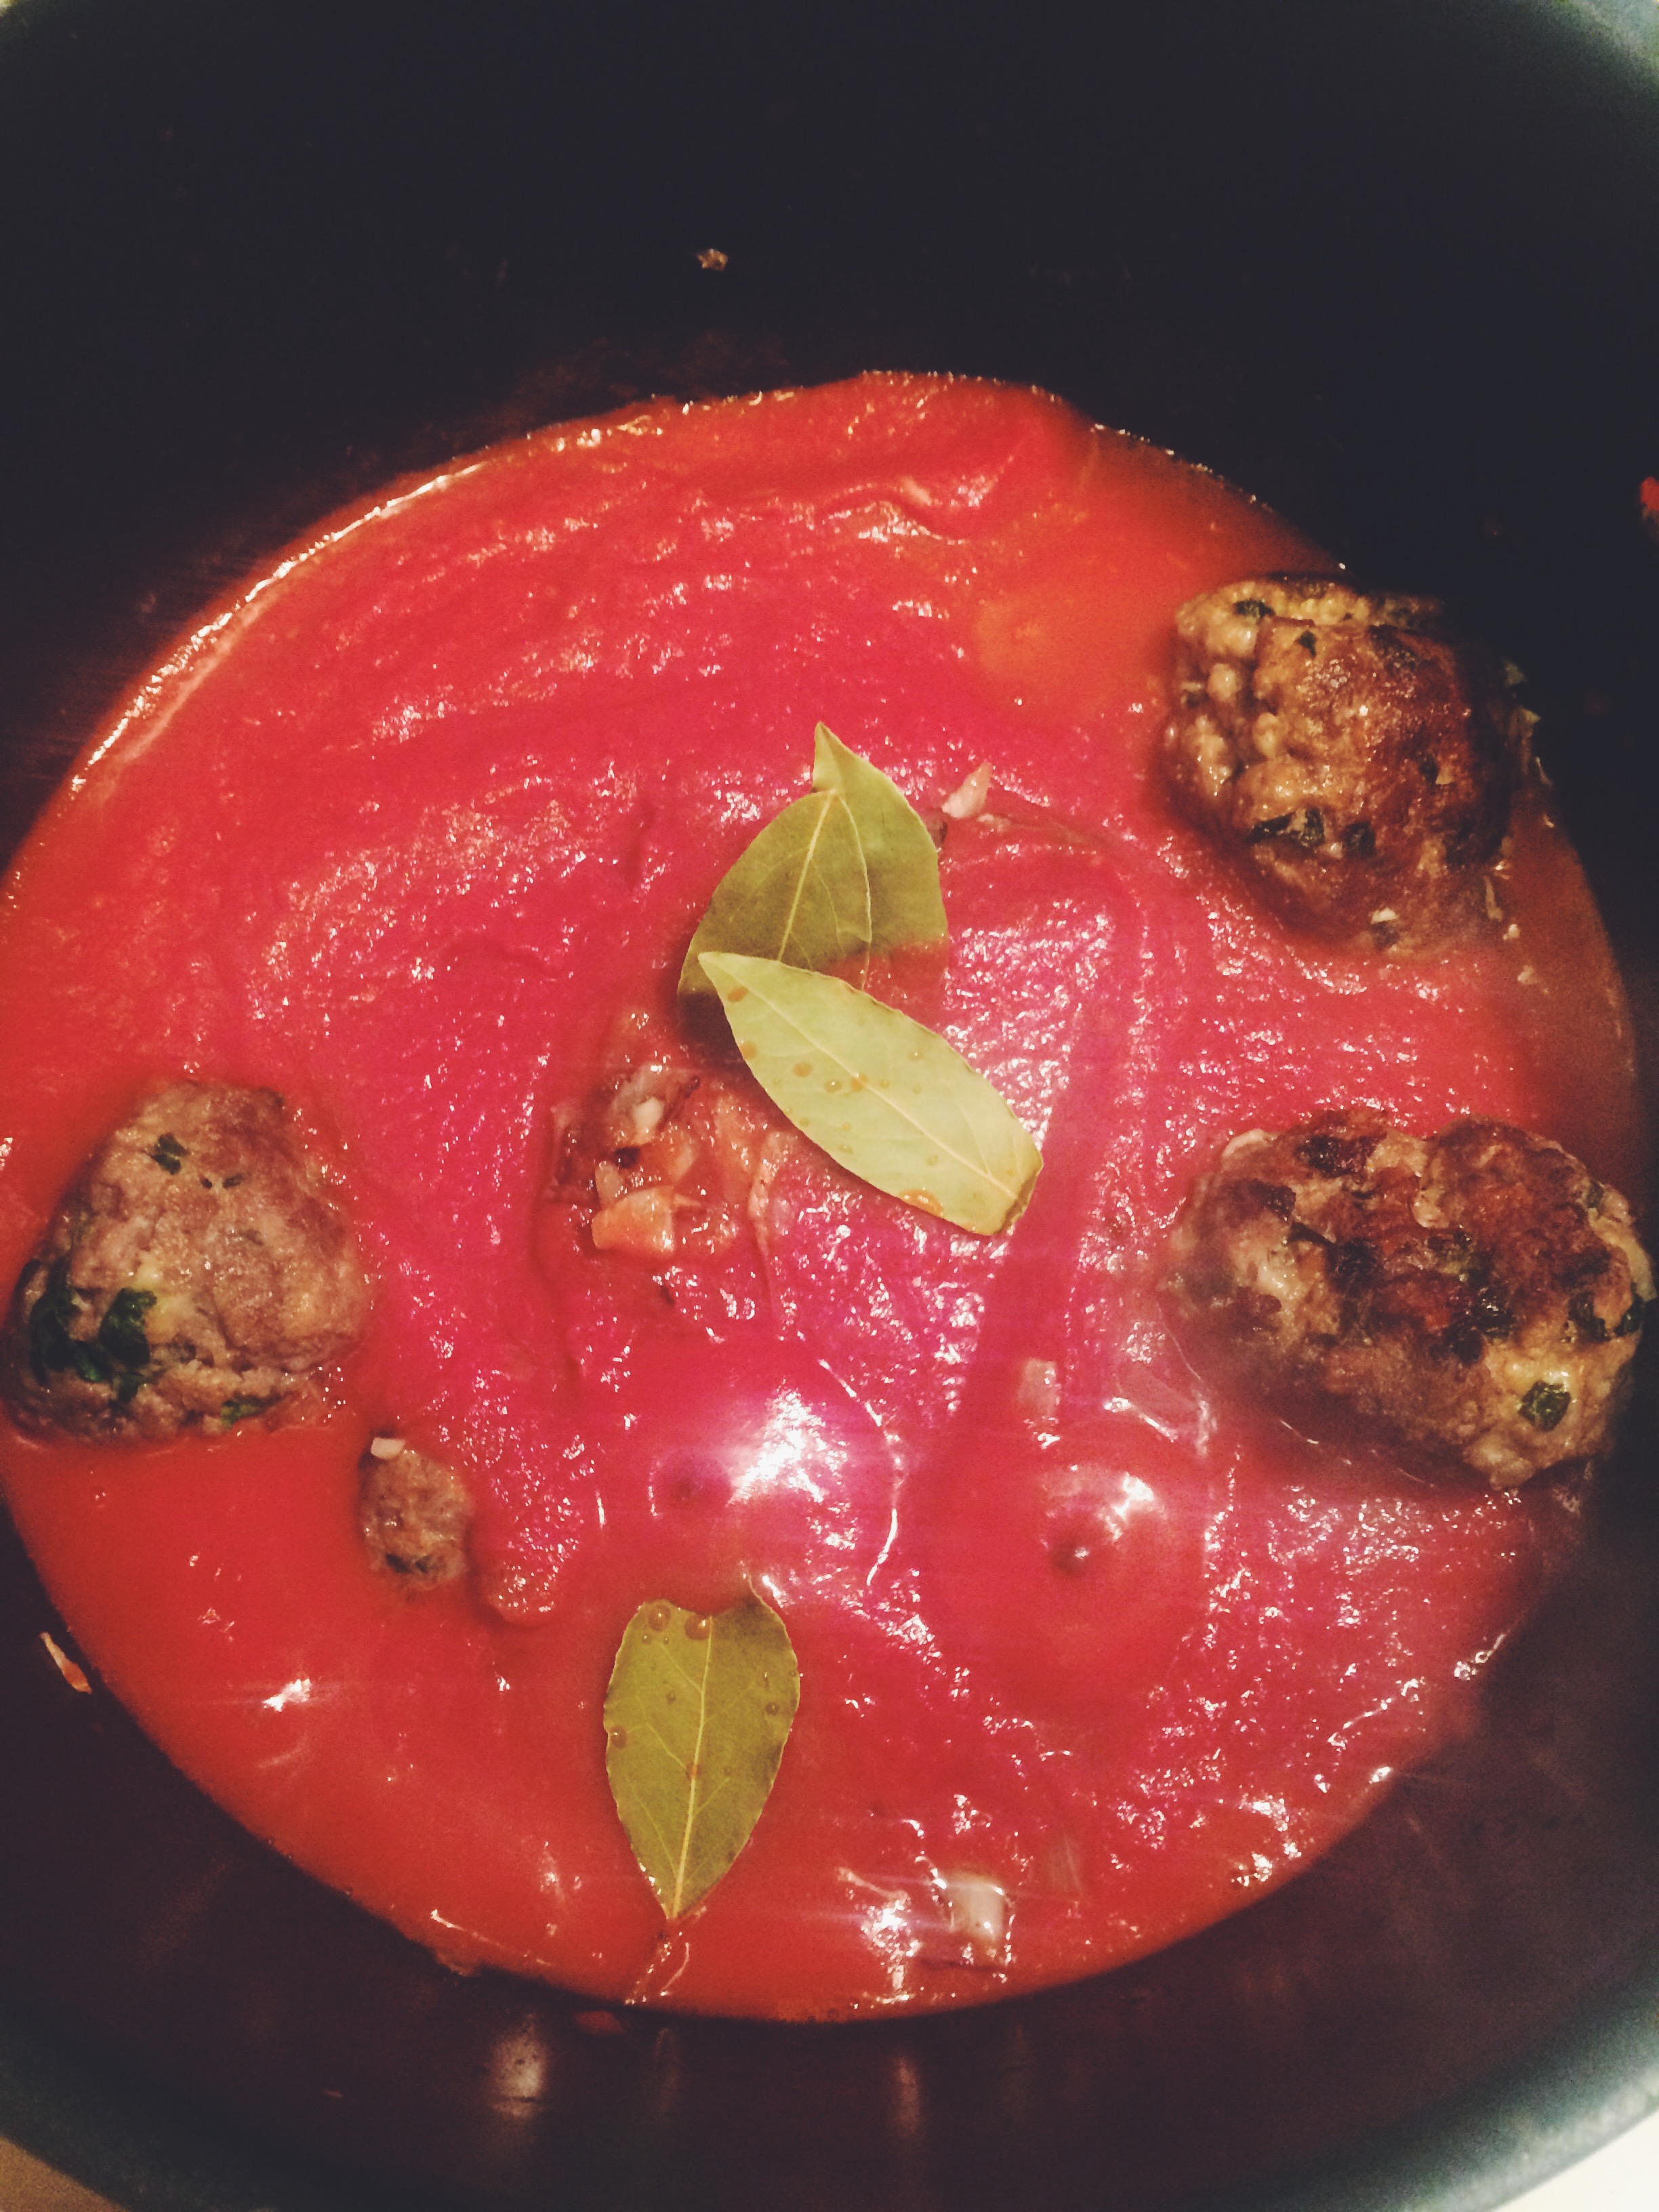
STEP SIX: COMBINE EVERYTHING AND LET THAT SIMMER FOR A WHILE
| Throw in about 5 – 6 bay leaves and let that simmer (make your pasta in the meantime) |
ENJOY! | Cook some of your favorite pasta, I used a corn & rice based gluten free spaghetti here; top with some chopped parsley and grated parmesan. Eat. |

After having released this spaghetti and meatball iteration to about 4 users (total), it has been deemed a statistically significant success. [i need to go on vacation].
xo, Huckleberry Kim
- (New) Tradition: Non-traditional Holiday Dinner, Part 1 – Momofuku Inspired Pork Belly Buns
For as long as I can remember, I have spent December holiday time with my entire (extended) family, which includes 7 aunts/uncles, all of their children, and the grandparents – it’s a lot of people. The holidays have always been a secular occasion for us – a nice time of year to spend time together, share love, laughter, food, stories, and gifts – though because of this, I had not been as exposed to many of the religious traditions that are the pinnacles of big December holidays (e.g. of Christmas or Hanukkah) around the world.
The only “tradition” my family has kept in the last years has been: hilarious. Each of the grandchildren (which ranges from me and my older brother – both in our mid-twenties- down through just under 20 cousins total, ranging from age 1 to 17) – having to display some sort of talent/entertaining performance for our grandparents (all aunts/uncles watching, naturally) before gifts are opened. Will share more on this later… I digress.
Anyhow, this year, having the holidays with just our nuclear family – my parents, my brother and me – I wanted to start a new tradition. And as my epically contrarian self, I determined that our holiday dinner “tradition” should be to always have a super non-traditional holiday dinner! Ha! Eat that, Santa. So having spent most of my 2014 eating super dank food between the east and west coasts, I was feeling confident, and I decided to take on the task of preparing our first non-traditional holiday dinner tradition.
The first course was inspired by David Chang @ Momofuku – I’m so predictable, right? Between eating way too much ramen and too many pork buns at Momofuku and having my passion for cooking reignited by watching The Mind of a Chef on PBS, it was inevitable, and I was determined to make David Chang’s infamous pork buns for my family.
I think they turned out okay:
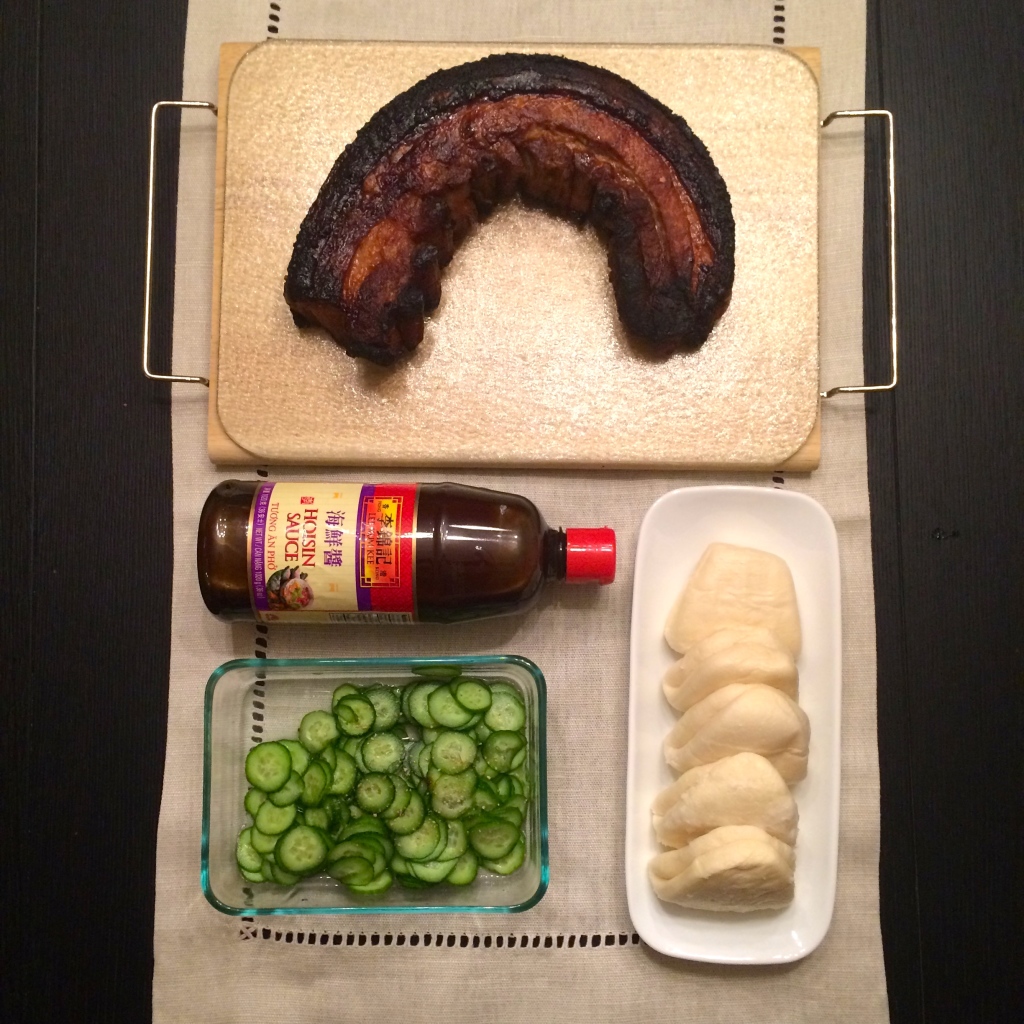
Roasted Pork Belly on Steamed Buns (Inspired by Momofuku)
> Prep the pork belly!
>> Take about 3 pounds of pork belly (remove the skin), mix a bowl of about half of a cup of kosher salt and sugar and coat your pork belly
> Cover it and let that hang out for 6 – 10 hours


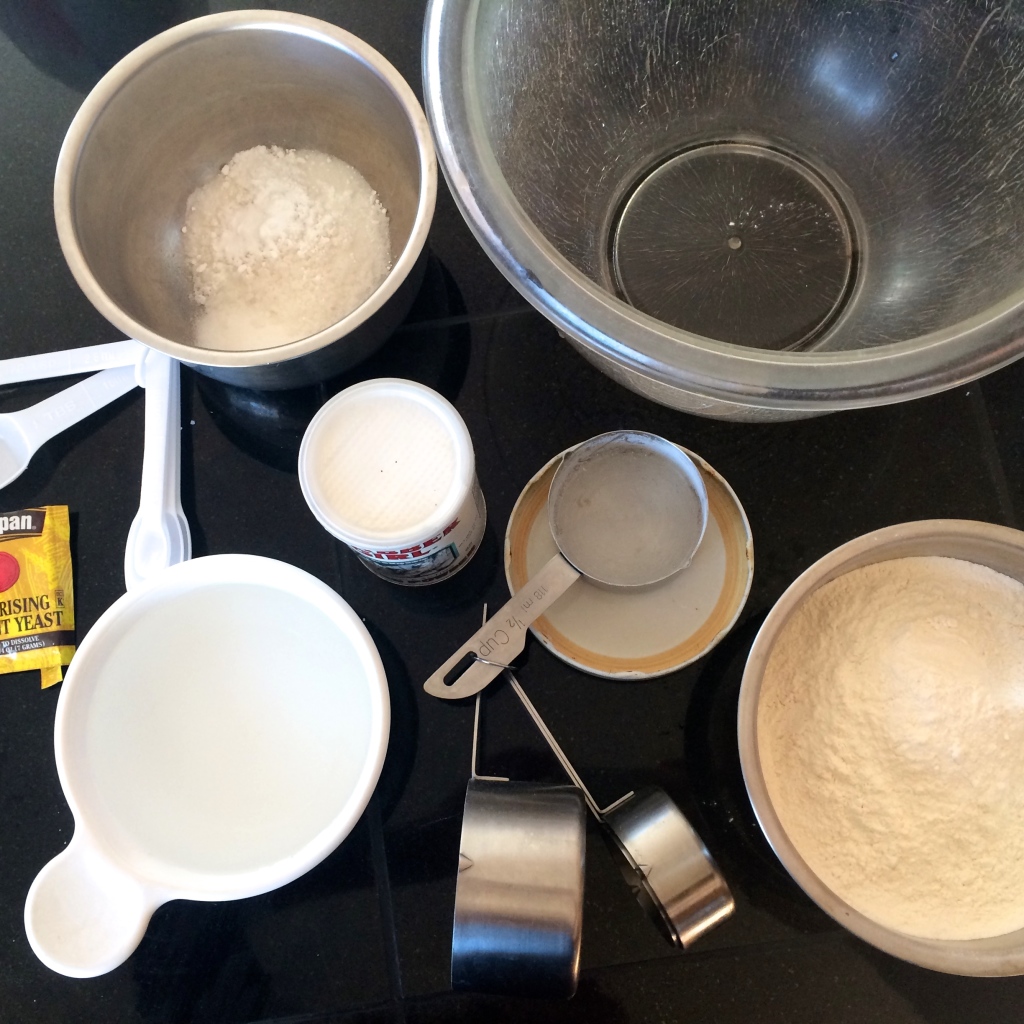
> Meanwhile…start your steamed bun dough!
>> Mix a packet of active dry yeast, 1.5 cups of water, 4.25 cups of bread flour (my mom suggests that next time I should try self-rising flour as that’s what she usually uses to make traditional Vietnamese steamed “bánh bao”), 6 tablespoons of sugar, 1 tablespoon of kosher salt, 1/2 teaspoon of baking powder, 1/2 teaspoon of baking soda, 1/3 cup of bacon/pork fat (i made some scrumptious bacon for breakfast and reserved the fat to use in my dough!)
>> Mix that until it’s all combined for about 10 minutes then gather into a ball.
> Let that sit and rise in an oiled bowl for 1-2 hours!

> After about 6-10 hours, there should be some liquid that has accumulated in your roasting pan with your pork belly – pour all of that out. Preheat your oven to about 450F and cook for about 45 minutes; flipping it over once in between. Then turn your oven down to about 250F and cook until the pork belly is well browned and tender.
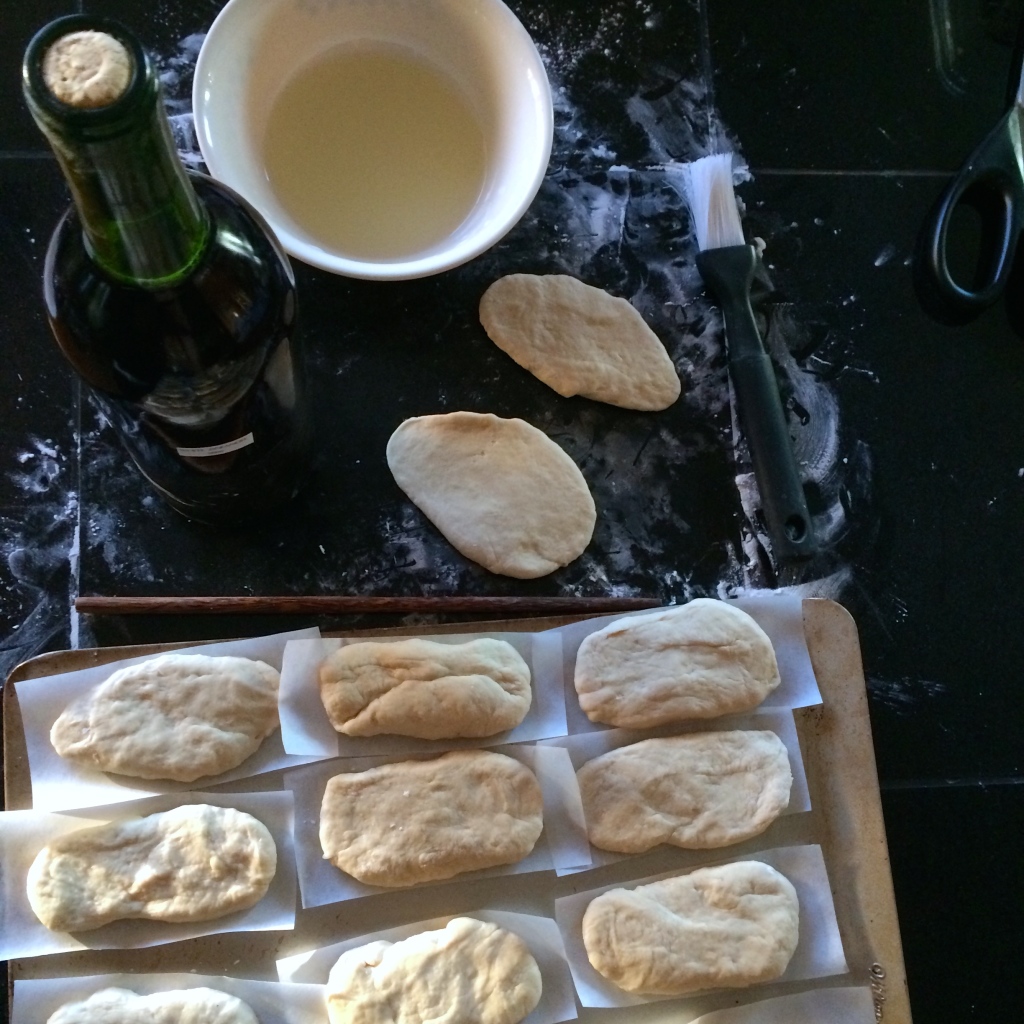
> Finish up your bread! Cut up your dough ball into about 20 even pieces and roll them into balls.
>> Roll each mini ball out into small ovals (I usually just use a wine bottle to roll out my dough – works well if you can’t find your rolling pin!)
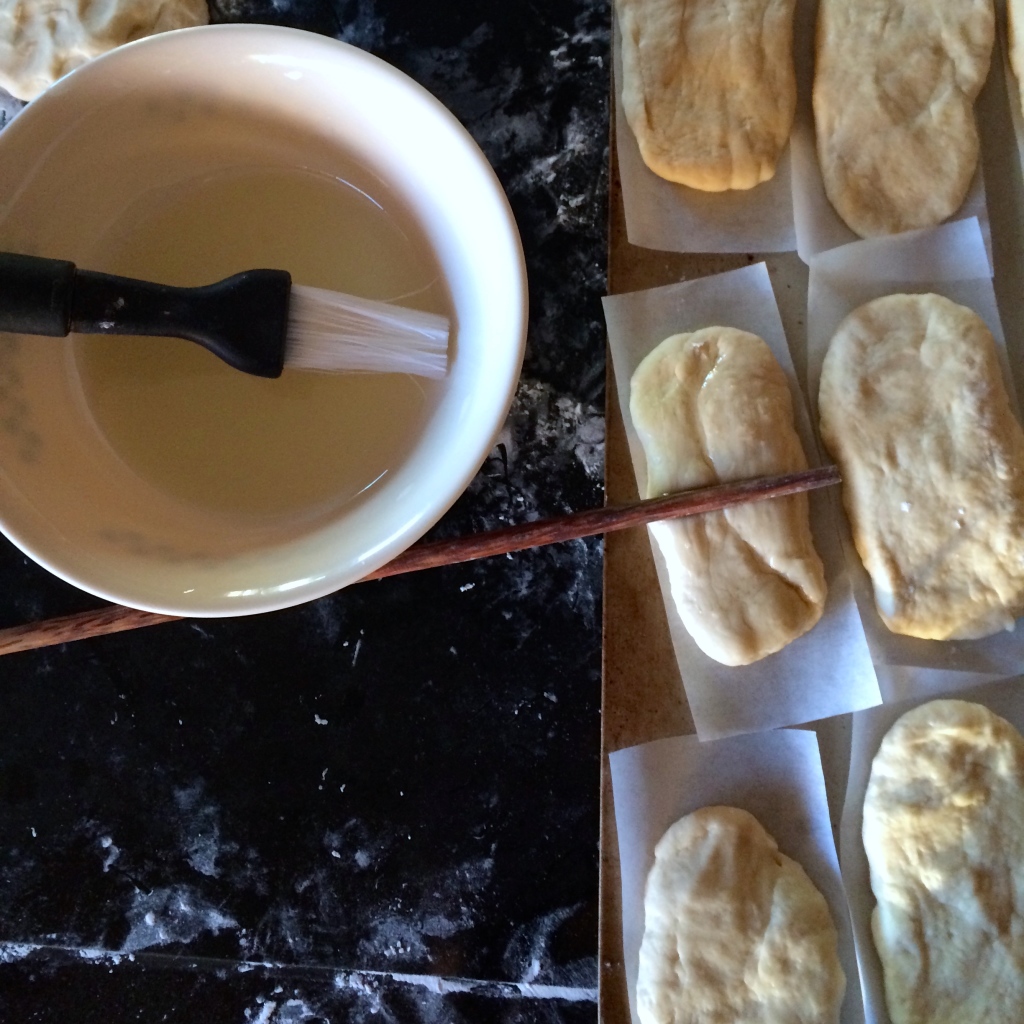
>> Place your rolled dough on small pieces of cut parchment paper
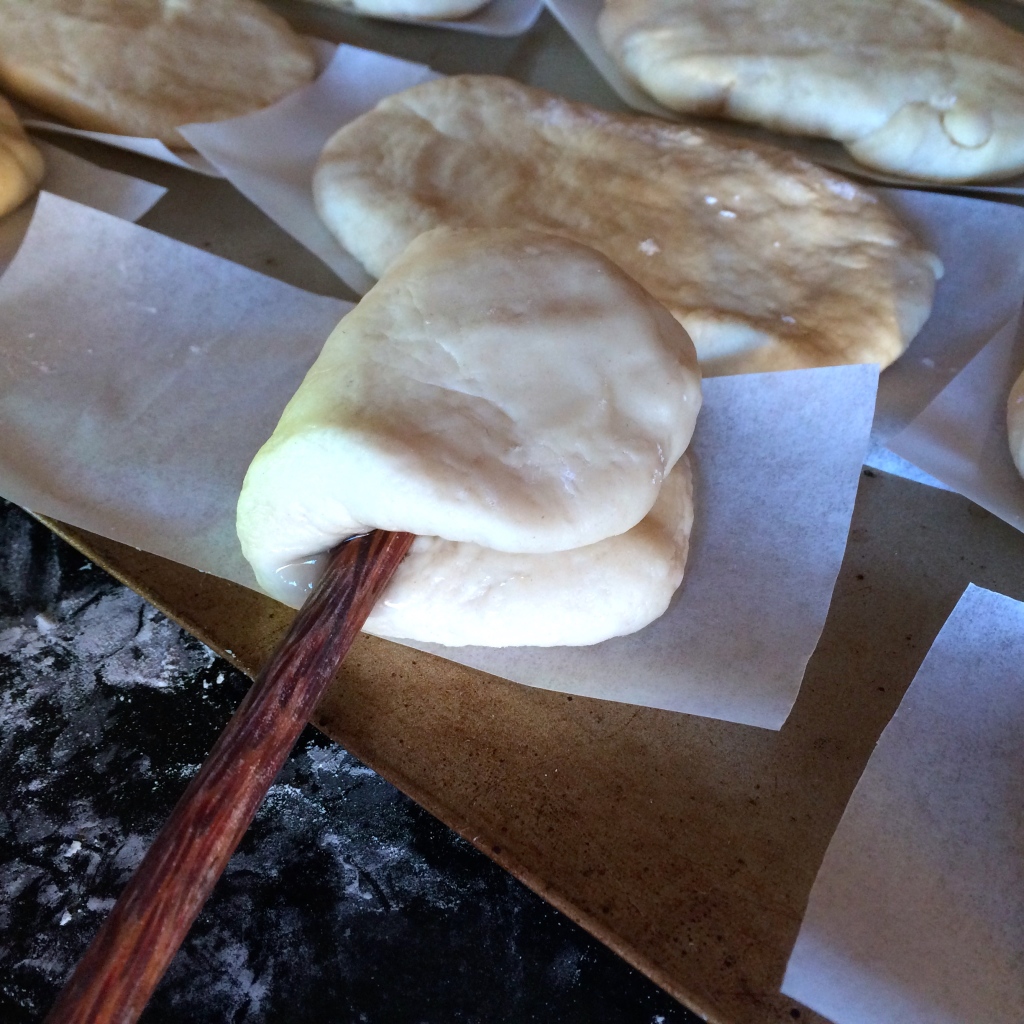
>> Brush each piece of rolled dough with a bit of vegetable oil, lay a chopstick across the center and fold the dough over onto itself making a wee little bun!
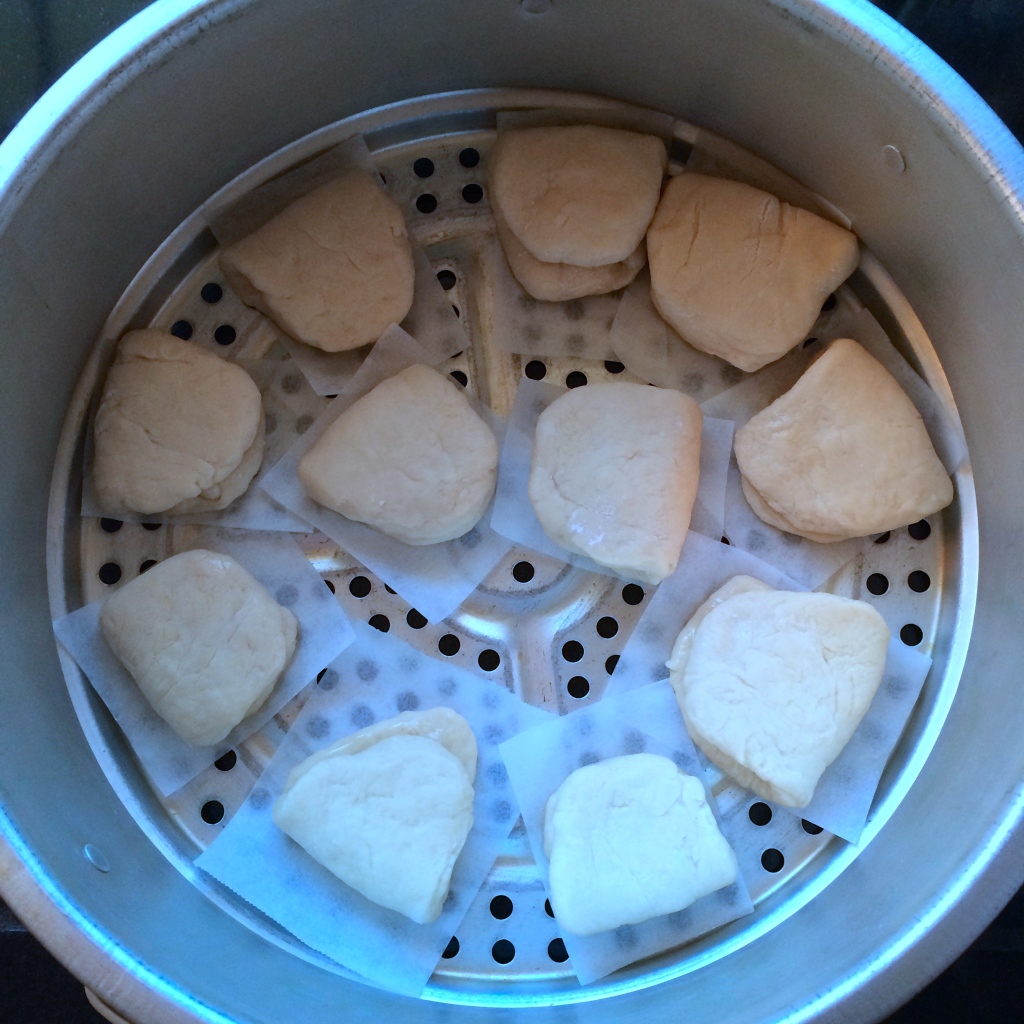
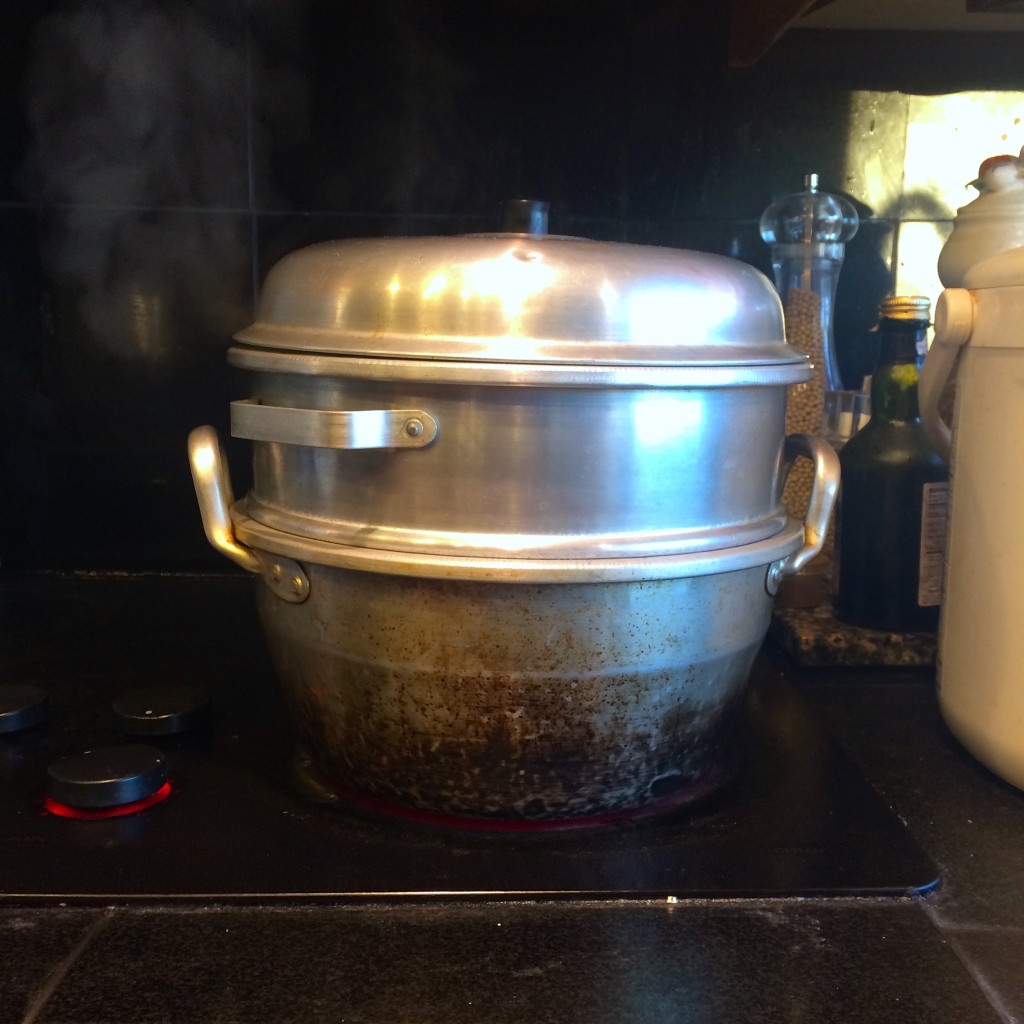
>> Steam your buns for about 10 minutes per batch.


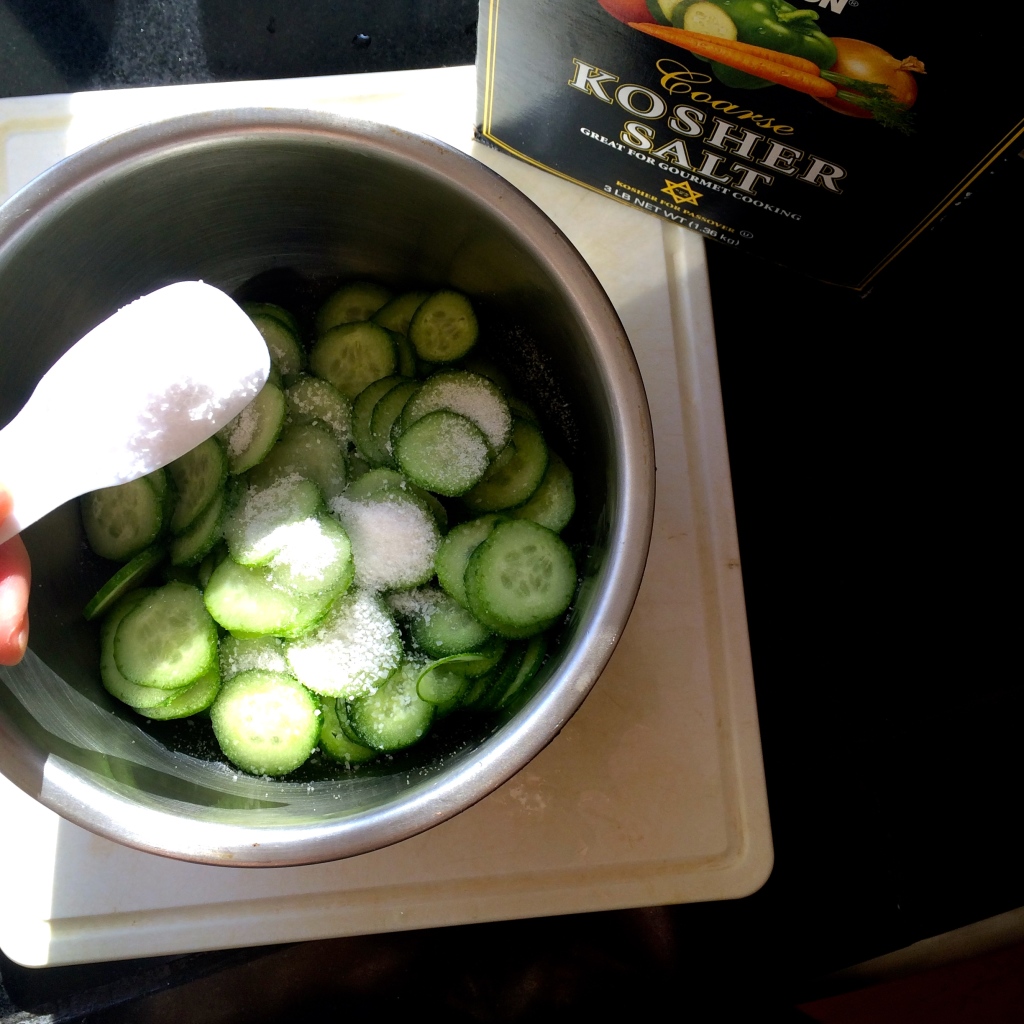
> Start your flash pickled cucumbers!
>> Take 5 persian cucumbers and run them over a mandolin or slice super thin (if you’re good at that).
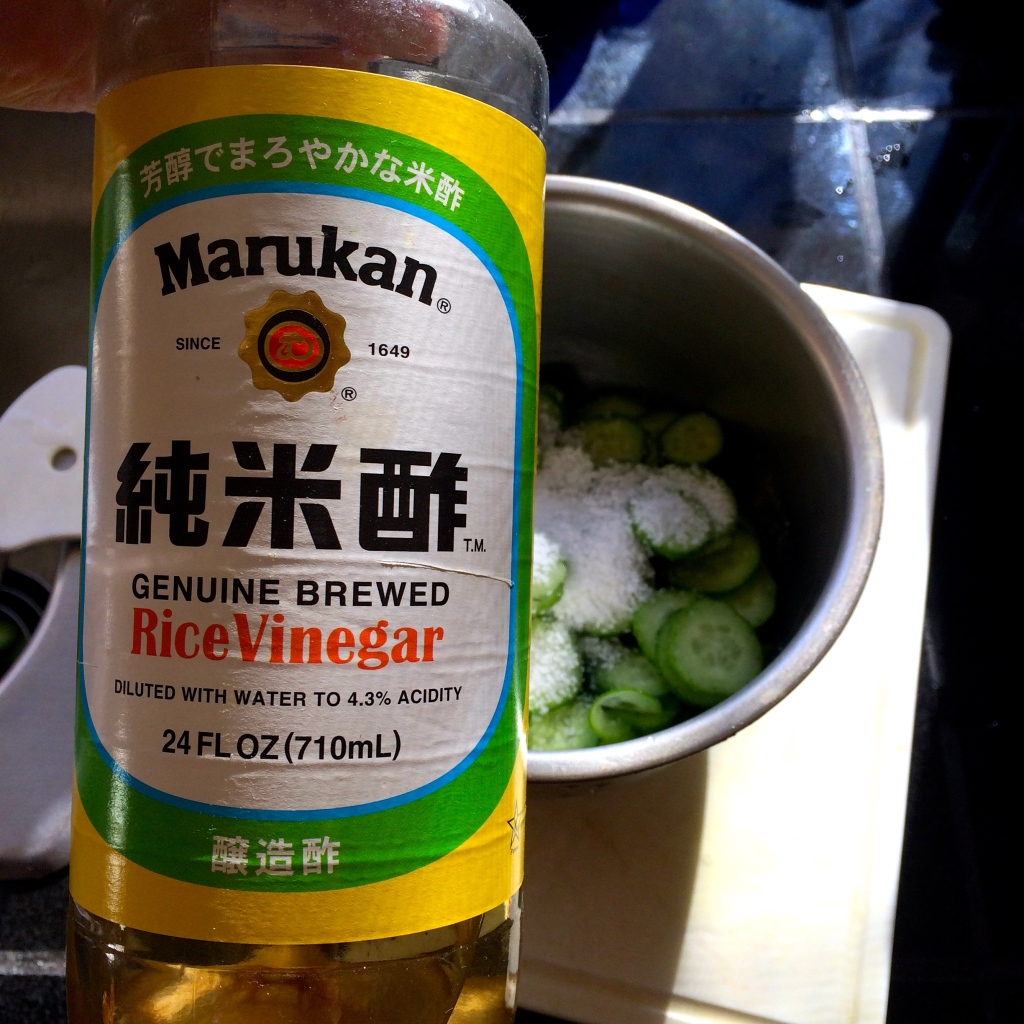
>> Add about 1 tablespoon of sugar, 1 tablespoon of kosher salt, 1 tablespoon of rice vinegar, and some coarse ground pepper.
>> Toss well and let that sit in the refrigerator until you’re ready to assemble your buns!
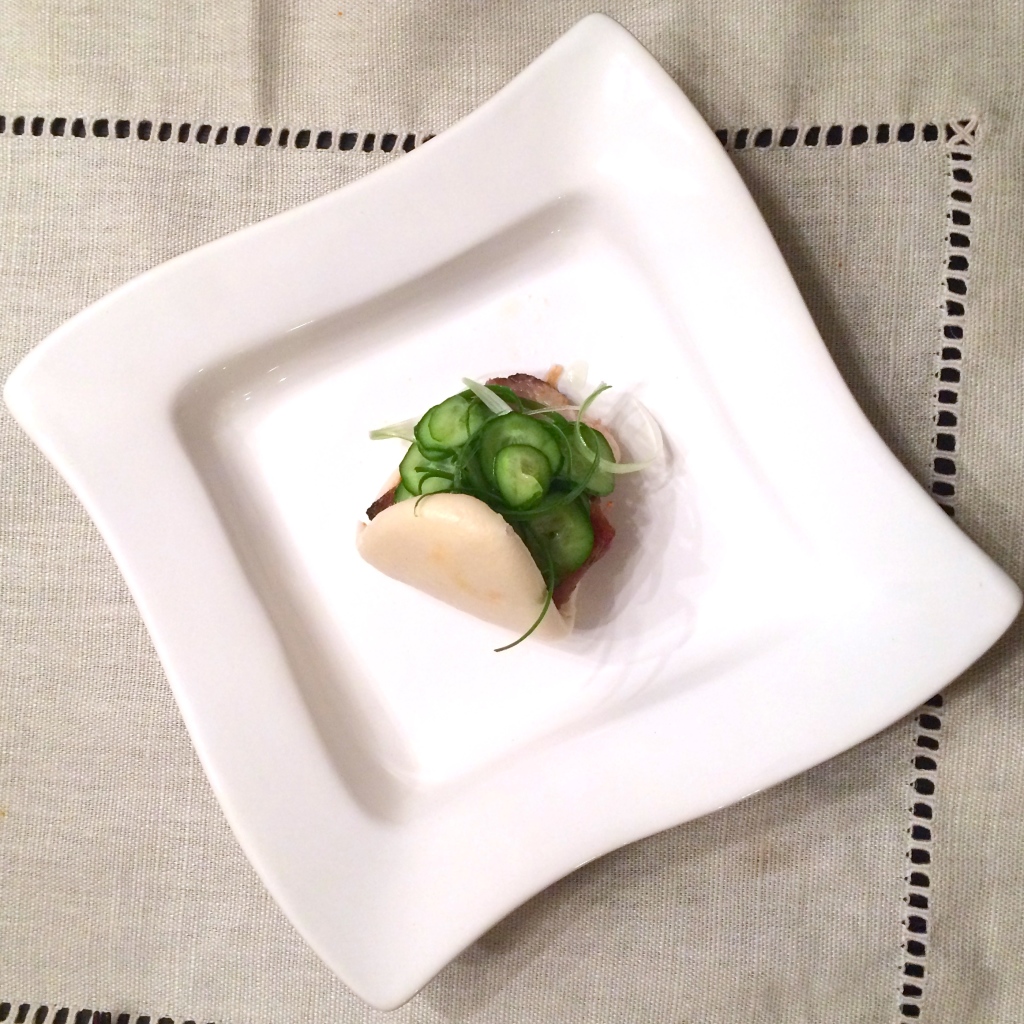
> When everything’s ready to go – assemble your buns!
>> Cut your pork belly into 1/4 inch thick slices, open a bun, spread about 1.5 tablespoons of hoisin sauce, about 1 tablespoon of Sriracha sauce, throw on some of your flash pickled cucumbers and some curled scallions and ENJOY!!

Happy Holidays!
xo, Huckleberry Kim
- sweet potato crust pizza with squash blossoms, figs & goat cheese
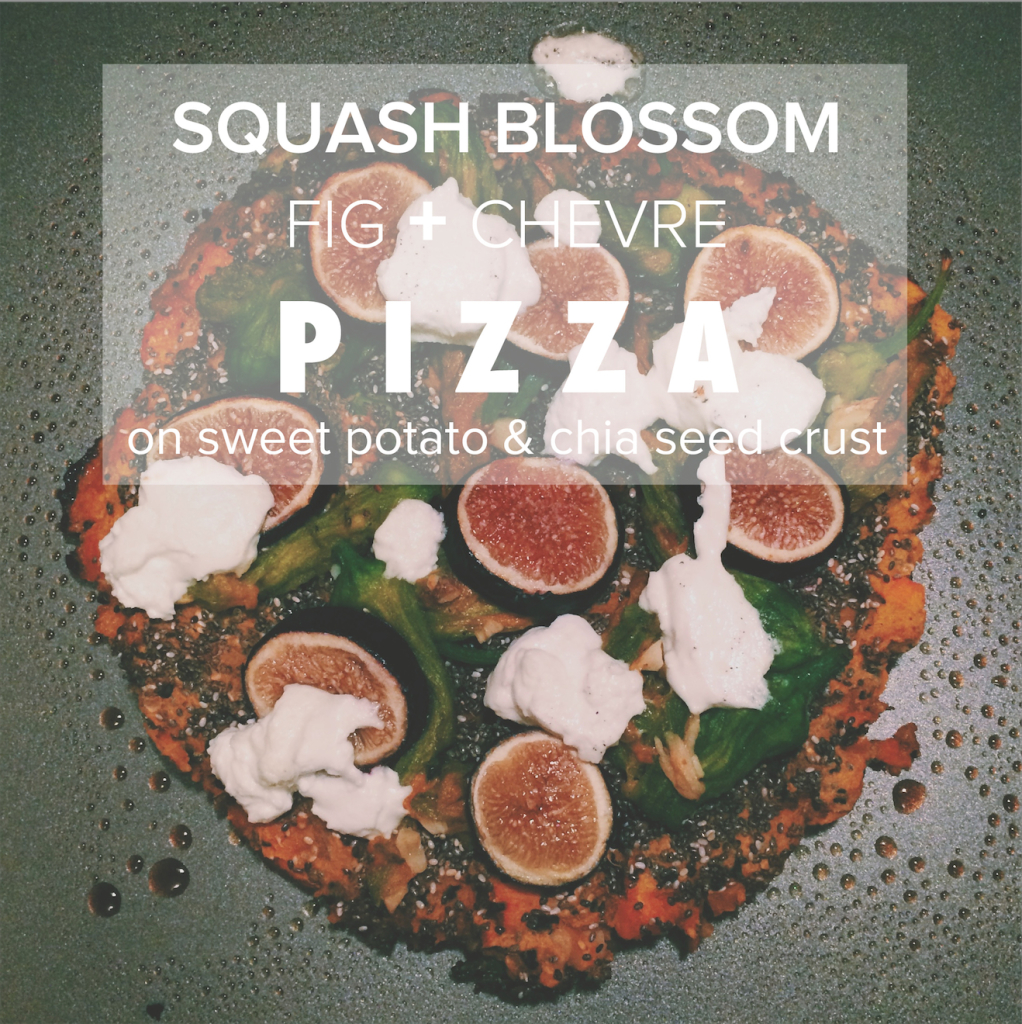 Lately, I’ve been all about the chia seeds. Perhaps it’s all in my head, but they keep me full and pumped with energy – rather than my 2 usual consumption cases of 1) not having time to eat at all or 2) eating all of the pizza. It was Monday night, I did not have any #weekendtk plans, so I got some sweet potatoes and wanted to make a guilt-free pizza! Here’s how it went:
- Peel and chop up 3 small – medium sized sweet potatoes and add them to a pot of boiling water with:
- half a teaspoon of coarse sea salt,
- half a teaspoon of cayenne (if you’re a spicy chef comme moi),
- half a teaspoon of ginger (I used ginger powder, next time I might try freshly ground).
- In a separate pan, heat up a tablespoon of olive oil and throw in 4-ish cloves of coarsely chopped garlic. Cook for 2 minutes.
- Add in your prepared squash blossoms (2-3 cups; they cook down a lot) and cook for an additional 3 minutes
- How to prepare squash blossoms, you ask?:
- Cut off the ends
- Strip stalks of epidermis (OMG, I’m such a nerd, but honestly, what else do you call it?)
- Wash thoroughly
- Dry
- How to prepare squash blossoms, you ask?:
- Set aside your squash blossoms
- Once your sweet potatoes are soft enough to easily pierce with a knife or fork, drain the water and add in about one third of your cooked squash blossoms
- Mash that mixture up really well (I actually used my hand blender – thanks MKB!)
- Add:
- three quarters of a cup of almond flour,
- one quarter of a cup of chia seeds,
- one teaspoon of baking soda,
- and half a teaspoon of coarse sea salt to your mash.
- Knead that. Knead it like you mean it.
- Press the dough into your lightly olive-oiled baking pan in whatever shape you want to make your pizza (it should be about 1/3 to 1/2 and inch thick)
- Bake that at 400 degrees Fahrenheit for 15 minutes or until the edges look slightly browned and happy.
- Take that out of the oven and add your remaining squash blossoms to the top – bake for an additional 7ish minutes.
- Top with figs and chèvre and broil for an additional 3 – 5 minutes.
- Eat.
Bon appétit!
Huckleberry Kim
- Peel and chop up 3 small – medium sized sweet potatoes and add them to a pot of boiling water with:
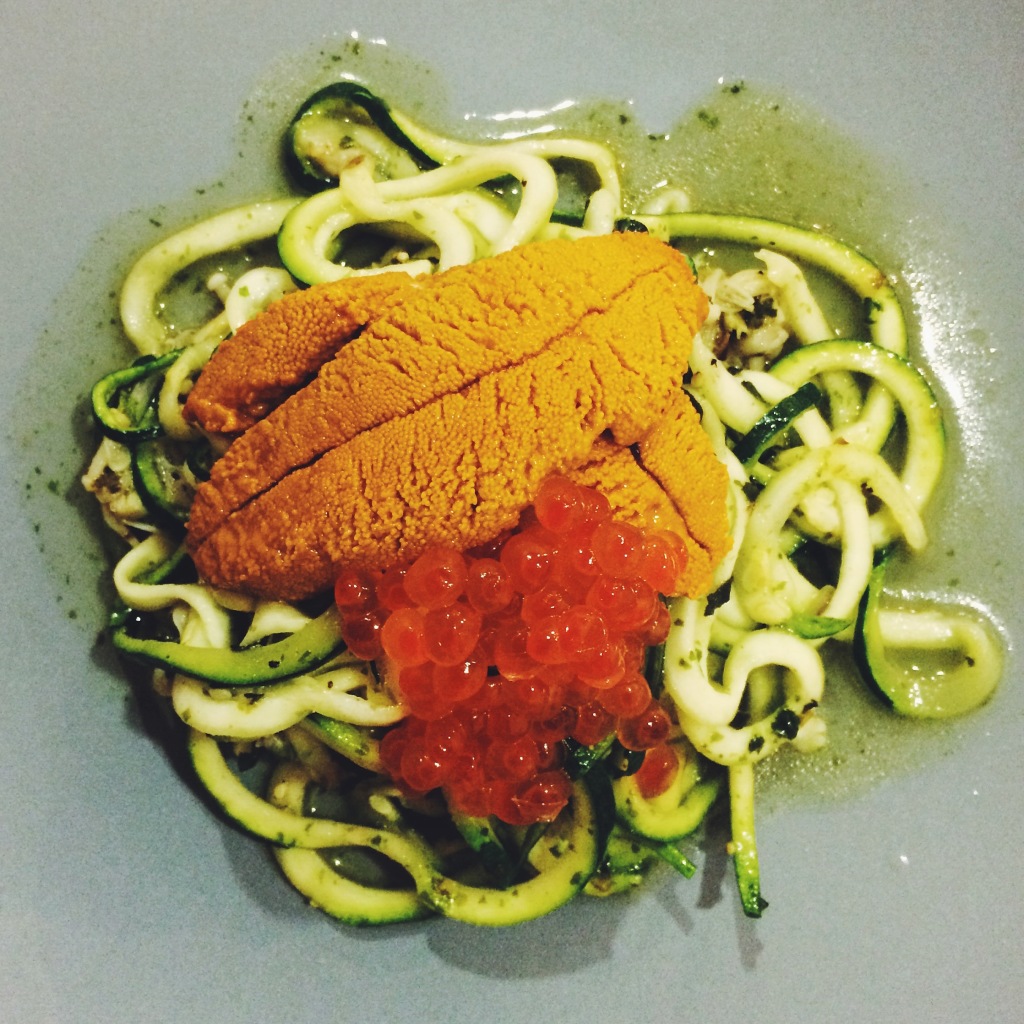
- UNI ZOODLES
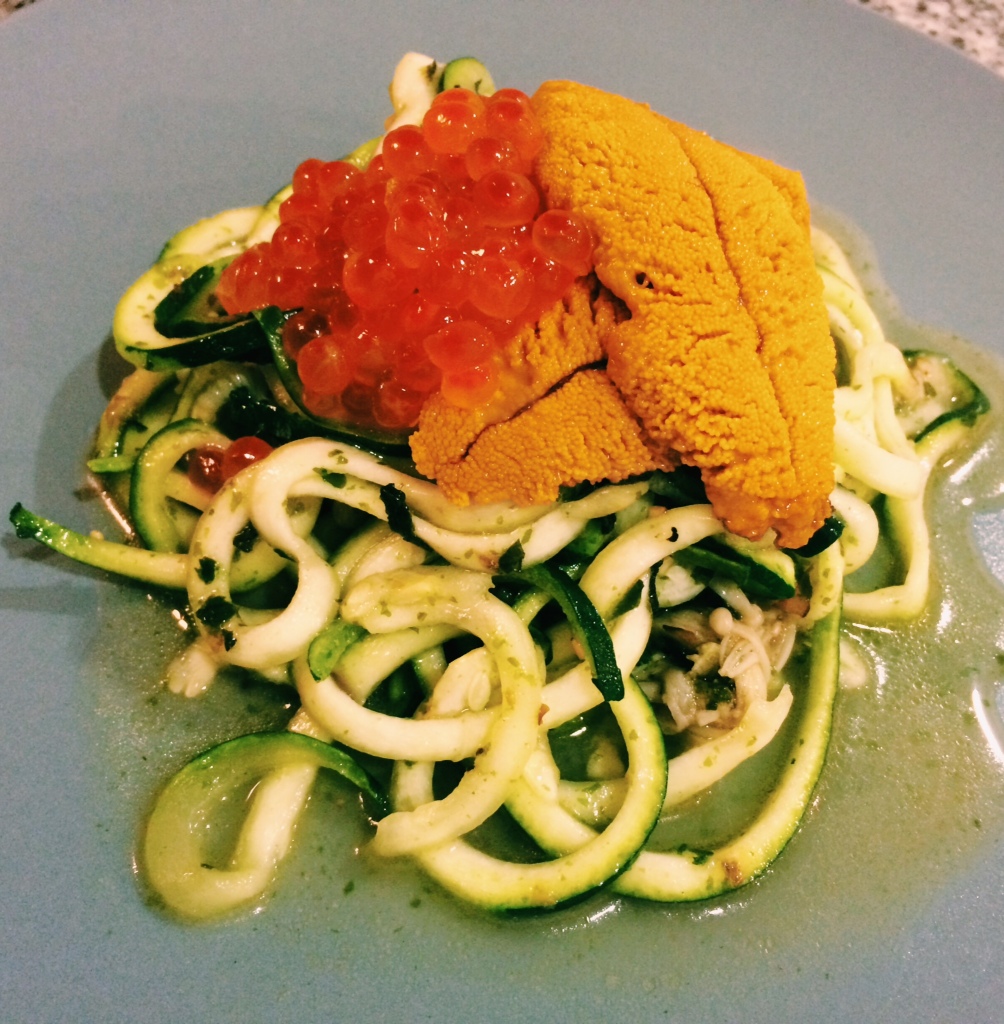 A group of my work pals have been on a very inspiring #healthyliving kick lately; we’ve been encouraging each other with workouts and clean eats. Everyone got Spiralizers, and I hopped on the bandwagon. The following are the steps for my easy first zoodle meal (zoodle = zucchini noodle). It literally takes 15 minutes to prepare. I’m also a wizard.
- Spiralize 1 zucchini (honestly, I wanted to do this recipe with a sweet potato, but couldn’t be bothered to look that hard for sweet potatoes at the grocery store. next time.)
- In a medium-sized pan, sautée 3 cloves of coarsely chopped garlic in 1 tbsp of olive oil.
- Add a handful of enoki mushrooms (after having chopped off the ends, washed, and loosely separated them).
- MIX IT UP (for like 45 seconds).
- Combine 3 tbsps of seaweed flakes with 1 tsp of roasted seasame seeds and 1/2 tsp of wasabi powder (+/- to taste).
- Add salt and pepper to taste.
- Throw in your zoodles and cook for an additional 90 seconds or to desired zoodle-texture.
- Top with fresh sea urchin and garnish with fresh salmon roe.
- It looks very pretty plated with the sea-friends on top, though next time I think I’ll blend up the sea urchin and spices and toss with the ikura to get better zoodle-coverage…I mean who am I trying to impress anyway, right?
Bon Appétit!
xx, Huckleberry Kim
more spiralizers:
- Coconut Matcha Chia Seed Pudding
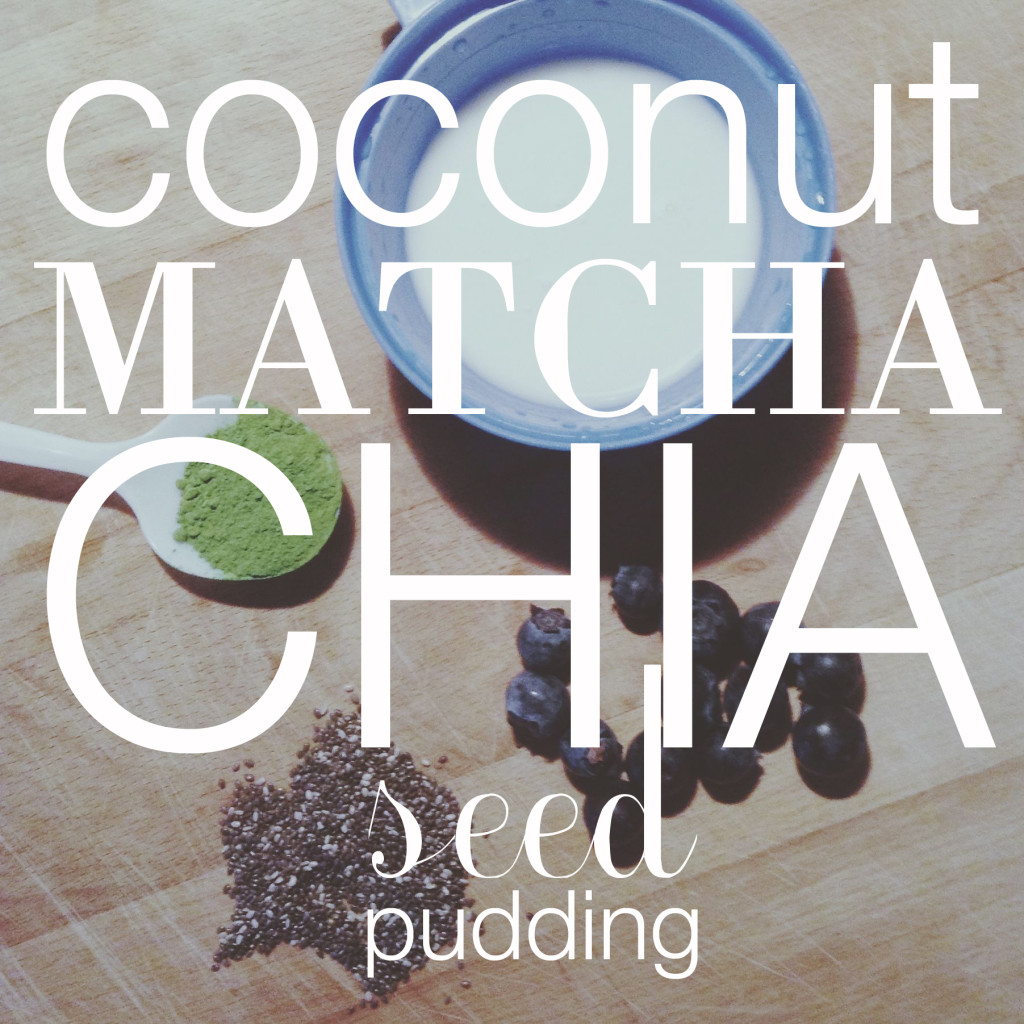
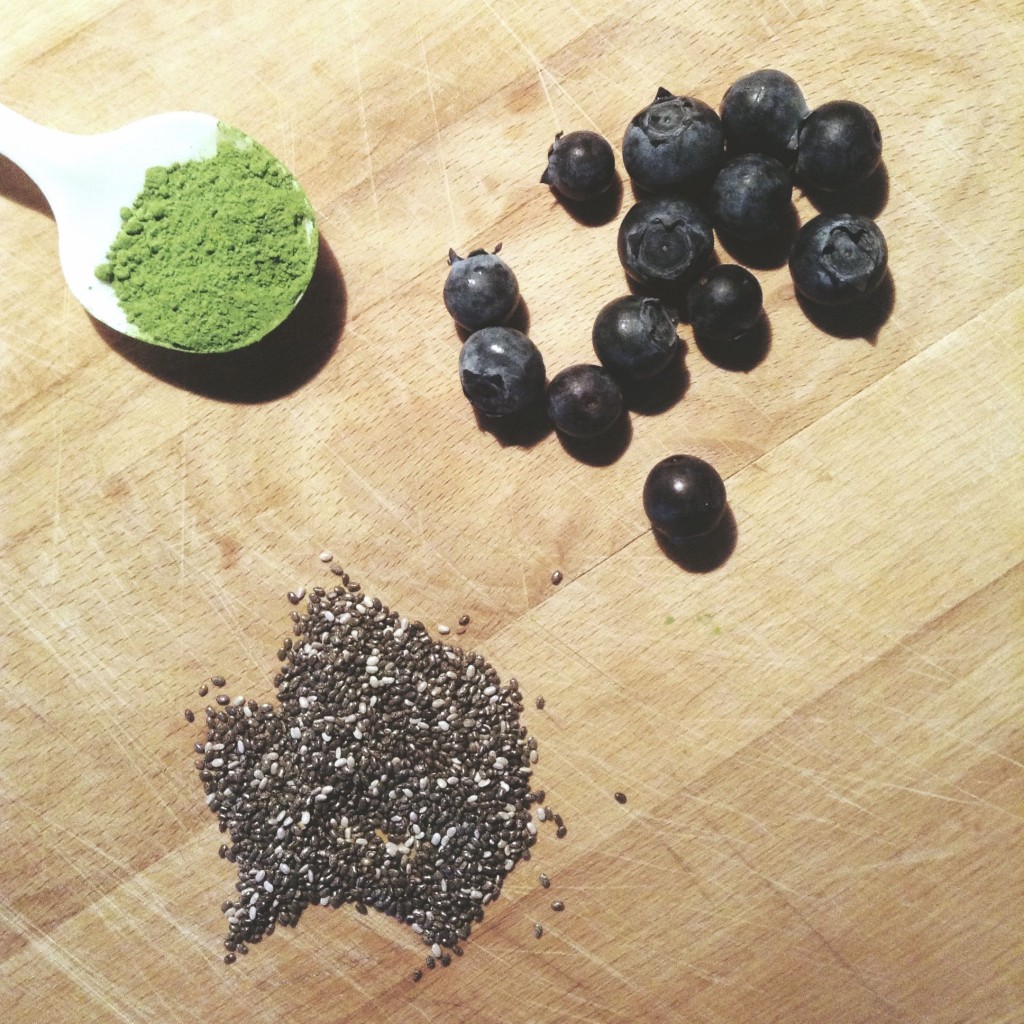
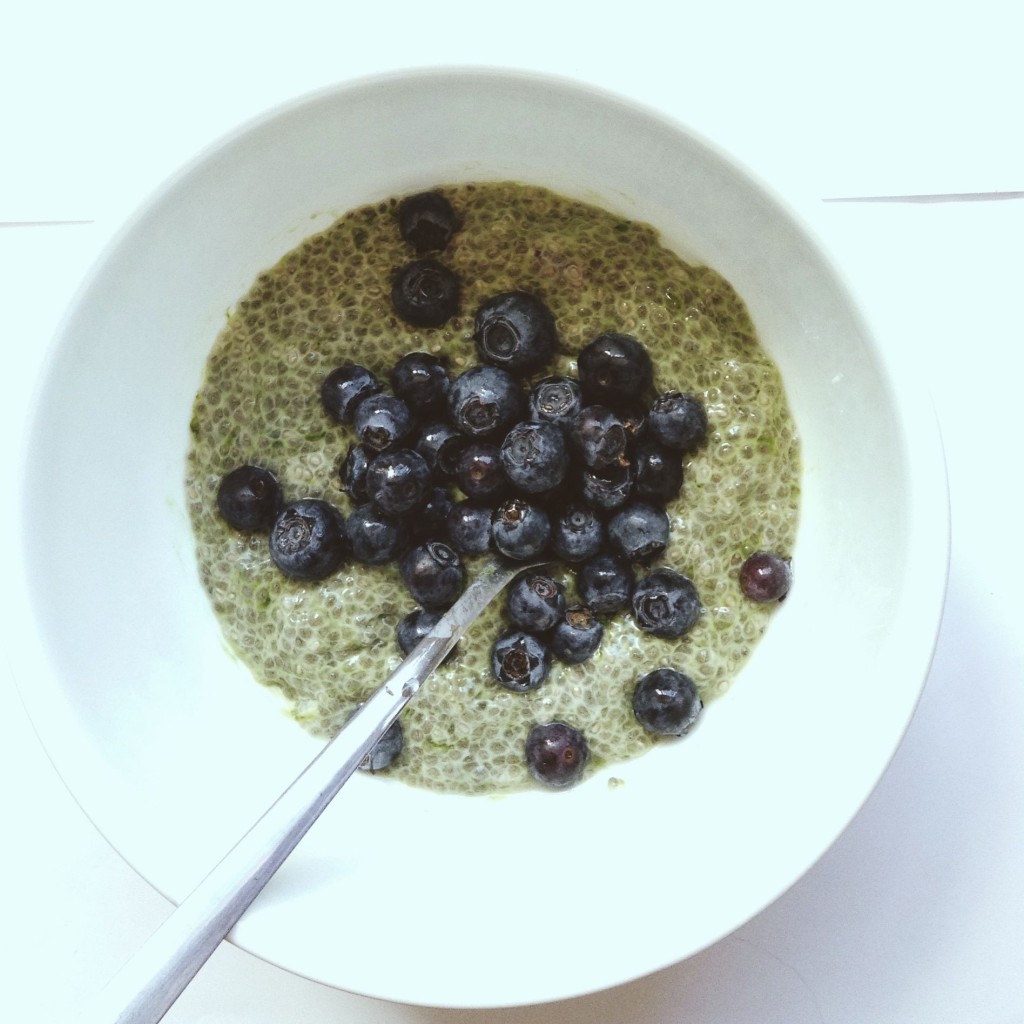
CONFESSION: With warmer weather approaching, I’ve been indulging in too much ice cream lately. So I’ve been looking for some healthier, cool, sweet, and refreshing options and hath concocted the following coconut match chia seed pudding. It’s so easy, lightly sweetened with a smidgen of honey and perfectly topped with fresh organic blueberries! Check out the easy recipe below:
- Take a quarter cup of chia seeds and whisk well with half a cup of coconut milk
- Mix in about a teaspoon of match powder until evenly dispersed
- Mix in about a teaspoon of your favorite honey (or to taste) until evenly dissolved
- Let it sit in the ‘fridge for a few hours (or over night)
- Top with fresh blueberries or your favorite fruits and enjoy!
xx,
Huckleberry Kim
- The Last Supper(s): San Francisco Spring 2014I am embarking on a trial move to NYC for the next few months. It’s quite exciting, as I have been talking about a coastal swap since I was around 14 – so after a decade of psyching myself out, I think I’m ready. San Francisco will always have my heart; though, I think it’s time that I take a little s p a c e .

 Naturally, being the gluttonous fool that I am, one last SF supper could not suffice… there’s simply too much food, that I love, to be eaten. So, I broke it down into 3 last-for-now SF suppers 🙂 Though New York will undoubtedly offer me copious opportunities for good eating…sometime’s there’s nothing like one’s very own comfort food faves – and having been born and raised in the Golden State, you guessed right, most of my comfort foods are home grow’d Californian cuisines:
i. State Bird Provisions – Finally! I used to live literally a block away from State Bird in the Western Addition, but I hadn’t had the patience to wait in line because let’s be honest: when I wants to eat, I wants to eat! I figured I had to try it before I left SF, so that happened.
The experience at State Bird is fun for tapas-loving-try-everything sorts of eaters like me. They have a short commandable menu that is supplemented by various seasonal provisions, which are offered dim-sum-style to dining guests. After having tried it {especially, the guinea hen dumpling with aromatic broth (omg, so aromatic – with the perfect hints of lime)}, I would definitely go back and wait in line.
Naturally, being the gluttonous fool that I am, one last SF supper could not suffice… there’s simply too much food, that I love, to be eaten. So, I broke it down into 3 last-for-now SF suppers 🙂 Though New York will undoubtedly offer me copious opportunities for good eating…sometime’s there’s nothing like one’s very own comfort food faves – and having been born and raised in the Golden State, you guessed right, most of my comfort foods are home grow’d Californian cuisines:
i. State Bird Provisions – Finally! I used to live literally a block away from State Bird in the Western Addition, but I hadn’t had the patience to wait in line because let’s be honest: when I wants to eat, I wants to eat! I figured I had to try it before I left SF, so that happened.
The experience at State Bird is fun for tapas-loving-try-everything sorts of eaters like me. They have a short commandable menu that is supplemented by various seasonal provisions, which are offered dim-sum-style to dining guests. After having tried it {especially, the guinea hen dumpling with aromatic broth (omg, so aromatic – with the perfect hints of lime)}, I would definitely go back and wait in line.


 ii. In-N-Out Burger, duh – Cheeseburger Animal Style, Extra Lettuce, Extra Jalapeños, French Fries, and a Neapolitan Milk Shake #nuffsaid

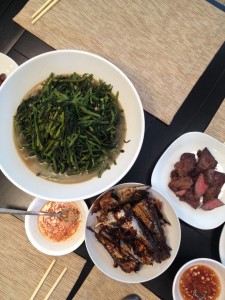
iii. And last but not least: Mama’s Homemade Vietnamese Food – including all of my childhood comfort food favorites like rau muống xào tỏi (hollowed water spinach sautéed with (lots of) garlic, cá kho tộ (claypot braised catfish), canh chua (vietnamese sweet & sour soup) and so much more. My mom rules. She literally cooked all day to send me off with a belly full of love. Cảm ơn mẹ, con yêu mẹ nhiều!

Thank you to all the friends and family who have been so supportive of my little transition. I have a belly full of great Cali-food memories and a heart full of love from you all to get me through the treachery of Spring in the Big Apple 😉
xx, Huckleberry Kim
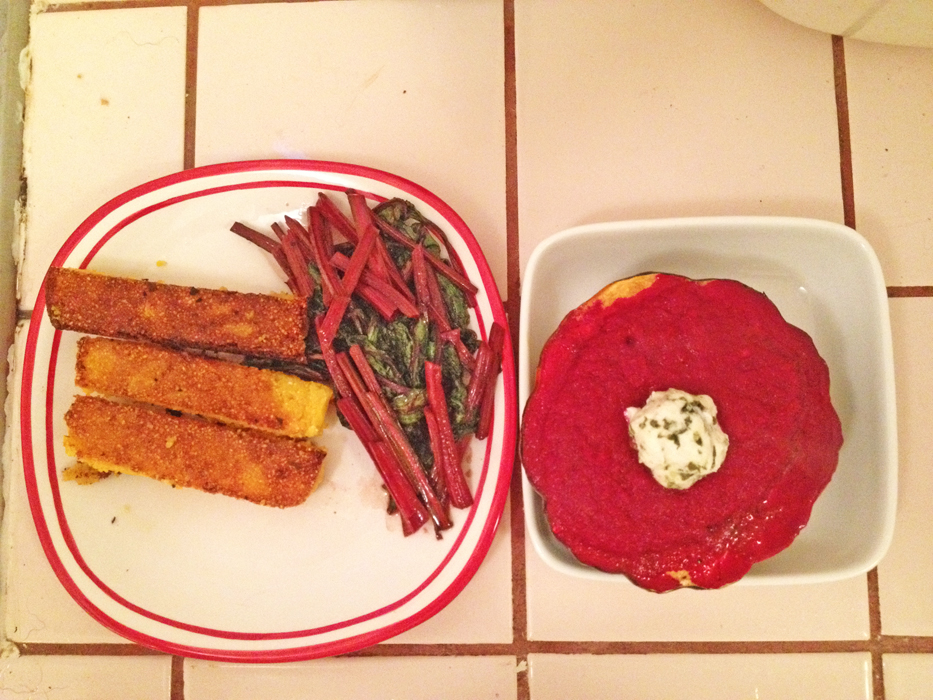
- HuckleberryEats: Apple Beet Soup in Roasted Acorn Squash Bowl + Polenta Fries
 Feeling a bit mid-week-ambitious, I really wanted to make a scrumptious healthy dinner I’d never made before (and, oh boy, did I pay the price burning my hand while cooking this delicious meal).
I love fruits & vegetables and based this meal off of a couple of my all time favorites: apples, beets, acorn squash, and GARLIC. As a result, I made a sweet and spicy pureed apple beet soup, which I served in a roasted garlic acorn squash bowl (with a side of crispy polenta fries!)
OH, DID YOU WANT TO COME OVER FOR DINNER?…okay!
xx, Huckleberry Kim
Feeling a bit mid-week-ambitious, I really wanted to make a scrumptious healthy dinner I’d never made before (and, oh boy, did I pay the price burning my hand while cooking this delicious meal).
I love fruits & vegetables and based this meal off of a couple of my all time favorites: apples, beets, acorn squash, and GARLIC. As a result, I made a sweet and spicy pureed apple beet soup, which I served in a roasted garlic acorn squash bowl (with a side of crispy polenta fries!)
OH, DID YOU WANT TO COME OVER FOR DINNER?…okay!
xx, Huckleberry Kim

 SQUASH & SOUP
First: Cut your acorn squash in half & remove the guts.
Then: Roast your acorn squash with some olive oil and garlic ( I also sprinkled some of my favorite seasonings: salt, pepper, cayenne) on a lower rack at 350 degrees while you prepare the rest of the meal.
Then: In a medium pan, sautée some diced shallots (2) until softened then add your peeled & chopped beets (4 large) and apples (1) – let this cook down for about 5 solid minutes.
Then: Add some salt to taste, about 1 teaspoon of cayenne pepper, and a couple cloves of garlic.
Then: Blend the soup with an immersion blender (food processor or traditional blender)
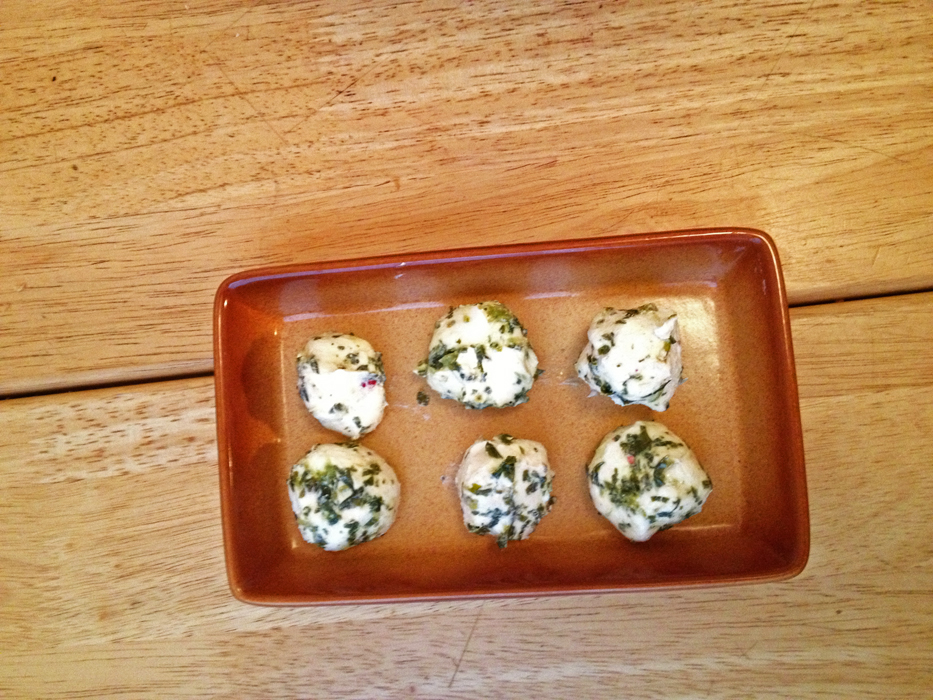
Prepare your chevre (goat cheese) basil balls by rolling your fresh chevre in finely minced basil.
Finally, remove your perfect roasted squash/garlic from the oven & loosen up some of the squash flesh before adding a ladle full of soup and a basil-chevre ball.
SQUASH & SOUP
First: Cut your acorn squash in half & remove the guts.
Then: Roast your acorn squash with some olive oil and garlic ( I also sprinkled some of my favorite seasonings: salt, pepper, cayenne) on a lower rack at 350 degrees while you prepare the rest of the meal.
Then: In a medium pan, sautée some diced shallots (2) until softened then add your peeled & chopped beets (4 large) and apples (1) – let this cook down for about 5 solid minutes.
Then: Add some salt to taste, about 1 teaspoon of cayenne pepper, and a couple cloves of garlic.
Then: Blend the soup with an immersion blender (food processor or traditional blender)
Prepare your chevre (goat cheese) basil balls by rolling your fresh chevre in finely minced basil.
Finally, remove your perfect roasted squash/garlic from the oven & loosen up some of the squash flesh before adding a ladle full of soup and a basil-chevre ball.
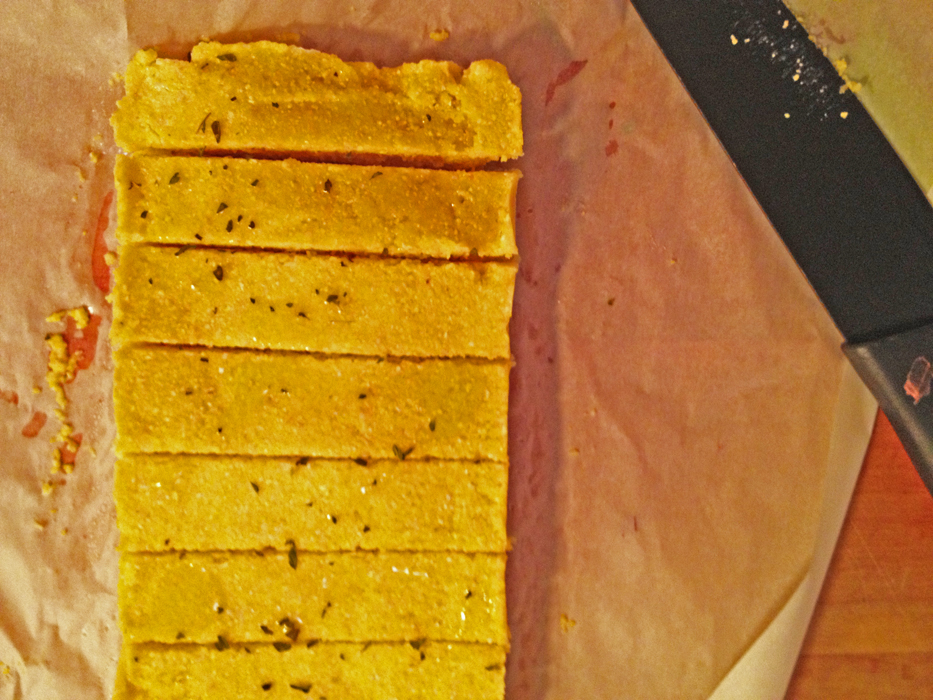 POLENTA FRIES
First, prepare your favorite creamy polenta recipe!
Then, pour the creamy polenta into a parchment lined pan & refrigerate (for about 1 hour).
Then, cut the solidified polenta into fries (that should look around the size of the french toast sticks once served in elementary school cafeterias [mine at least!])
Heat up a pan with some oil & fry each side of the polenta fries until crispy golden brown
ENJOY!
POLENTA FRIES
First, prepare your favorite creamy polenta recipe!
Then, pour the creamy polenta into a parchment lined pan & refrigerate (for about 1 hour).
Then, cut the solidified polenta into fries (that should look around the size of the french toast sticks once served in elementary school cafeterias [mine at least!])
Heat up a pan with some oil & fry each side of the polenta fries until crispy golden brown
ENJOY!
Huck Eats!