- COMING HOME IS ALWAYS REJUVENATING
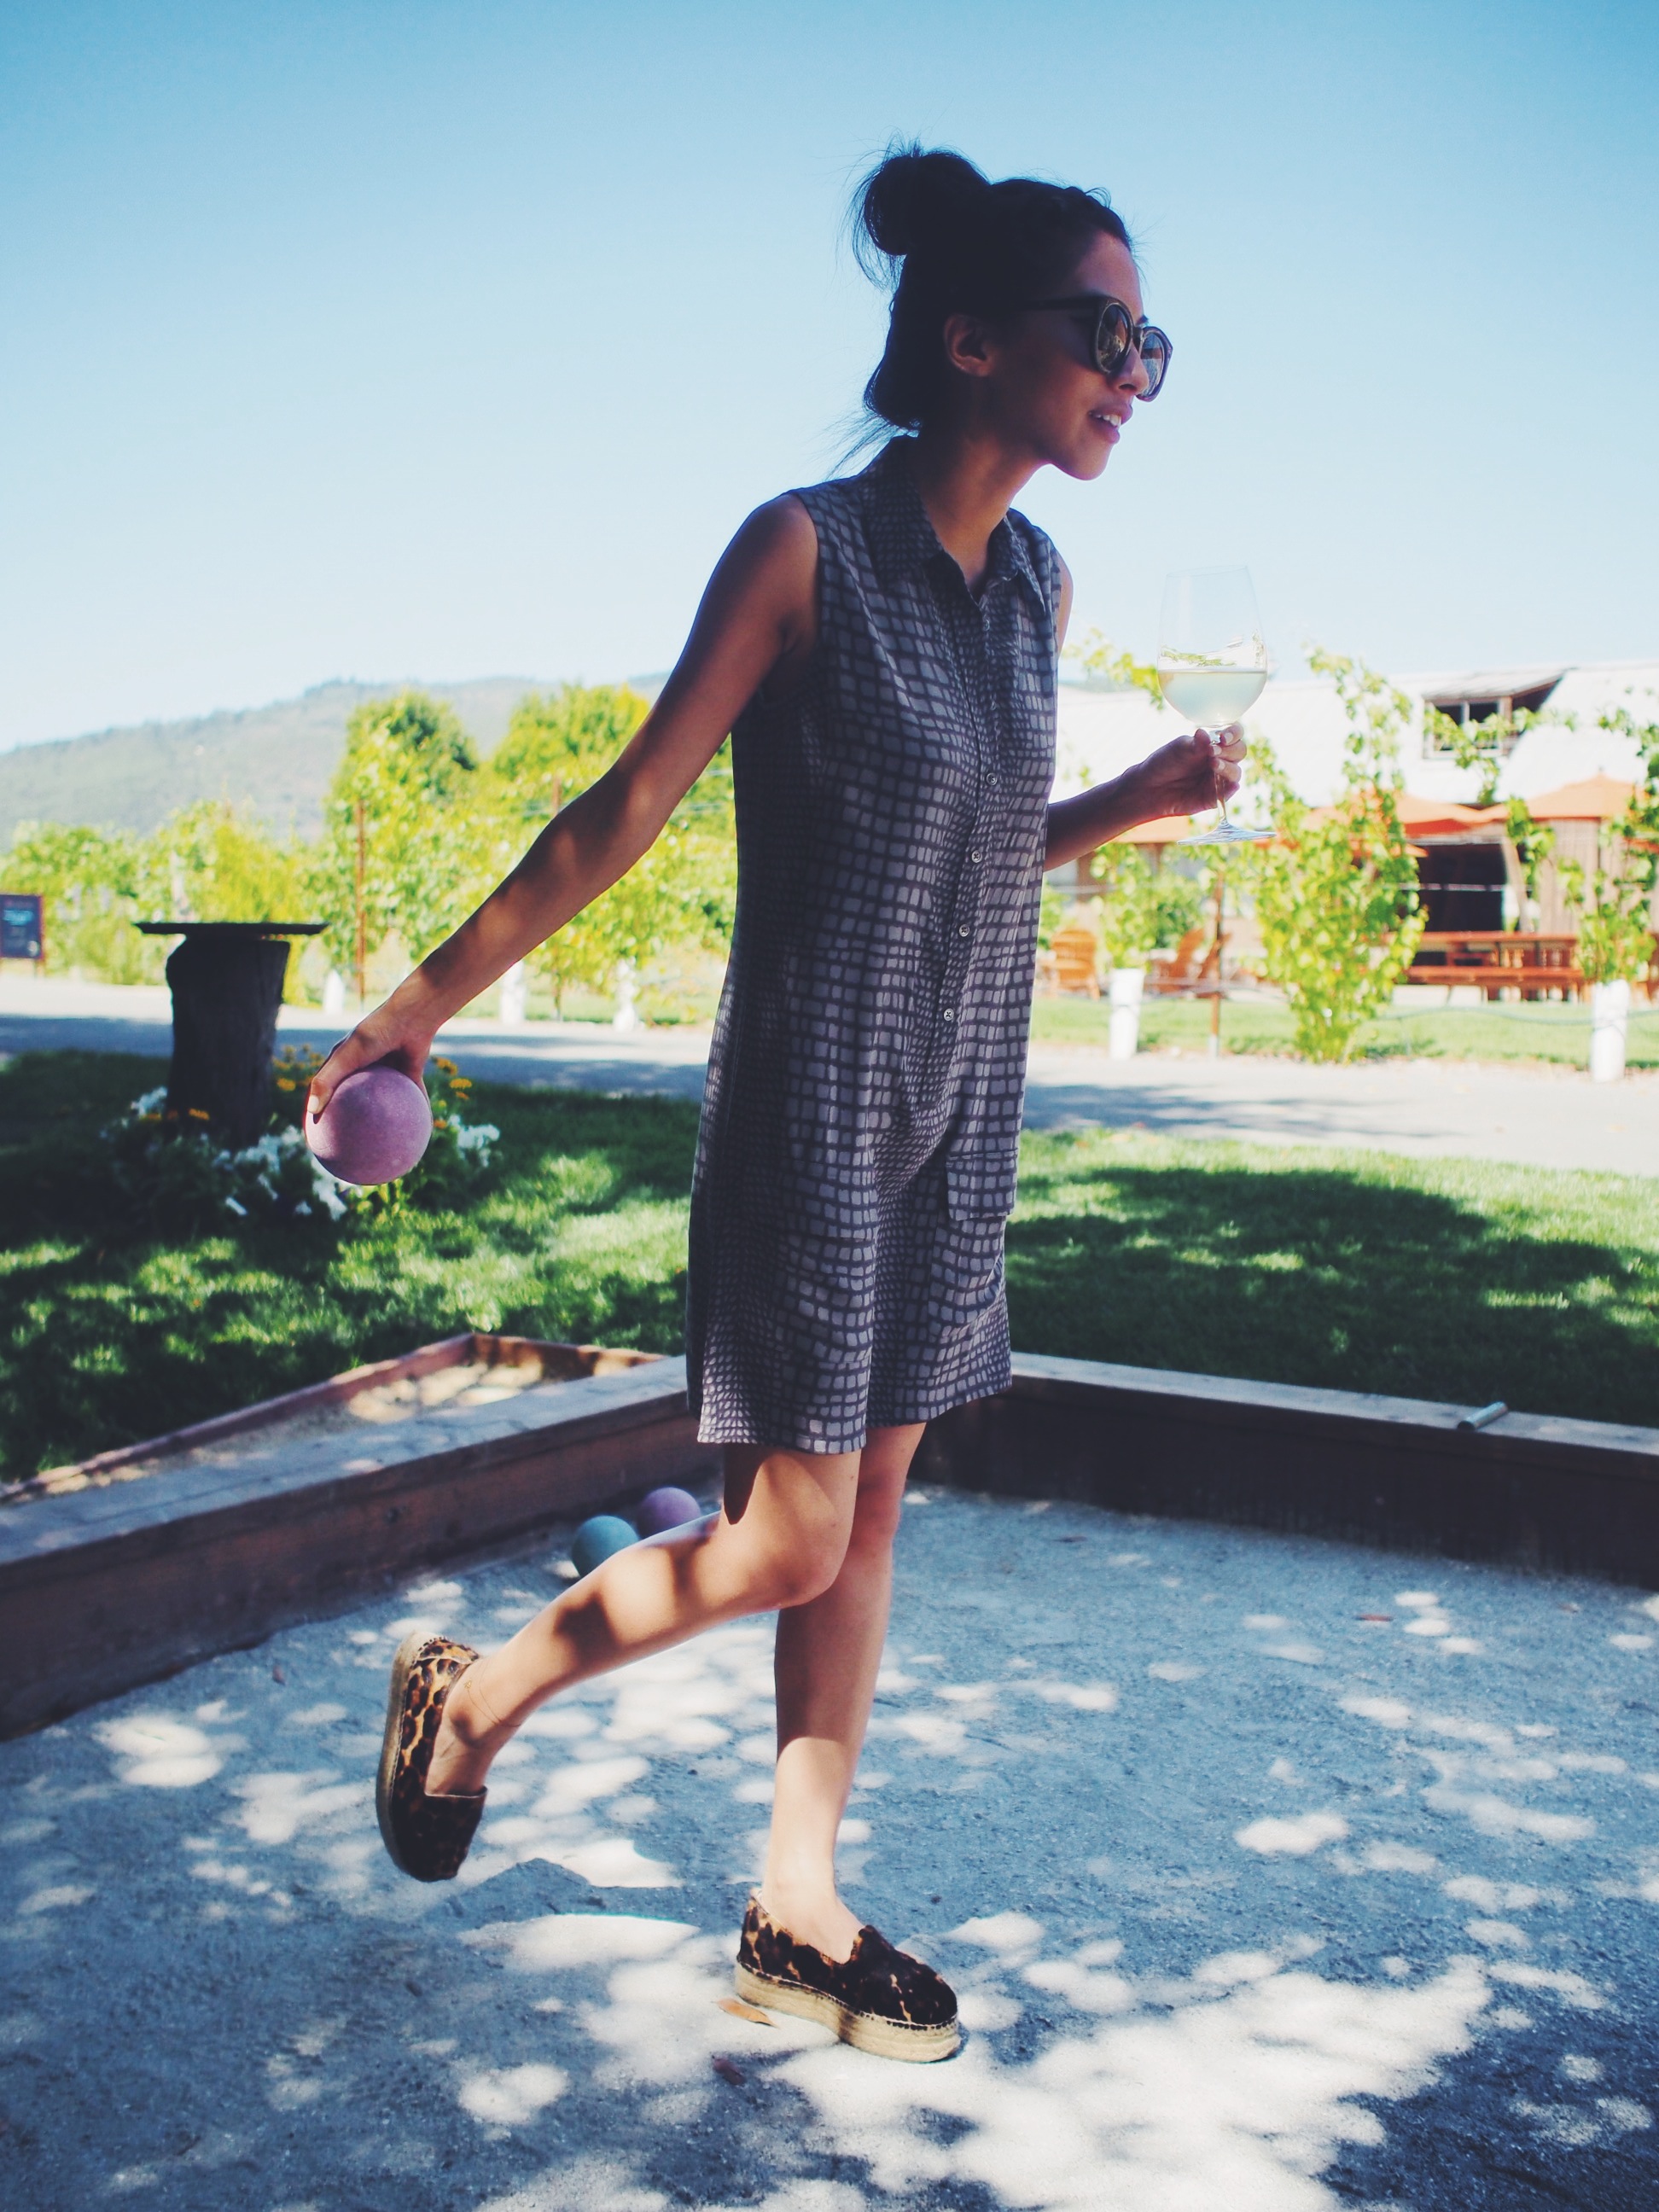
- Wearing: silk sleeveless Lucida shift dress by Equipment (similar in leopard, red crocodile, cotton chambray)


- This song will change your life:
| boy don’t hurt your brain |

xx,
Huckleberry Kim

| boy don’t hurt your brain |
xx,
Huckleberry Kim
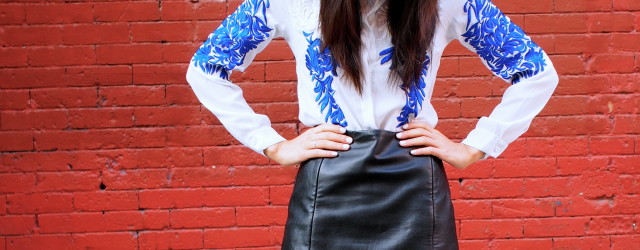
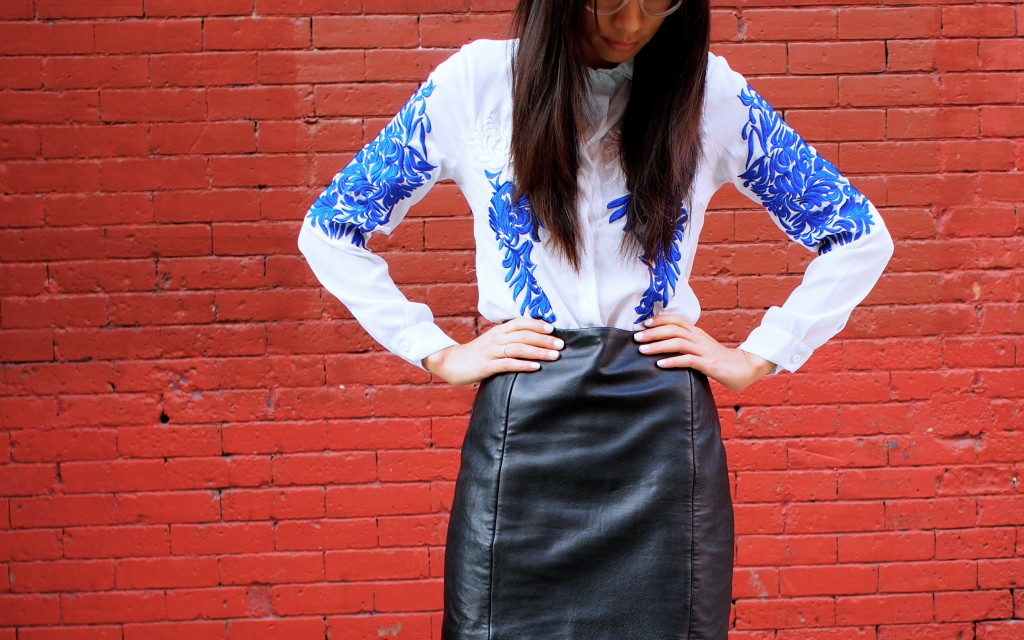
I’m a practical gal; though I like small comforting luxuries on the daily. This is why silk blouses are my year round staple – because sleeveless, short, or long sleeved, I love being draped in soft luxurious silk. This signature long sleeve from Equipment is one of my best old time friends.

I also adore this detailed delight that my friend Christine picked up for me in Hong Kong:

Being in New York now, I’m trying to challenge myself to experiment away from my most-often-choices – e.g. everyday silks, only uni soba, and the same jams on repeat [I’ve been spending the last few days on the Sam Smith bandwagon (thanks, Jack) because honestly: voice of an angel] And I’m definitely open to recommendations to see if I can’t find myself some new oftens.
xx, Huckleberry Kim
#huckleberrygrooves
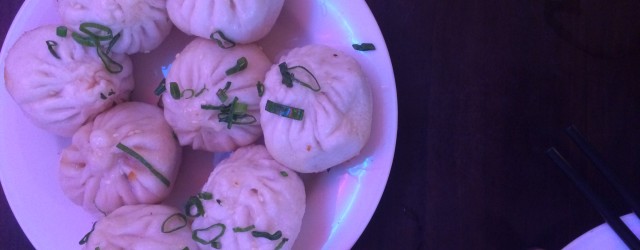
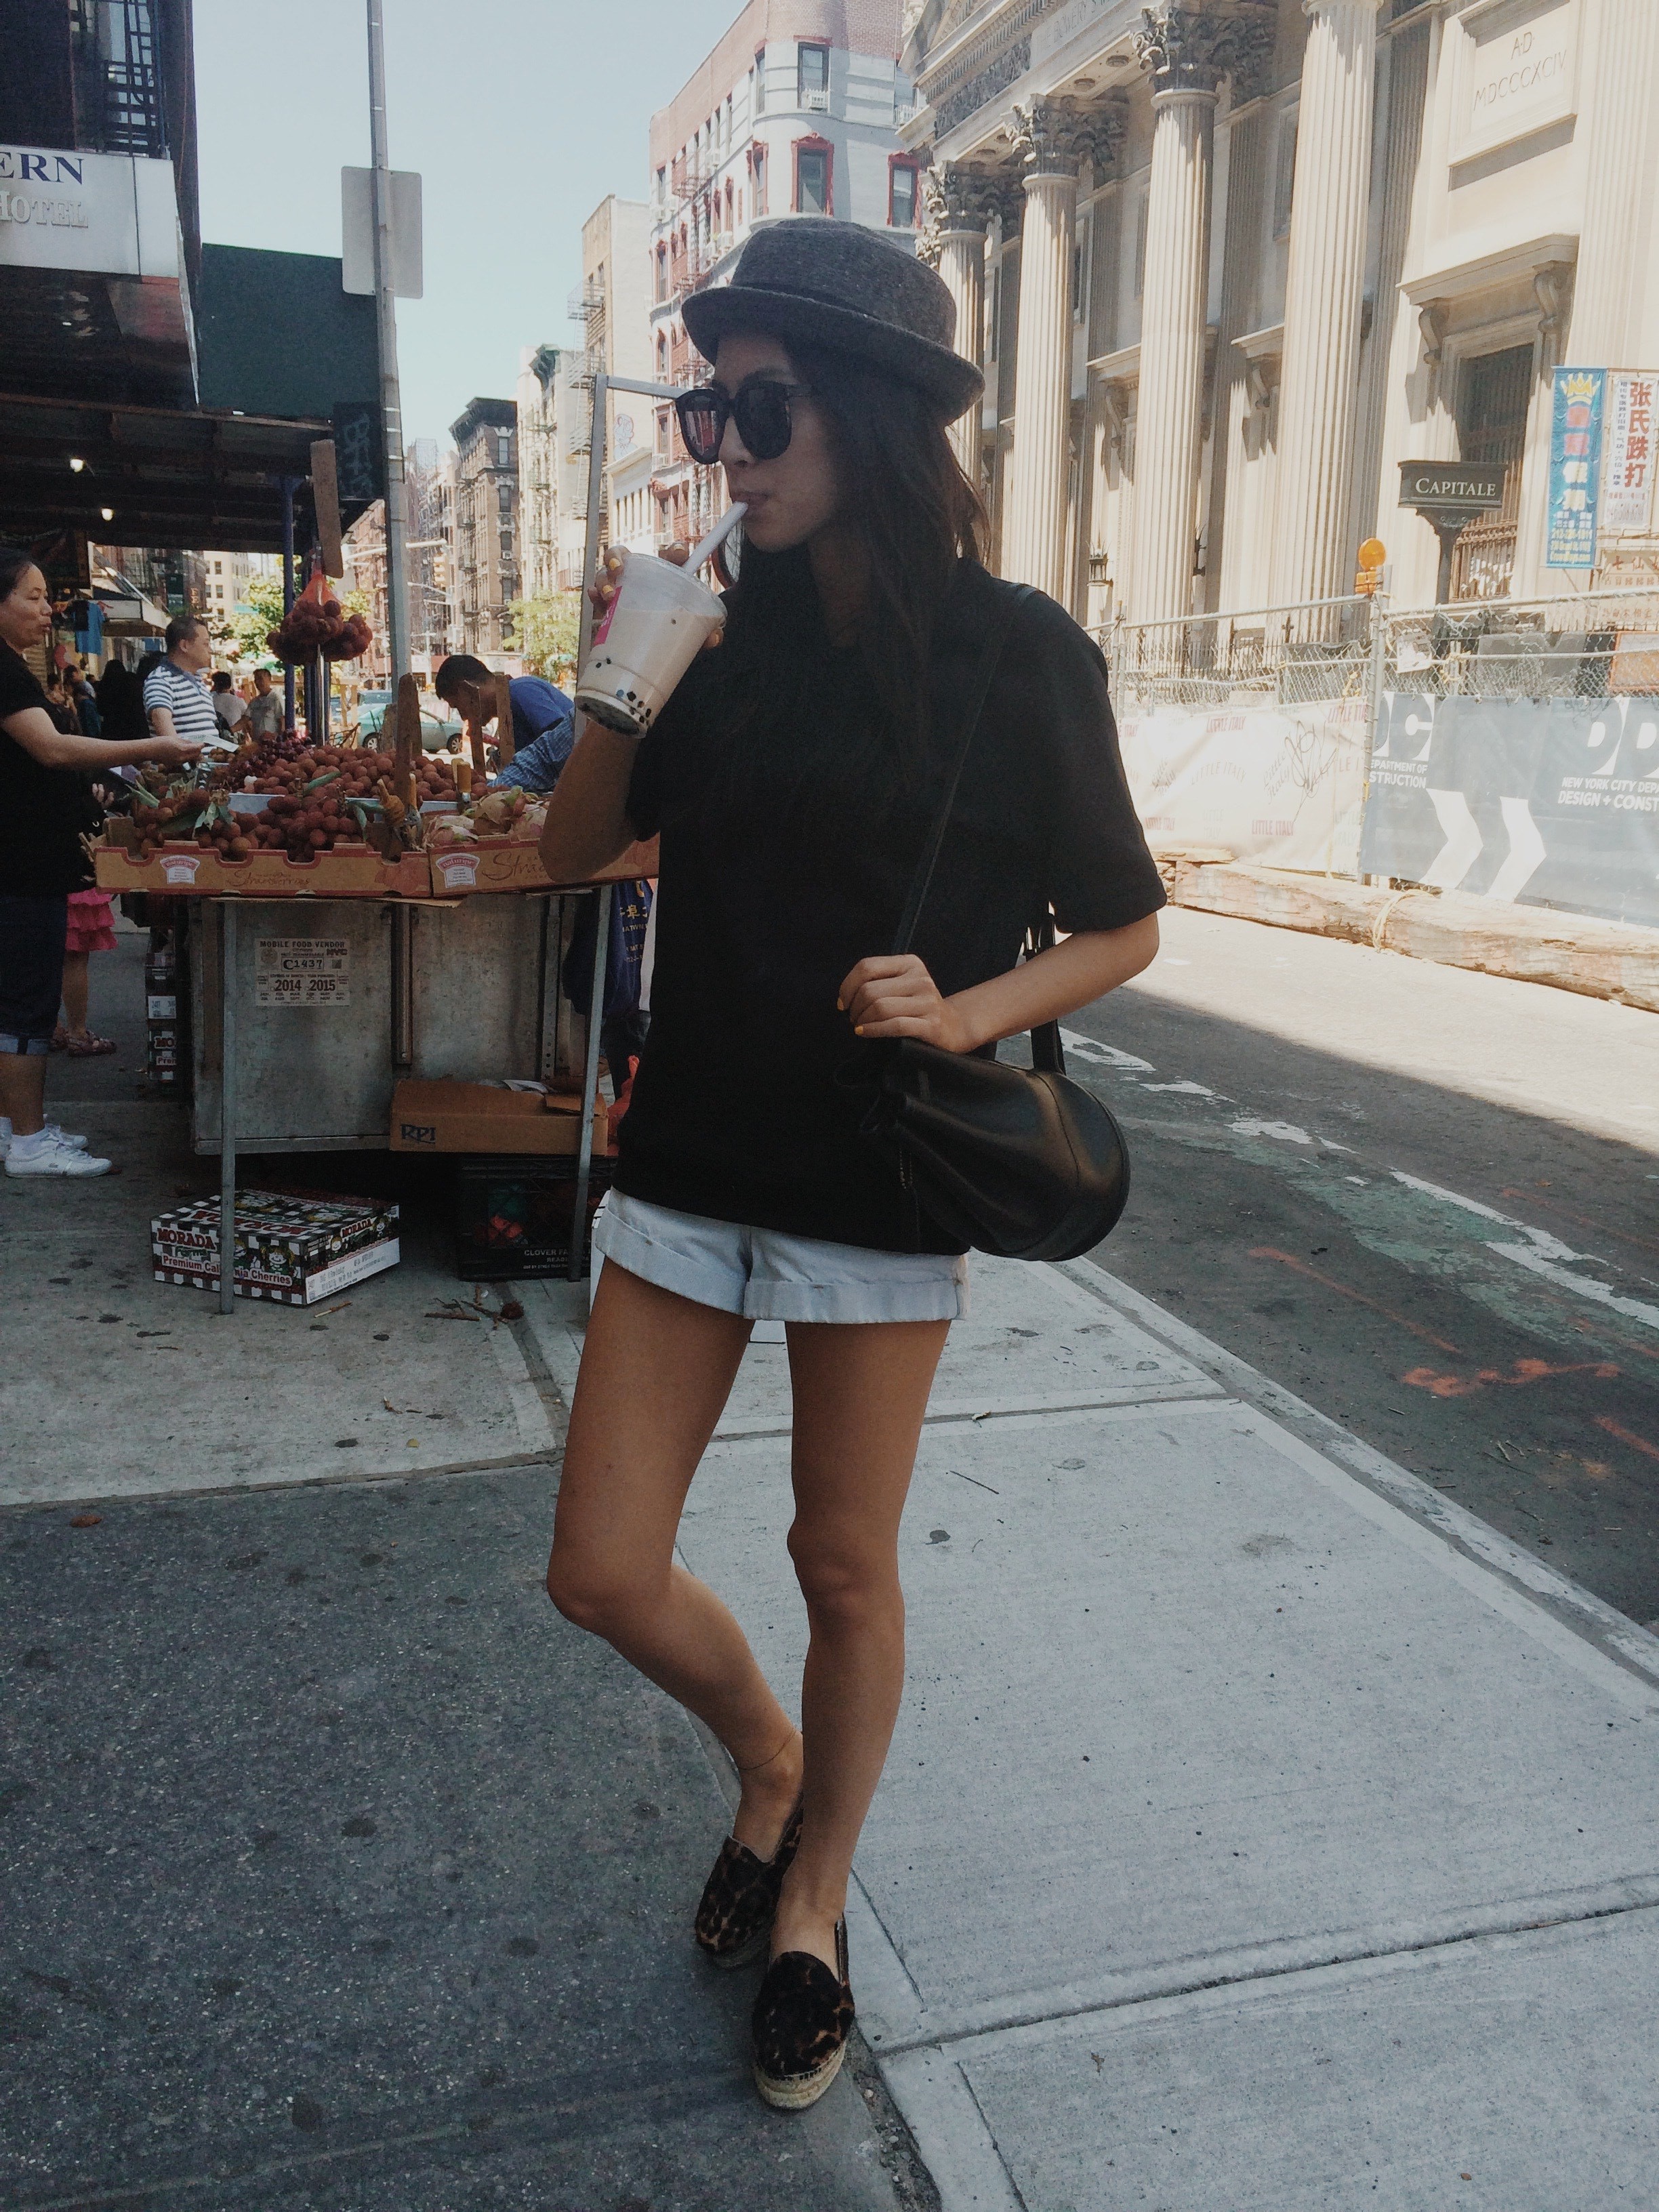
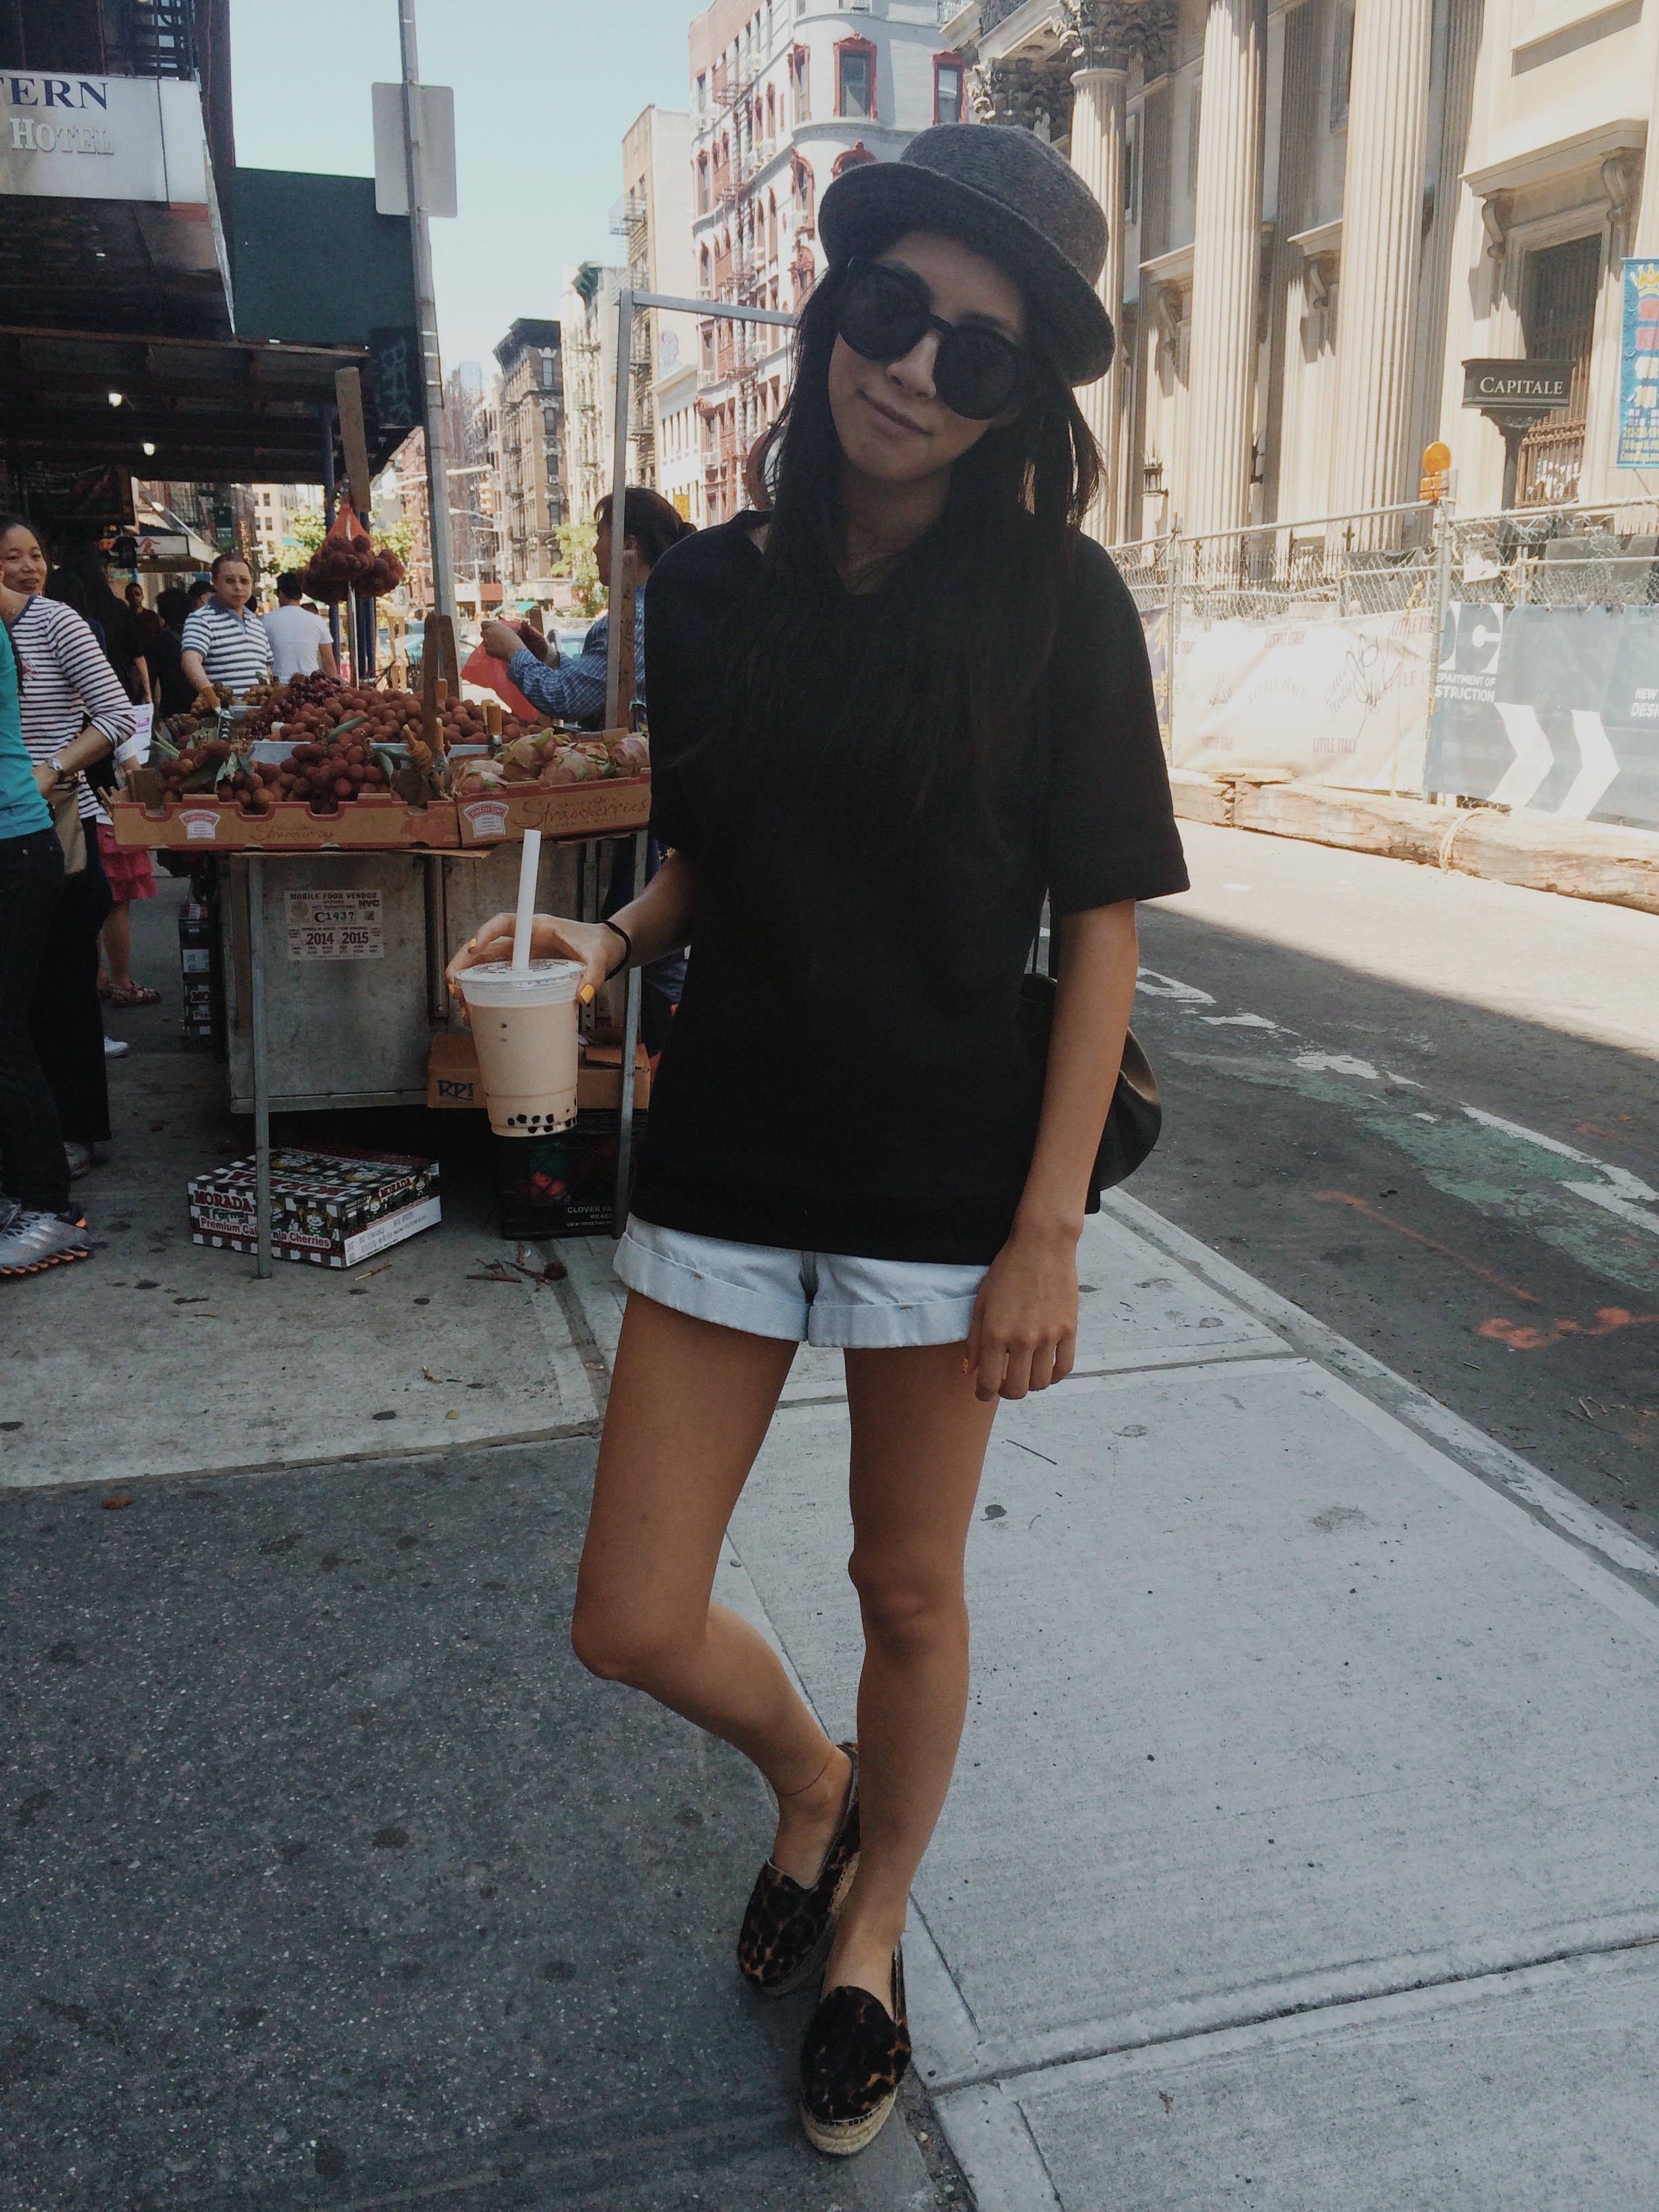
I like spending Sunday mornings in Chinatown eating xiao long bao (shanghai soup dumplings). Today, Shanghai Cafe was the jump off. First of all, I love that the menu translates them so literally as “steamed tiny buns” – both the pork and pork + crab varieties are delicious. Also, the fried version, “fried tiny buns” were just delightful and a nice variation of flavour and texture. I’ll definitely be back.
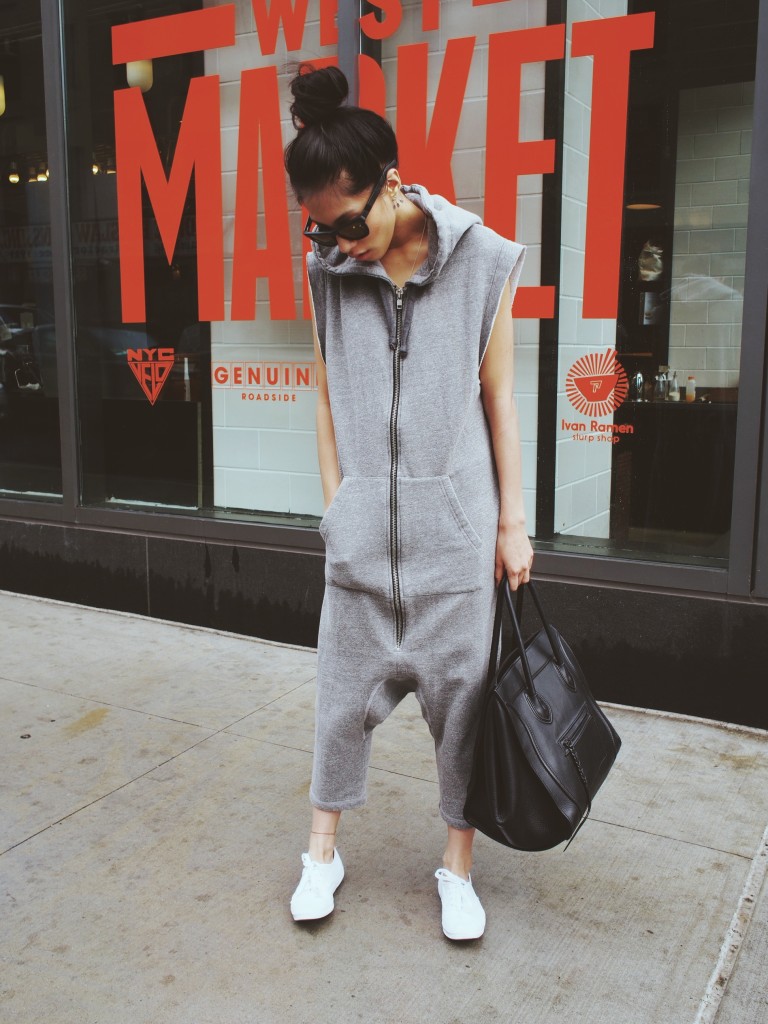
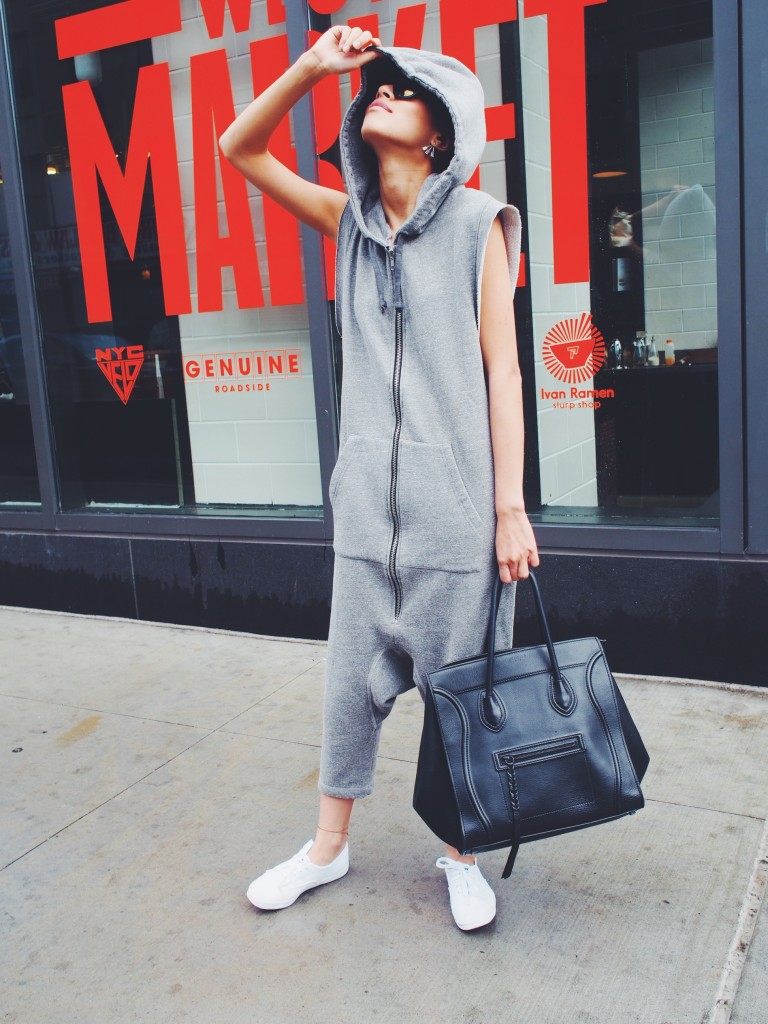
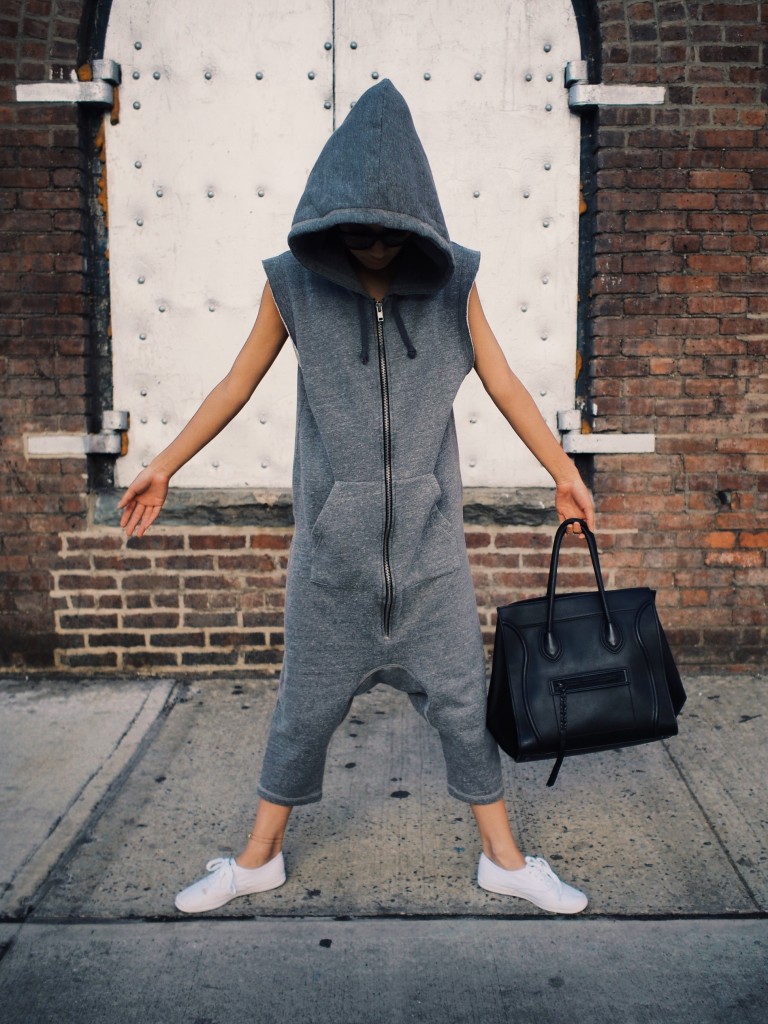
On these xiao long bao Sunday excursions, I like to plan ahead for the dumplings that will fill my belly – no body con dresses here, y’all. I’m all about the short sleeve sweatshirt and loose-fitting shorts. (Similar: by James Perse | by Vince on sale! | by Rachel Roy on sale!)
The short sleeve sweatshirt from Everlane (XS in black pictured here) is just oversized enough for me to eat 2 bamboo trays worth of xiao long baos without showing any tummy-dumpling-bulge. [Sidenote: NYC, if you haven’t yet, go check out the Everlane Open House, in SoHo @ 199 Lafayette, this week. Pick up some white tees and try on the Summer Shirt Collection! I’m already planning which denims I need, duh.]
Porkpie Hat old (similar: Free People | Goorin Bros. | Goorin Bros. )

What’s an excursion to Chinatown without a Milk Tea Boba for dessert, right? (Sidenote: Dear Purple Kow SF D4, I miss you.)
What’s your favorite Sunday indulgence outfit?
xx,
Huckleberry Kim

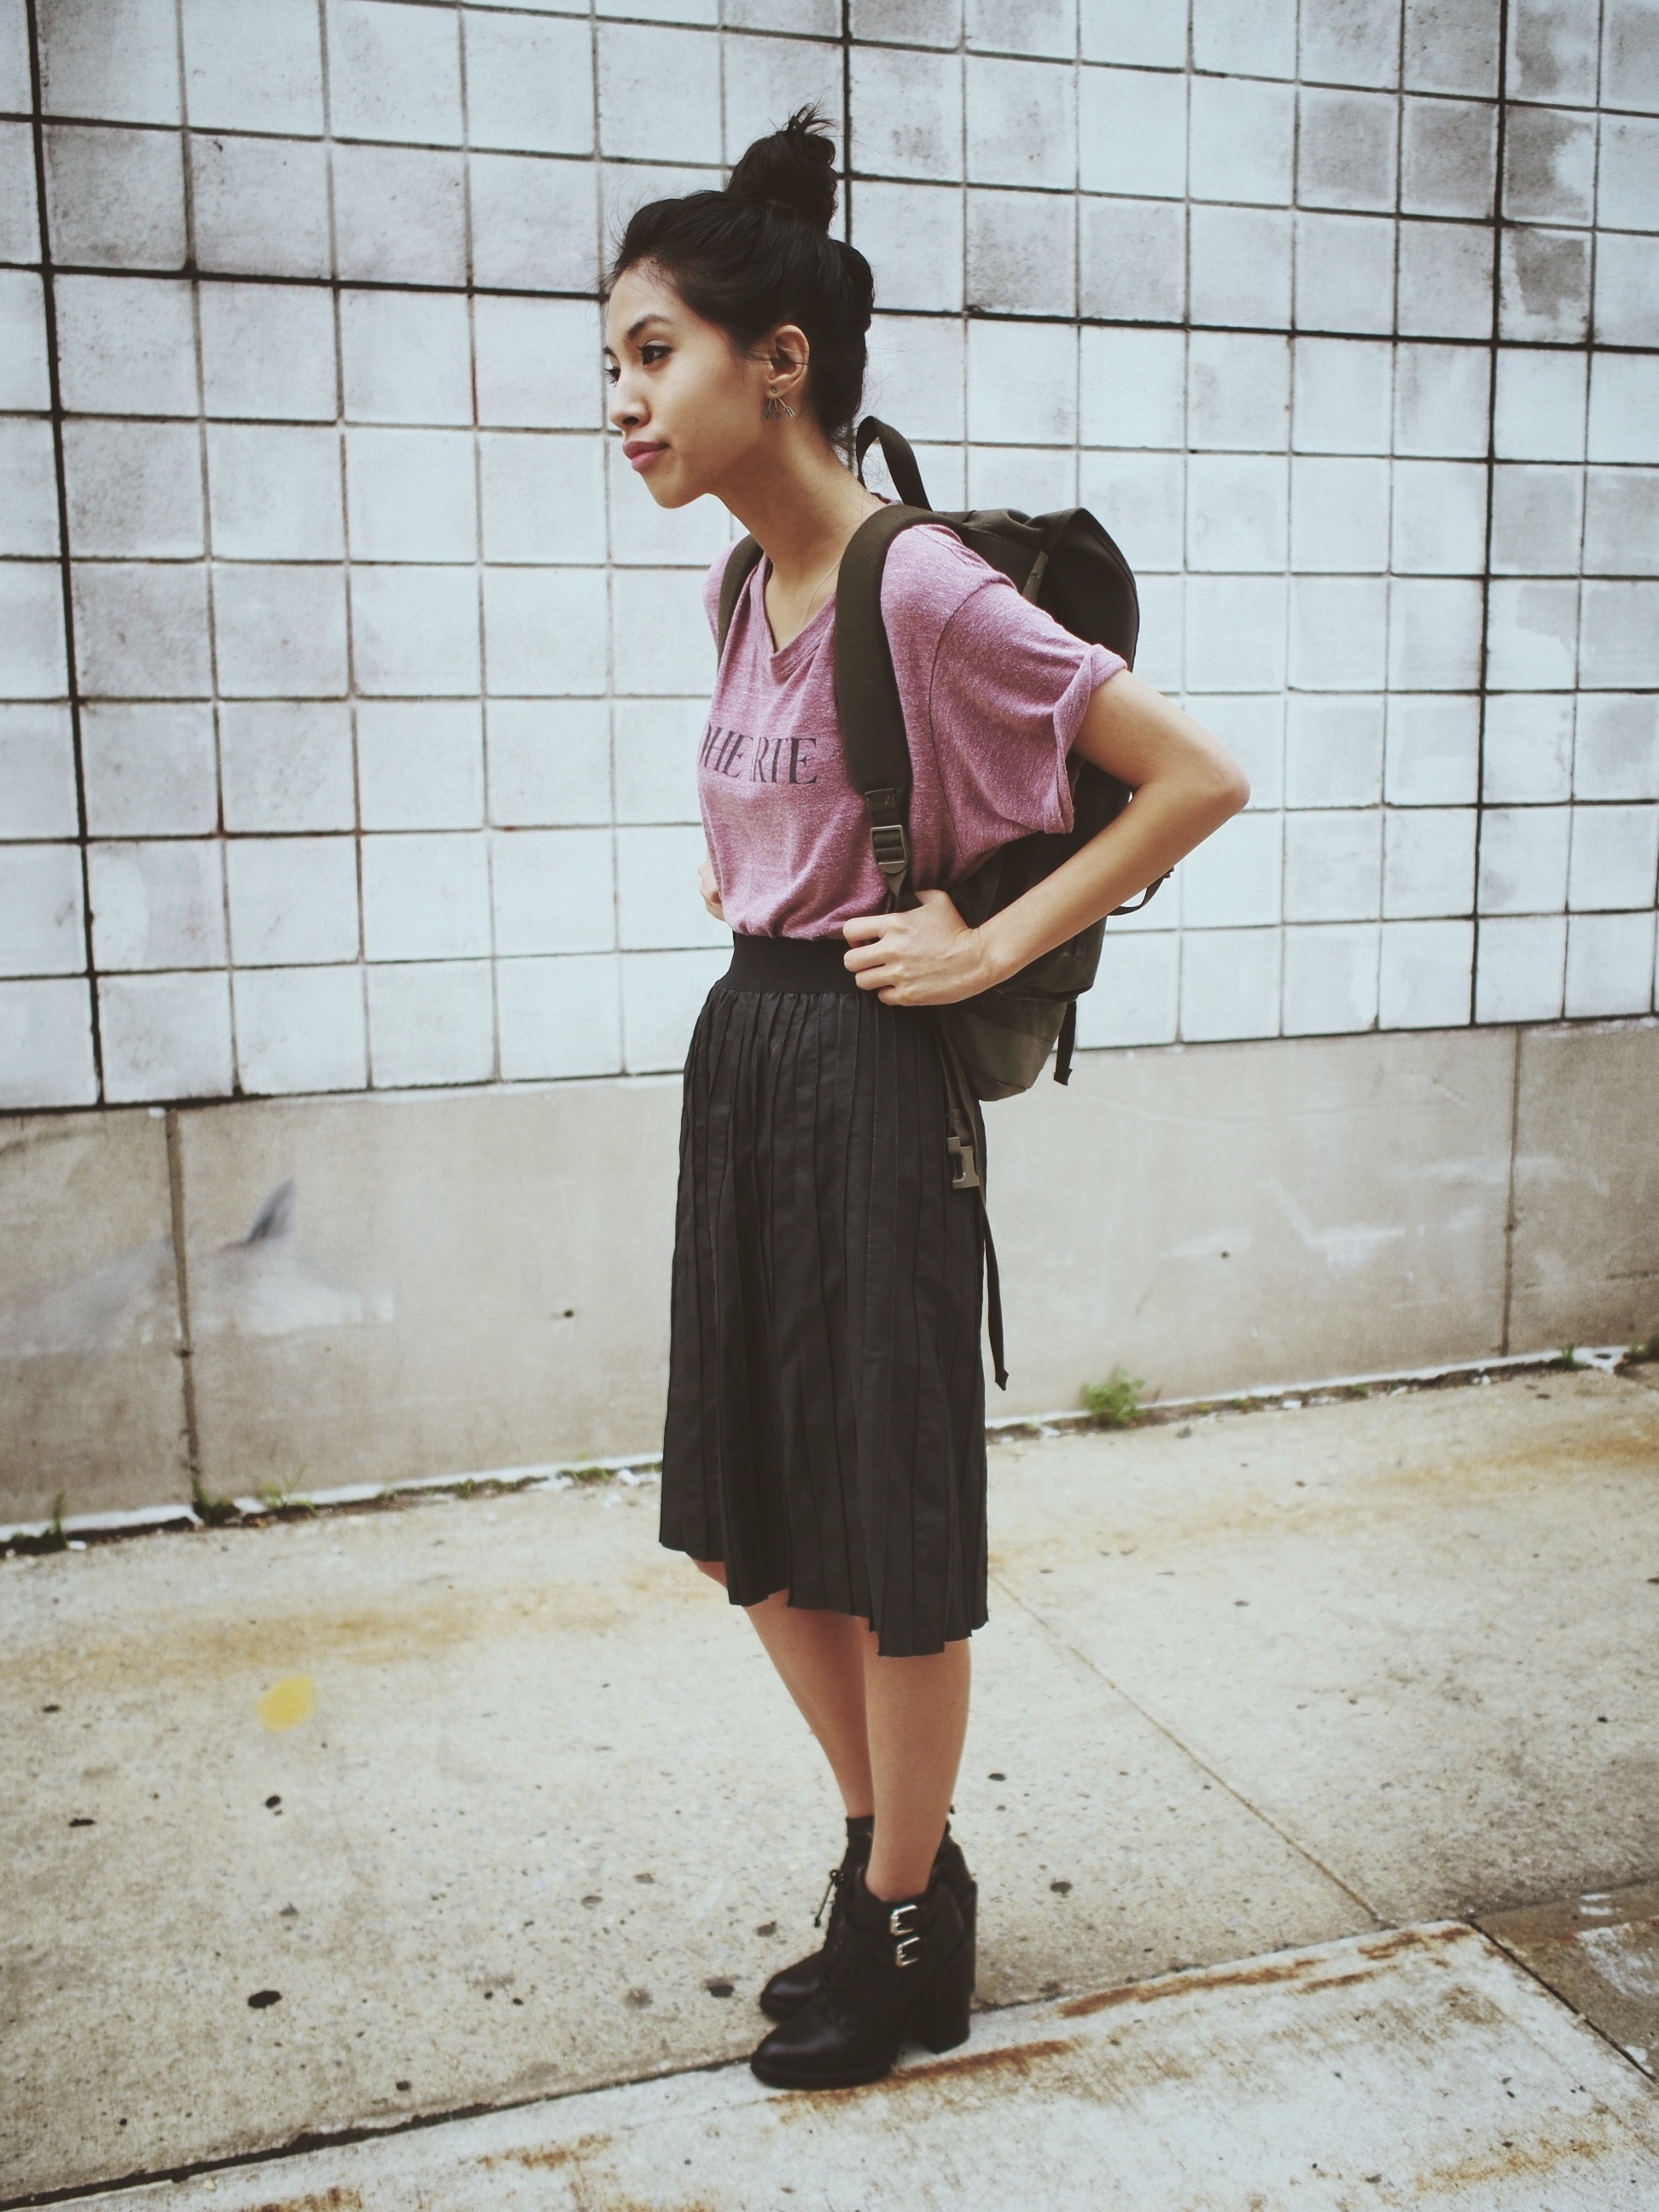
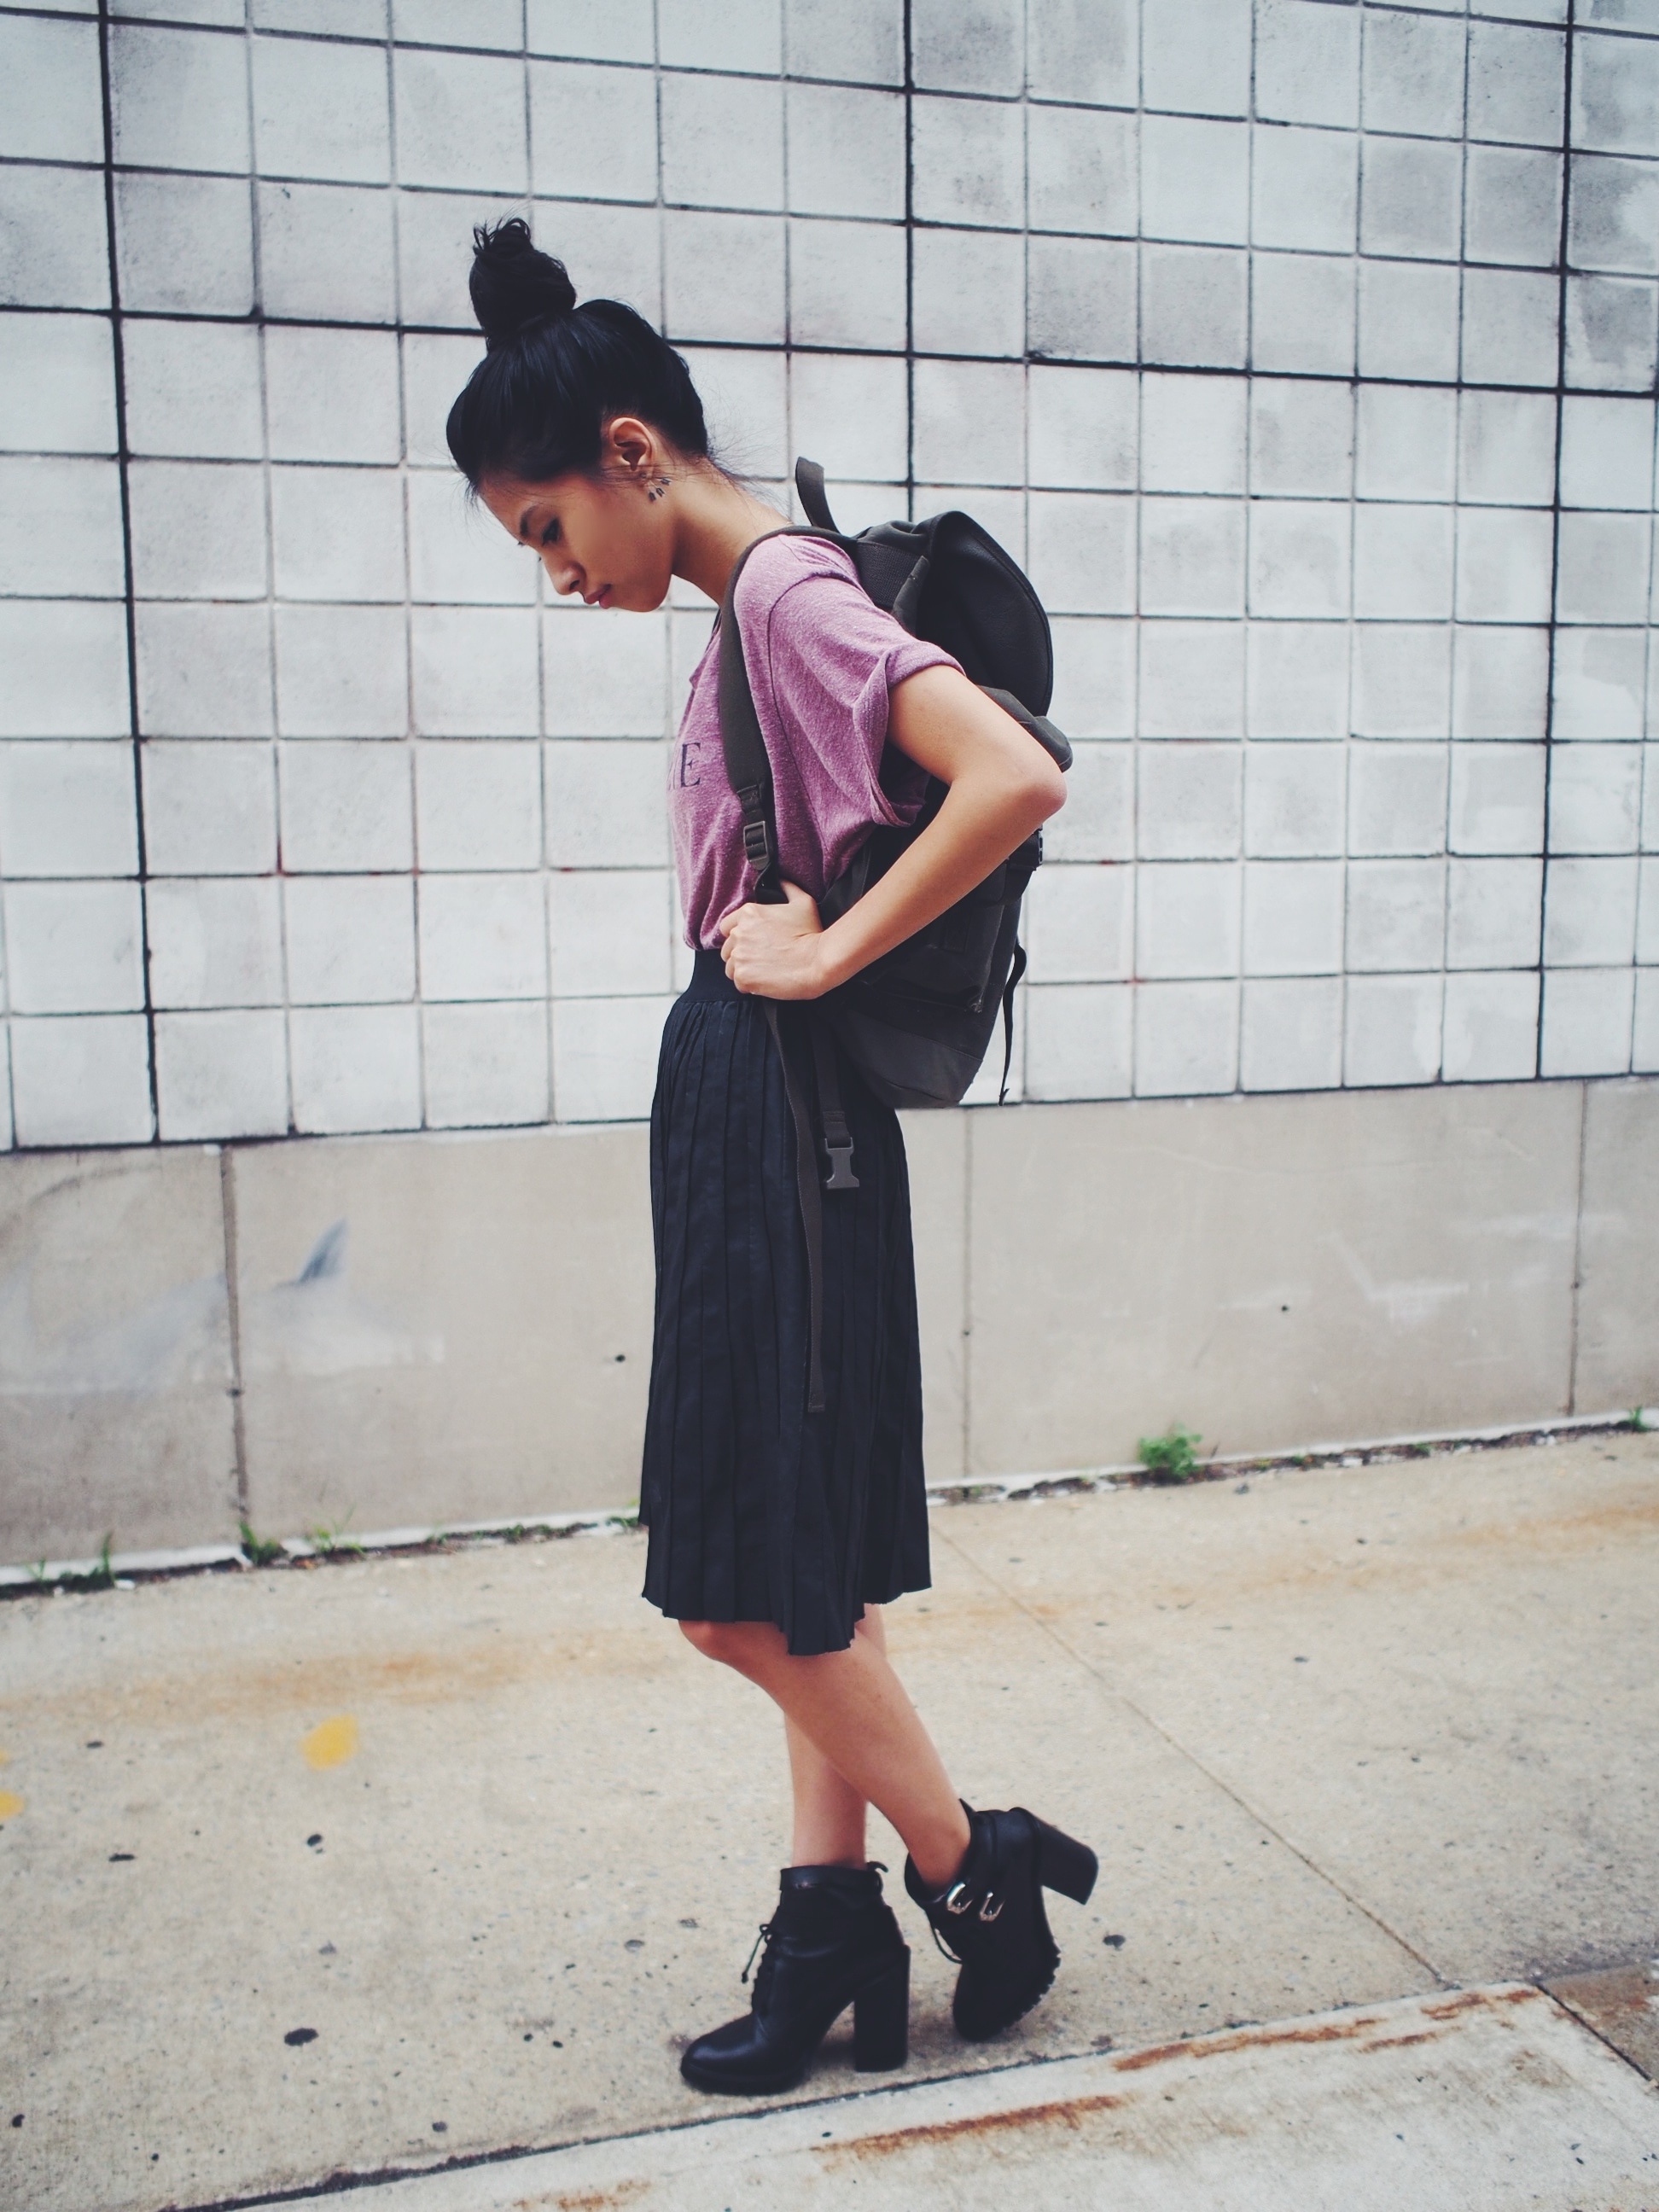
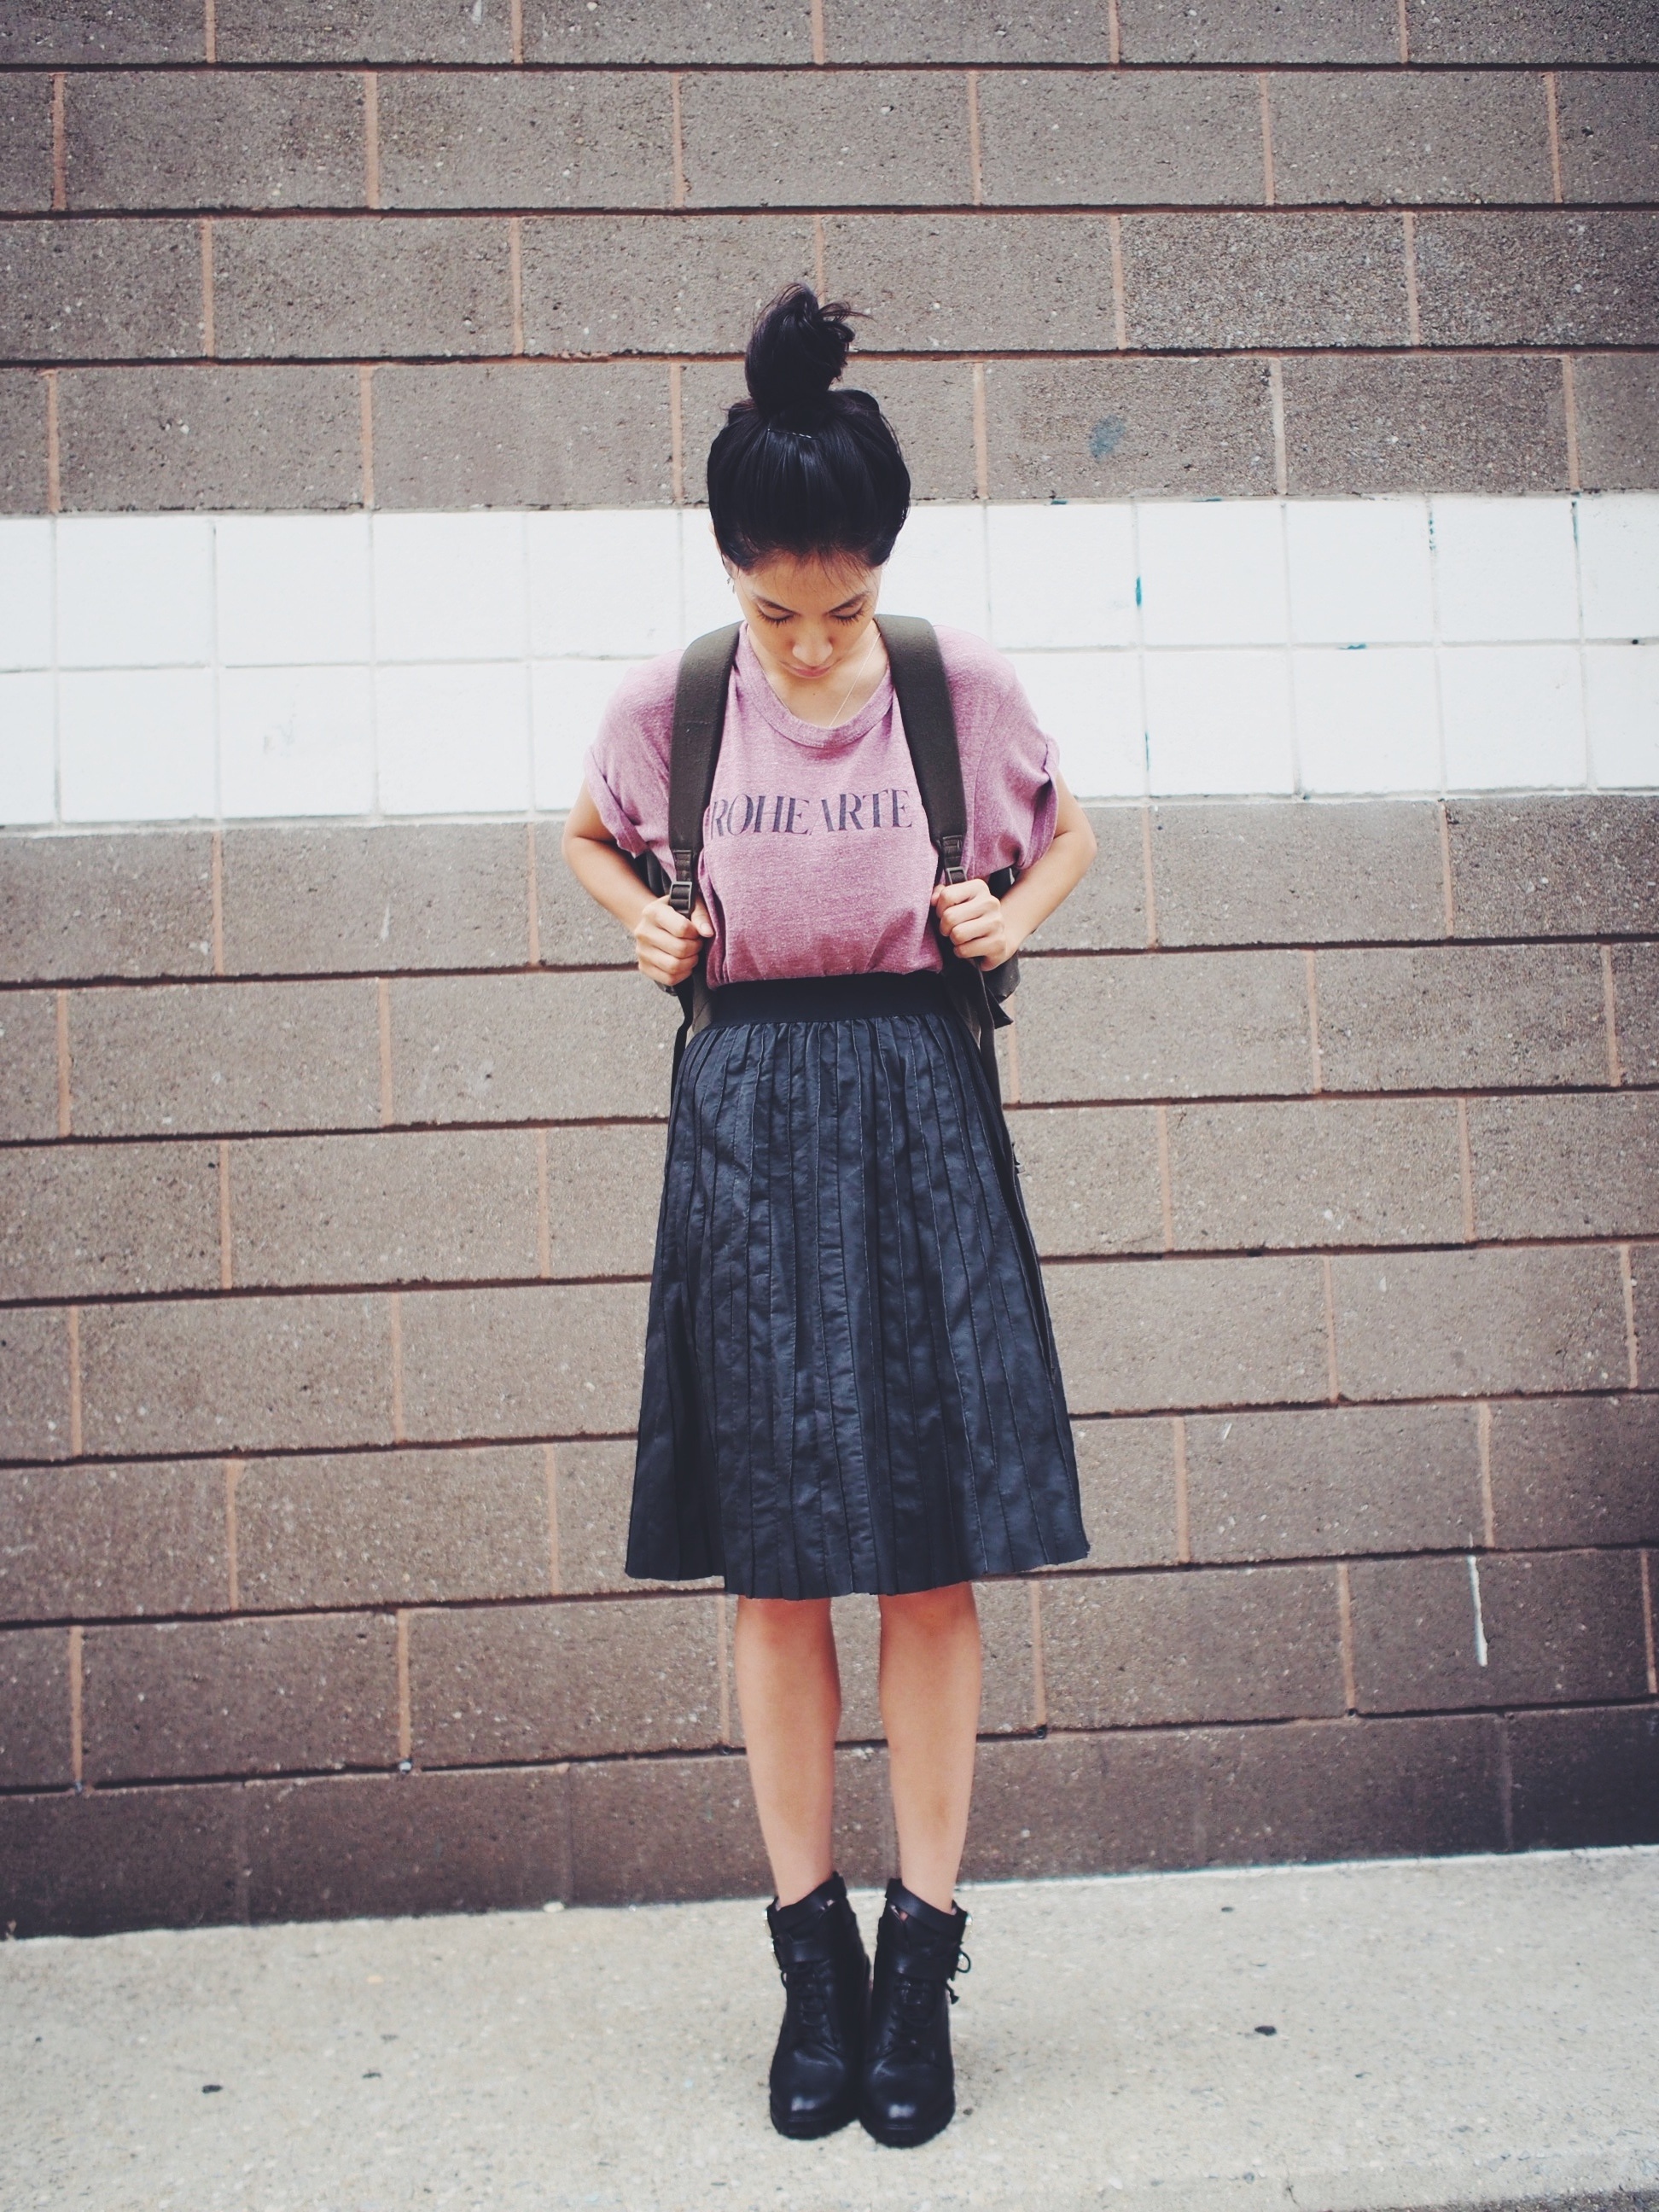
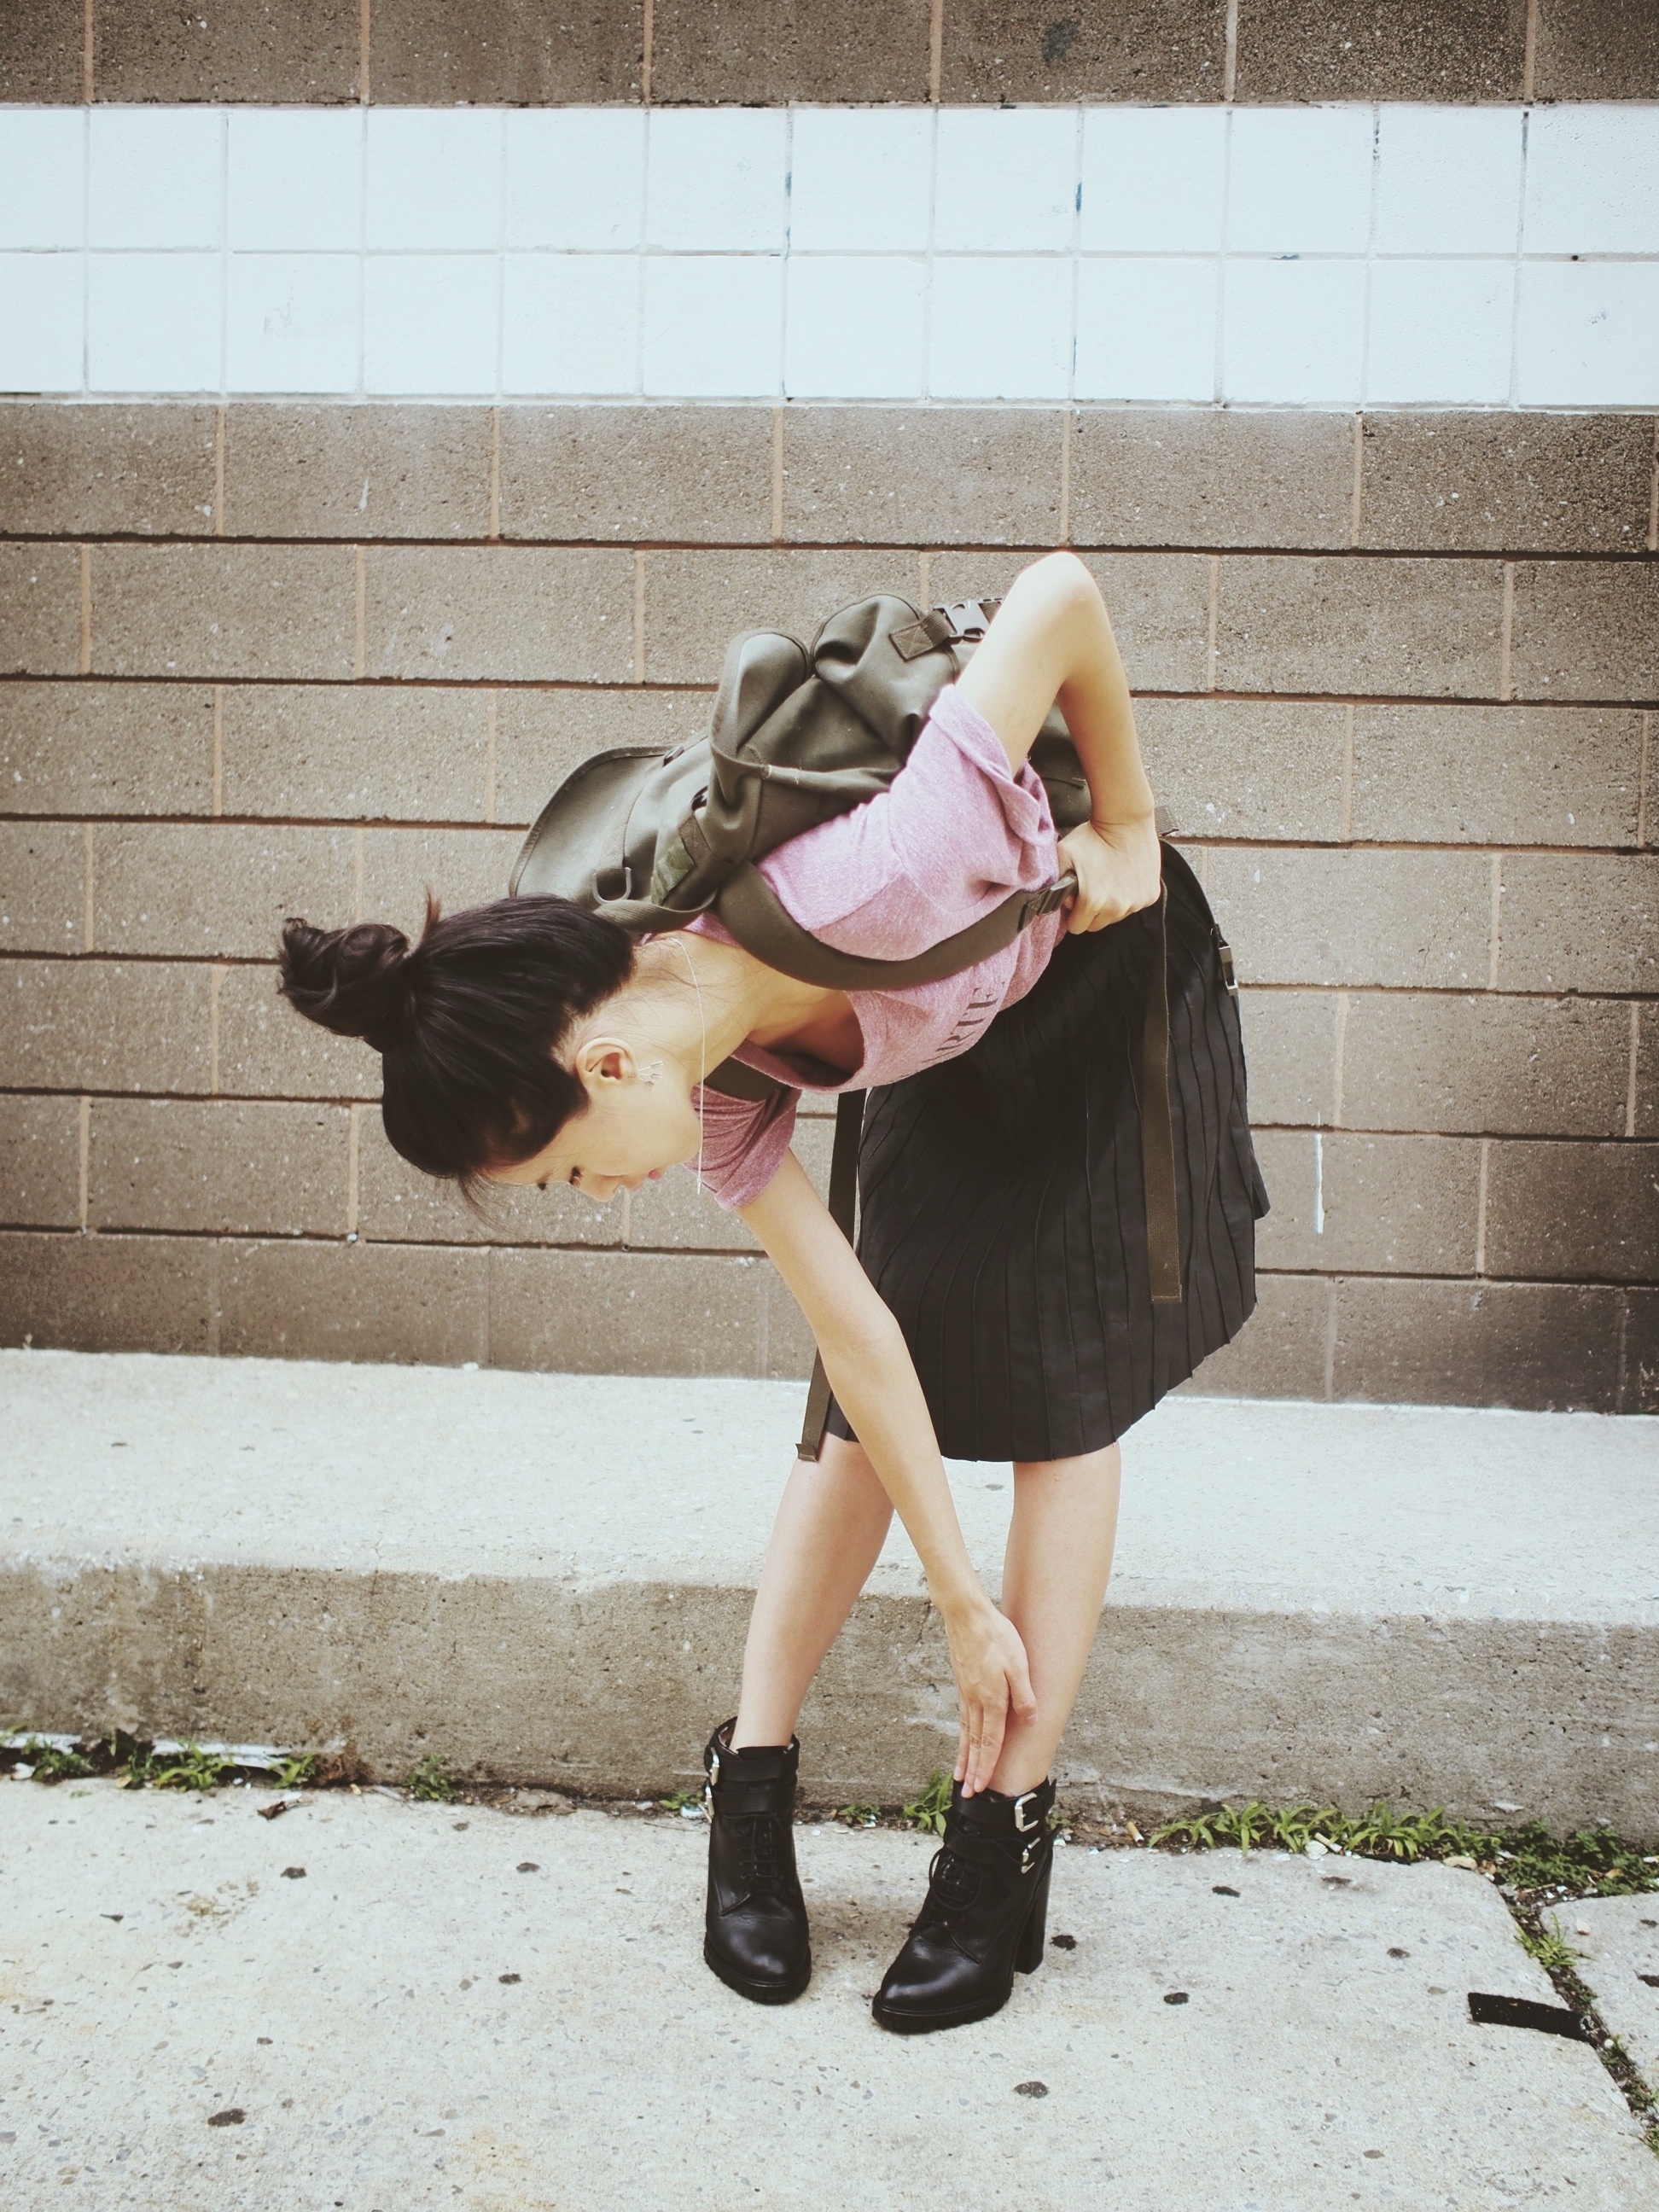
| Vintage surplus backpack (similar following) | ASOS skirt old (similar) | “ROHEARTE” by Rodarte X Opening Ceremony old (similar following) | Zara boots old (similar following) |
xx,
Huckleberry Kim

| wintermute by westward leaning | archer by pamela love (similar with spikes) |
| classic keds | hooded short romper by oak |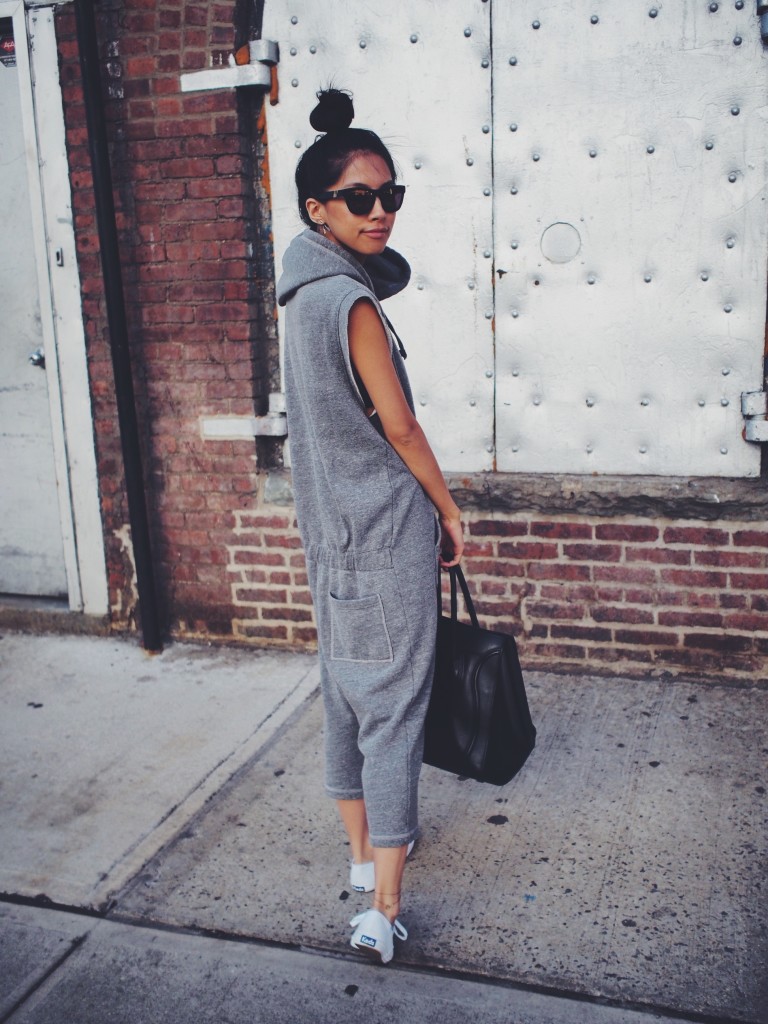

xx,
Huckleberry Kim
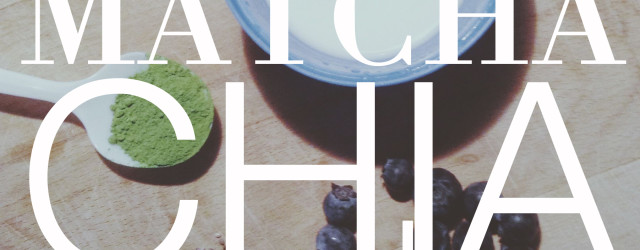
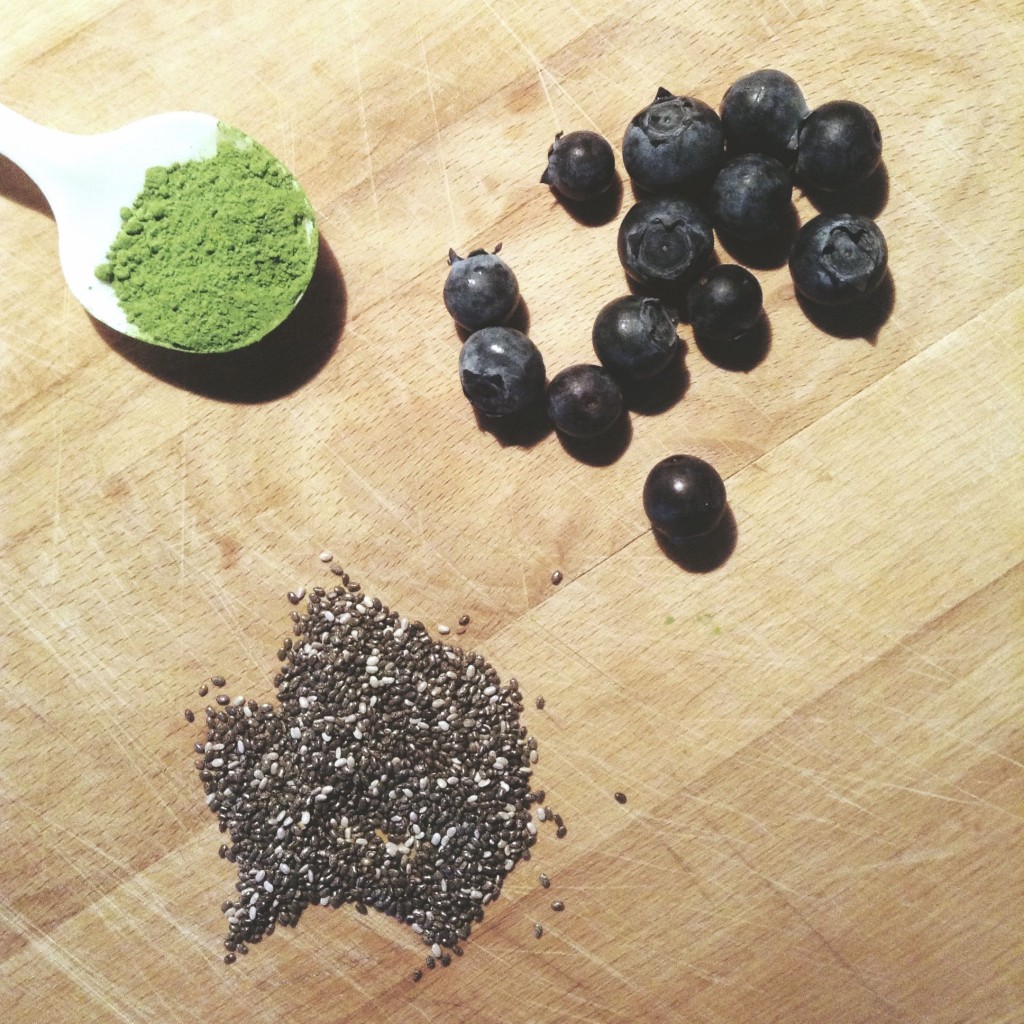
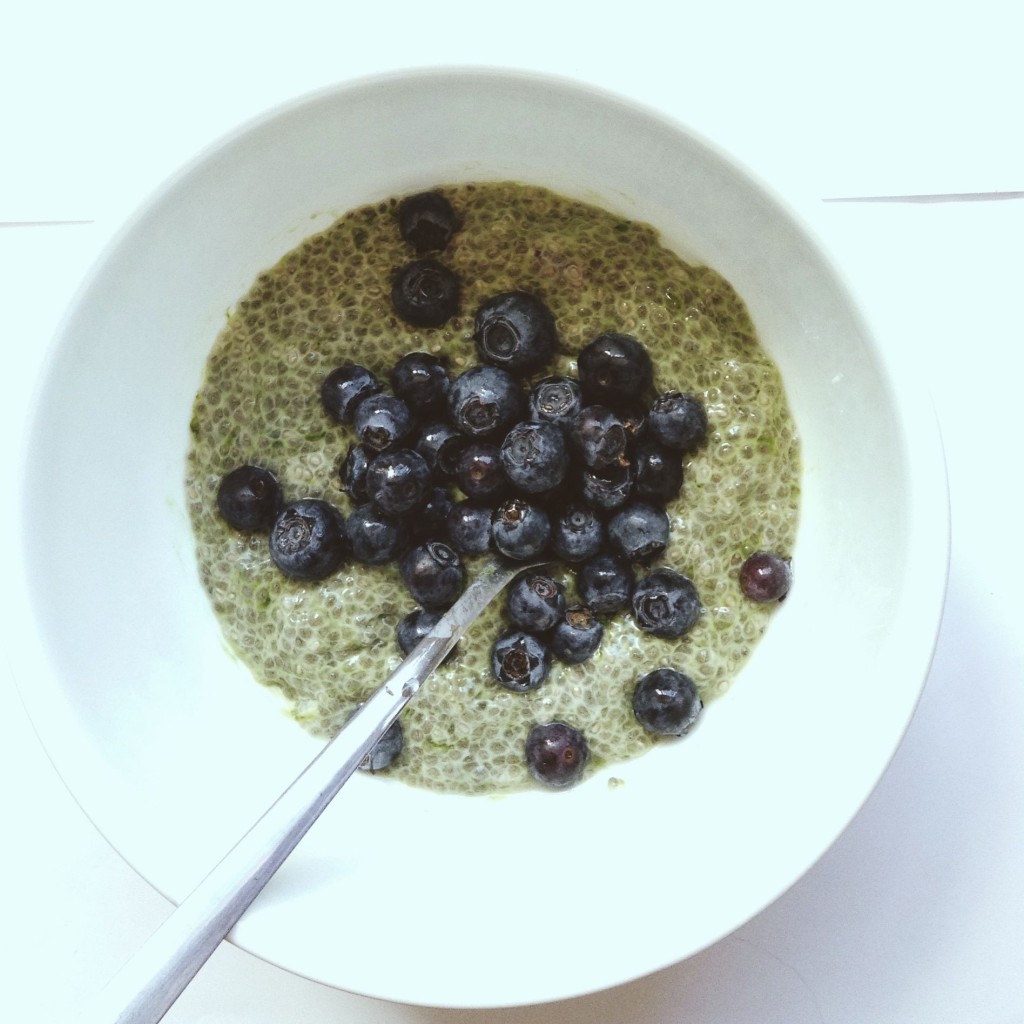
CONFESSION: With warmer weather approaching, I’ve been indulging in too much ice cream lately. So I’ve been looking for some healthier, cool, sweet, and refreshing options and hath concocted the following coconut match chia seed pudding. It’s so easy, lightly sweetened with a smidgen of honey and perfectly topped with fresh organic blueberries! Check out the easy recipe below:
xx,
Huckleberry Kim

Just revisiting being 9 years old.
As a child, I surely did not appreciate my mother’s trailblazing style & kindling foresight enough. Mother used to crown-braid my hair almost every day when I was a child – especially for soccer practice. She insisted, as I’d always been a hide-behind-your-hair-shy wee girl; “I want to see your pretty face,” she would say to my awkward missing-toothed childhood grin. Oh boy, how things have changed…
Since fighting awkward-bang stage and trying to grow out my super fly fringe from last fall, I have fully embraced the crown braid; so much, that I’ve had to master the folds in under 5 minutes myself.
Like my 9 year old self, I still do love pairing up the ‘do with some kid-cuddly ruffle socks and baddie boots. Thanks for showing me the light, mama.
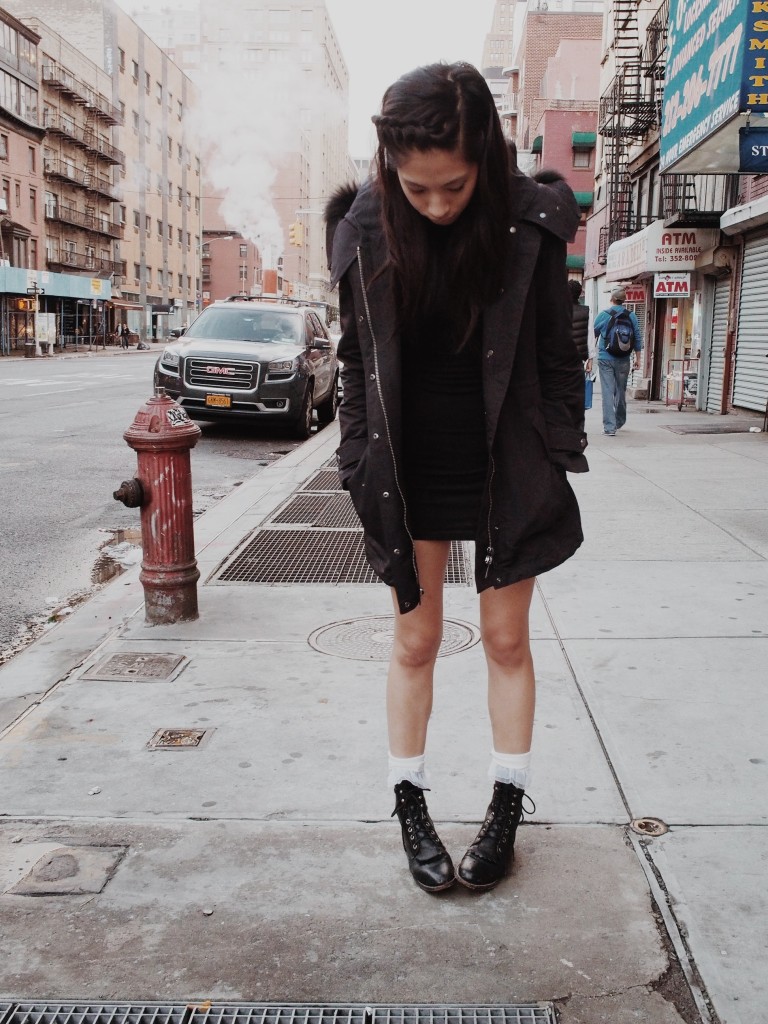


Burberry Brit Parka (similar: one, two, three), American Apparel dress
xx,
Huckleberry Kim
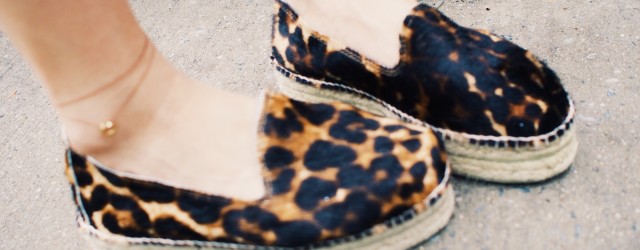
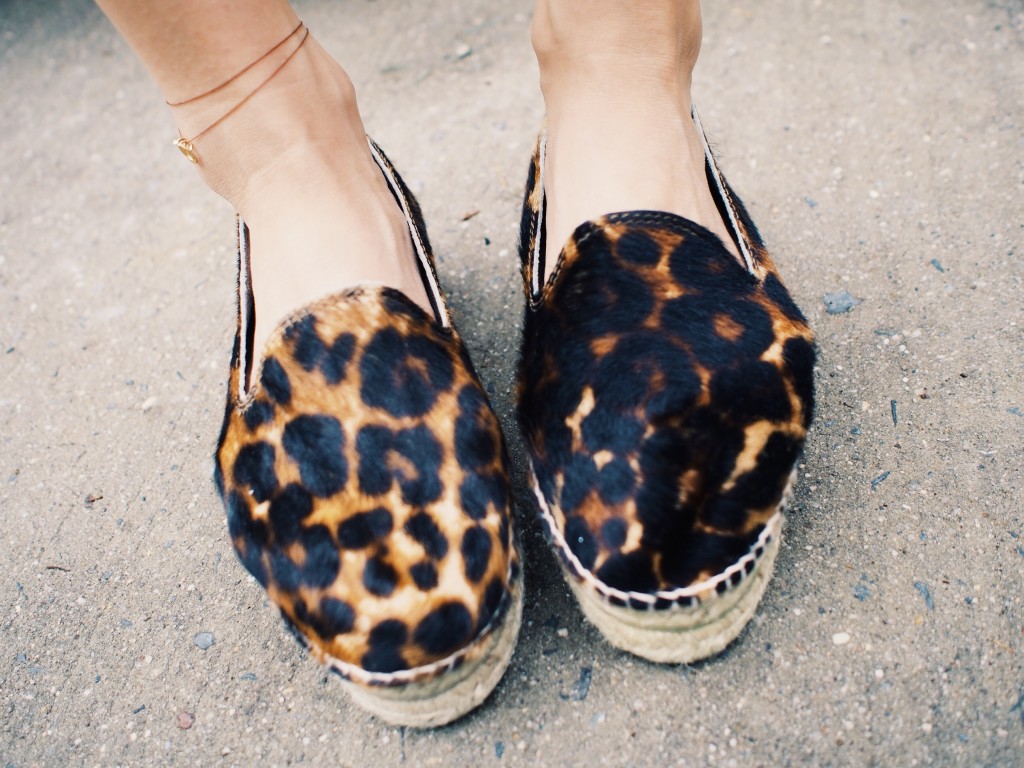
| leopard print pony hair | double espadrille | slips on |
I also love love love these from Elyse Walker, but the double espadrille sealed the deal.

dress: J. Crew (old); similar below, dogeared horseshoe from @PopSugar Must Have 
Other similar friends in the leopard espadrille game right now:
xx,
Huckleberry Kim
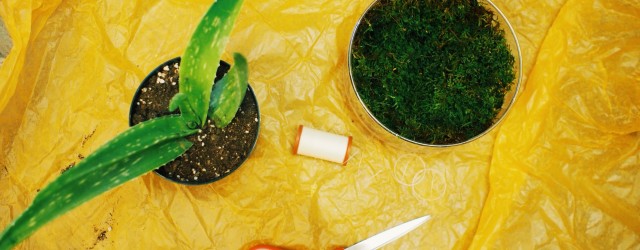
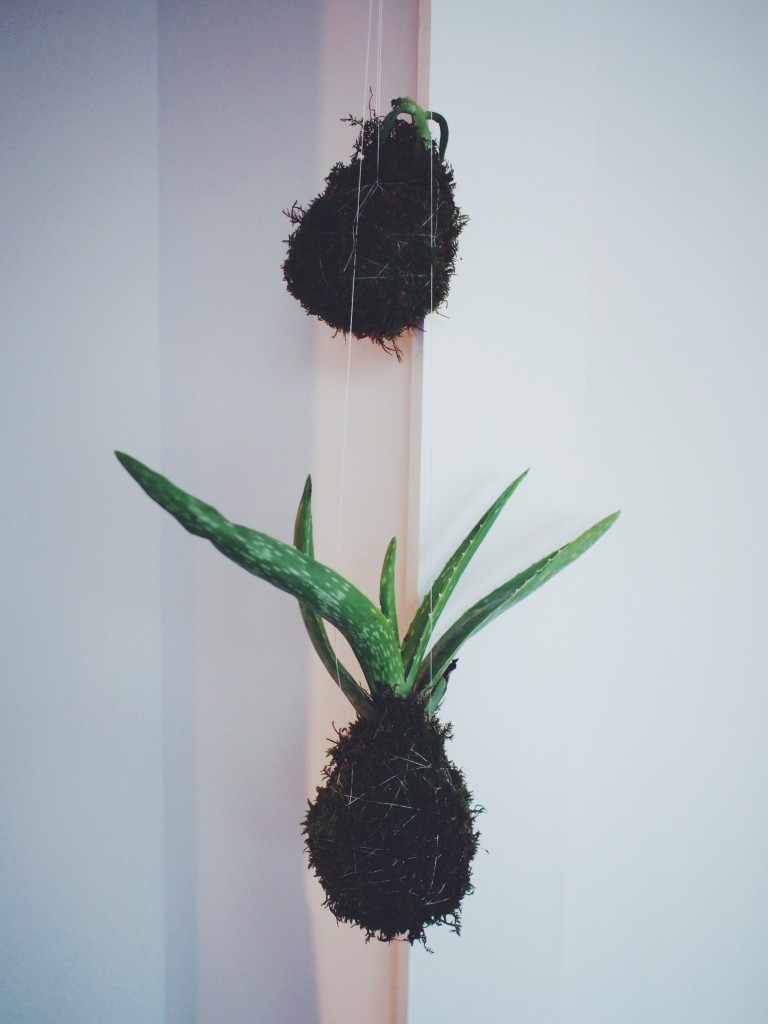
Who doesn’t love a quick, easy, pretty DIY house plant project? #amiright?
I had a hankering to get my hands DIY dirty today – both literally and figuratively, so I dropped by a little plant store in the NYC Flower District and picked up a little plant to sate my DIY craving.
I chose a little aloe plant, as I thought it’d be nice to have some soothing aloe hanging around this summer! har har har.
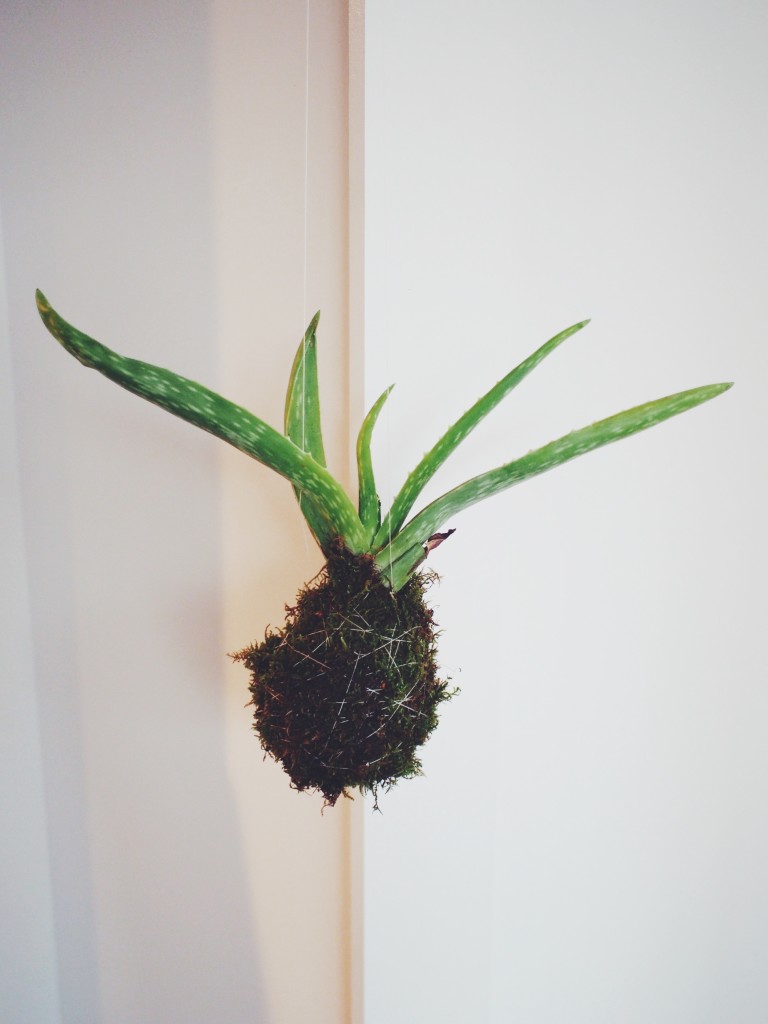
Check out the easy steps below and share pics of your favorite kokedamas! So far, I only have experience making these with succulents and ferns; though I’m very excited about the thought of DIY flowering plant and mini herb kokedama gardens next!
EASY STEPS TO MAKE A LITTLE ALOE PLANT KOKEDAMA:
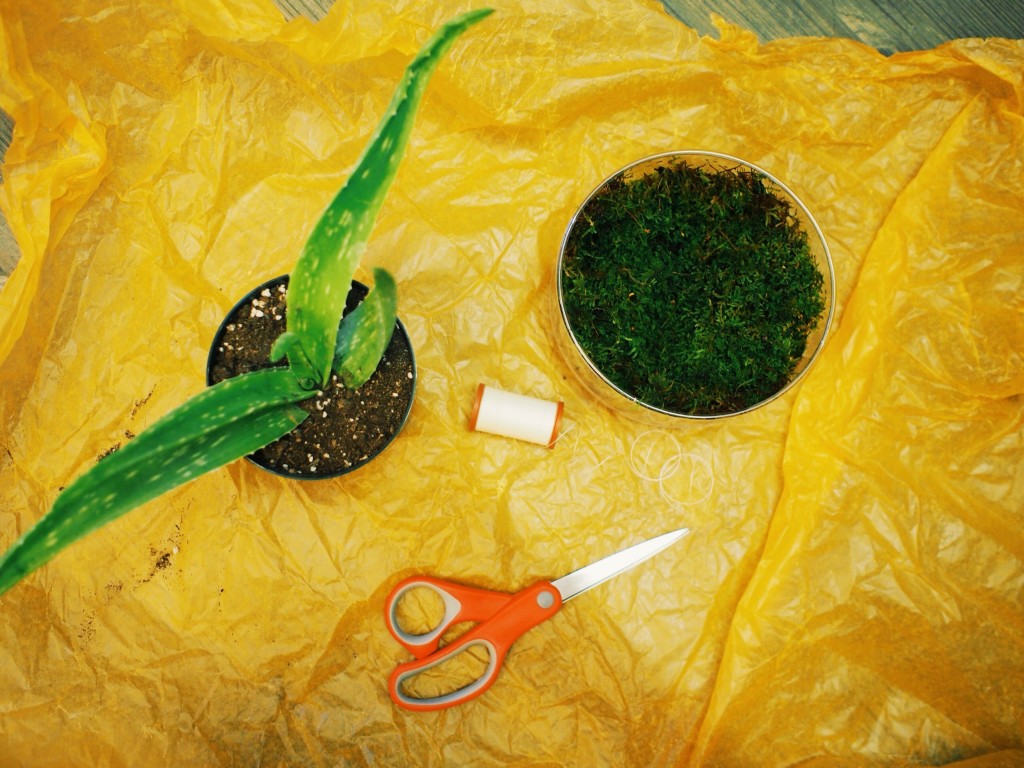
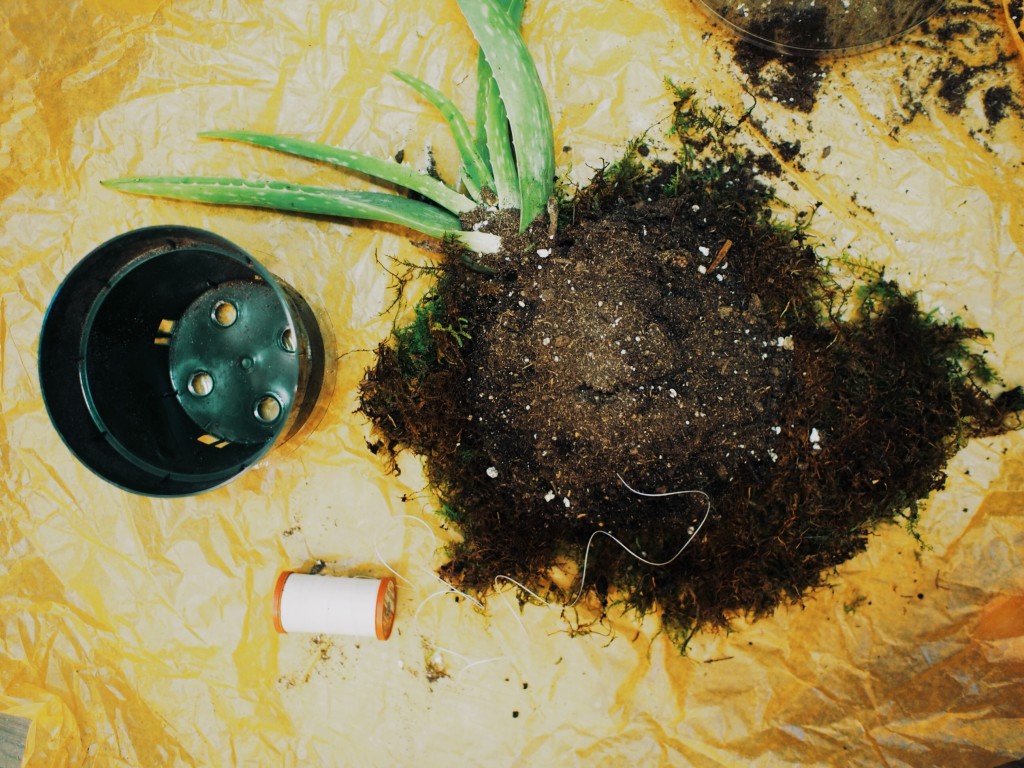
Step One: Get your gear & materials together
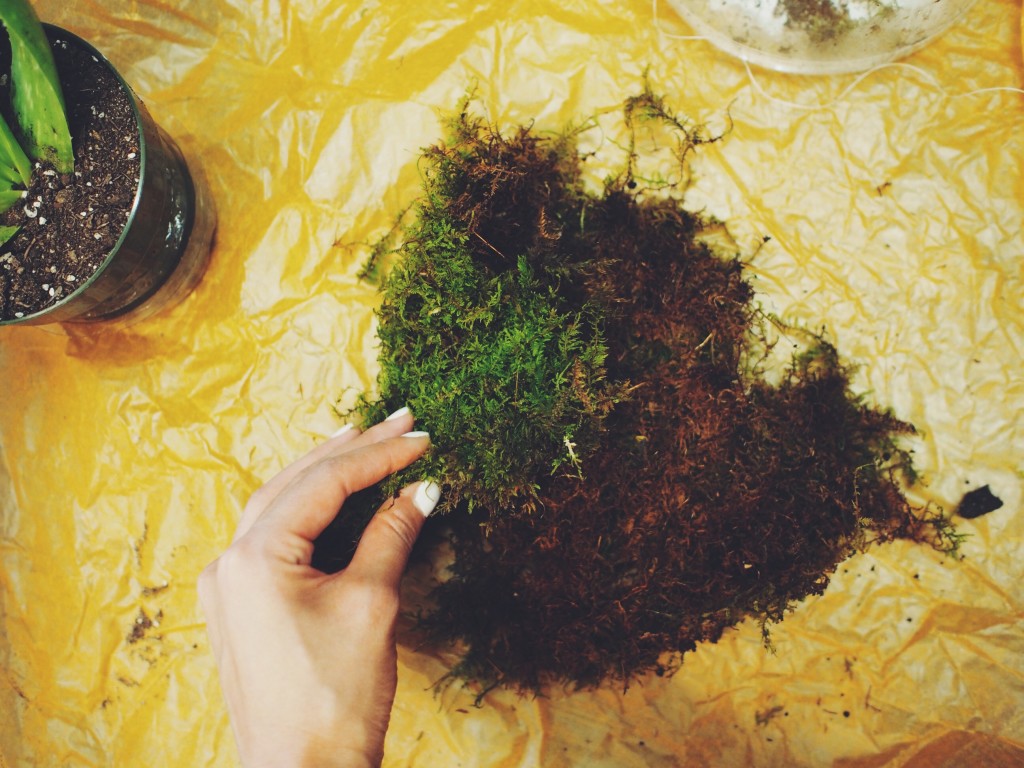
Step Two: Lay out your moss
Step 3: Add your (aloe) plant
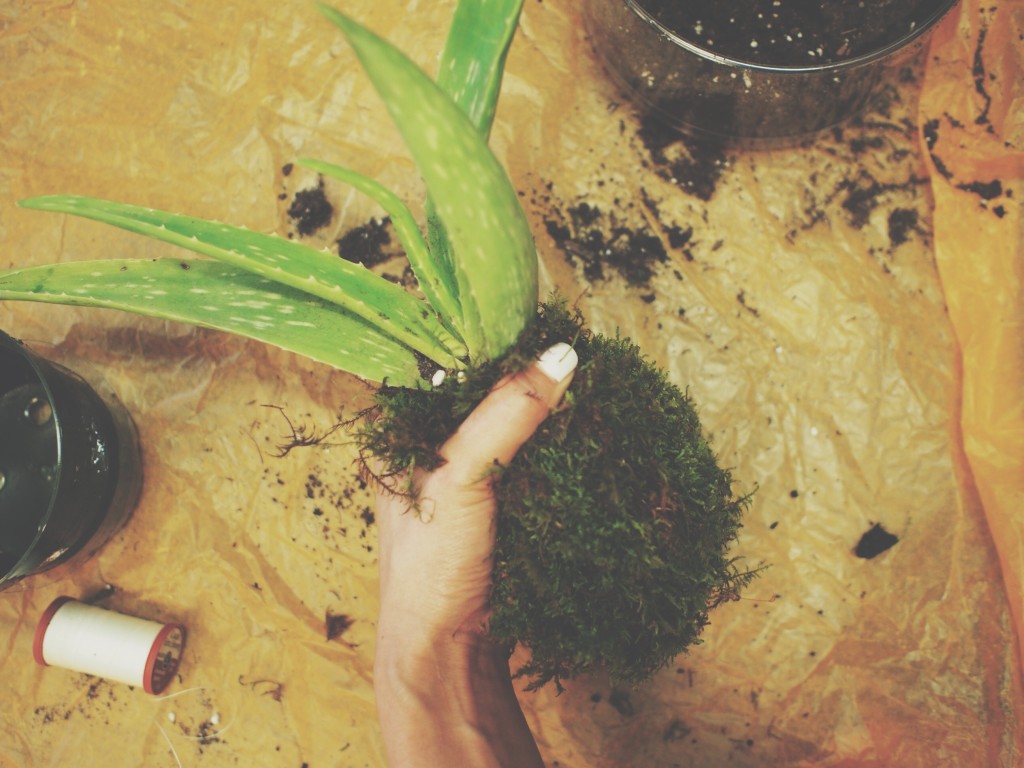
Step 4: Form the moss around the plant and soil
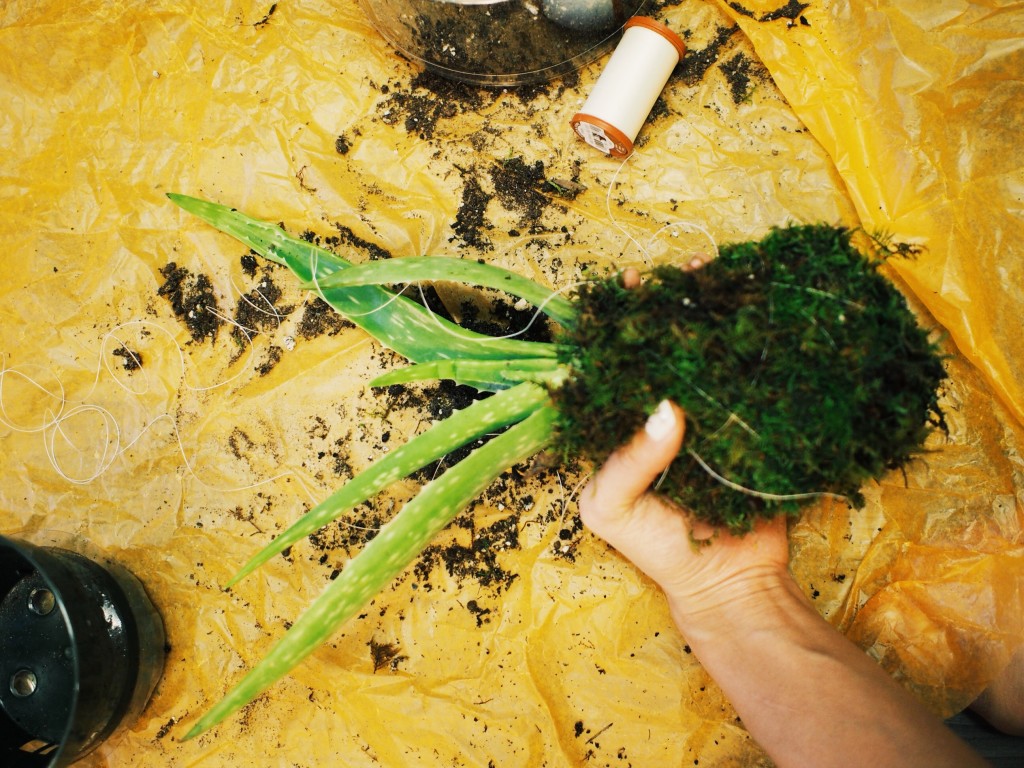
Step 5: Start tying your thread/twine/string around the moss
Step 6: Hang up your kokedama and enjoy!
Doesn’t this little guy resemble a wee pineapple?!
xx,
Huckleberry Kim